Setup Guide: Fat Burning Interval Training Treadmill vs. Walking Pad
Compare walking pads and traditional treadmills for HIIT. Learn exact setup, clearance, and installation steps for a safe fat burning interval space.

The Biomechanical Reality: Walking Pad vs. Traditional Treadmill for HIIT
When engineering a dedicated home gym space for high-intensity interval training (HIIT), equipment selection dictates your entire installation process. The market is currently flooded with ultra-compact walking pads, but can they truly replace a full-sized machine when your goal is to build a fat burning interval training treadmill station? The short answer is no, but the nuanced reality requires a deep dive into biomechanics, motor thermodynamics, and spatial setup.
According to Mayo Clinic's research on interval training, true HIIT requires pushing your heart rate to 80-95% of its maximum capacity, which typically translates to all-out sprinting or steep incline power-walking. This introduces massive kinetic energy and stride-length demands that compact walking pads physically cannot accommodate. Below, we break down the exact setup, installation, and calibration requirements for both machine types so you can build a safe, effective fat-burning zone in your home.
Spatial and Electrical Setup Requirements (2026 Comparison Matrix)
Before unboxing any cardio equipment, you must audit your room's spatial and electrical capacity. Sprints on a traditional treadmill generate up to 3x your body weight in downward impact force, while rapid speed transitions draw massive amperage spikes from the motor.
| Feature | UREVO Strol 2E (Walking Pad) | King Smith R1 Pro (Hybrid) | Sole F80 (Traditional) |
|---|---|---|---|
| Belt Dimensions | 41' x 15' | 47' x 17' | 60' x 22' |
| Motor (CHP) | 1.25 CHP | 2.5 CHP | 3.5 CHP |
| Max Speed | 7.6 MPH | 7.5 MPH (w/ handle) | 12.0 MPH |
| Electrical Draw | ~5 Amps (Steady) | ~8 Amps (Steady) | 15 Amps (Peak Sprint) |
| Required Clearance | 2 ft rear / 2 ft sides | 4 ft rear / 2 ft sides | 6 ft rear / 3 ft sides |
| 2026 Avg Price | $299 | $499 | $1,199 |
Step-by-Step Installation: Preparing Your Floor and Power
Whether you opt for a hybrid folding model or a commercial-grade traditional treadmill, the physical installation requires precision to prevent machine drift and motor burnout during rapid interval transitions.
Step 1: Subfloor Fortification
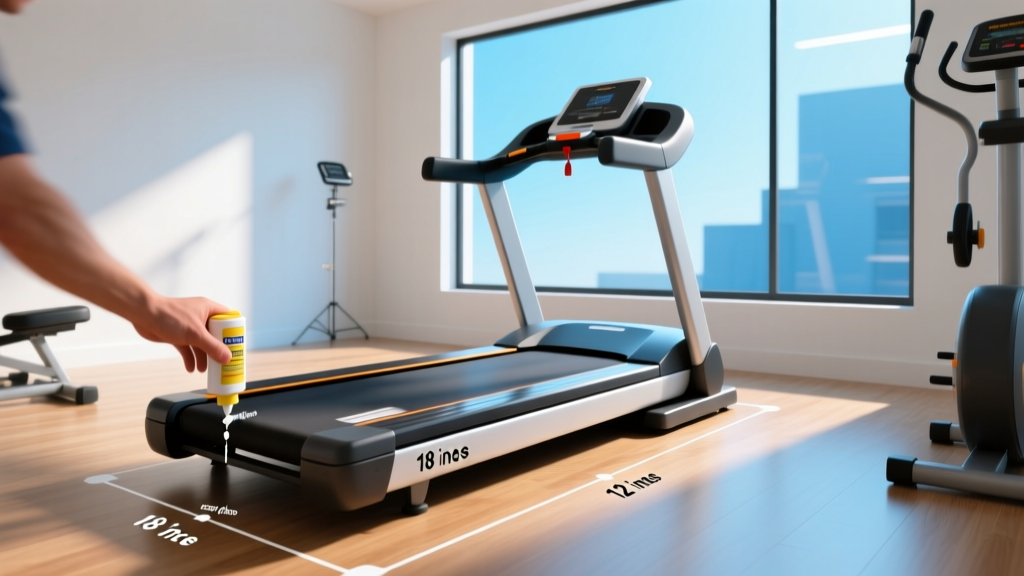
Do not place your machine directly on hardwood or standard carpet. The repetitive impact of interval training will degrade floor finishes and cause acoustic resonance that shakes your home's framing. Purchase 3/4-inch thick vulcanized rubber horse stall mats (typically 4x6 feet, costing around $50-$70 each at farm supply stores). Cut the mat to extend 12 inches beyond the treadmill's footprint on all sides. This provides the necessary shock absorption for heavy sprinting and prevents the machine from 'walking' across the room during high-incline intervals.
Step 2: Electrical Circuit Isolation
A major edge-case failure mode during HIIT is the thermal overload trip. When you command a traditional treadmill like the Sole F80 to jump from 3 MPH to 11 MPH in 3 seconds, the 3.5 CHP motor draws a massive spike in amperage. If your treadmill shares a 15-amp circuit with a space heater, air conditioner, or even a high-draw gaming PC, the breaker will trip mid-sprint. Always plug your traditional treadmill directly into a dedicated 15-amp or 20-amp wall receptacle. Never use an extension cord or a standard surge protector, as they cannot handle the inrush current and pose a severe fire hazard.
Step 3: Rear Roller Calibration and Belt Tensioning
Out of the box, treadmill belts are often slightly loose to prevent roller deformation during shipping. If you run intervals on an untensioned belt, your foot strike will cause the belt to slip over the drive roller, resulting in a dangerous 'stutter' effect. Using the included Allen wrench, turn both rear roller adjustment bolts exactly one-quarter (1/4) turn clockwise. Run the machine at 5 MPH and walk on the belt. If it slips, add another 1/8th turn to both sides equally. Over-tensioning will destroy the motor bearings within months.
Calibrating Your Machine for Interval Apps and EPOC Tracking
The primary driver of fat loss in interval training is Excess Post-exercise Oxygen Consumption (EPOC), commonly known as the 'afterburn effect'. National Institutes of Health (NIH) studies on HIIT fat oxidation confirm that maximizing EPOC requires precise work-to-rest ratios (e.g., 30 seconds at 90% max effort, 90 seconds active recovery).
To automate this, your equipment must integrate with modern fitness software via the Bluetooth FTMS (Fitness Machine Service) protocol.
- Traditional Treadmills (e.g., Sole F80, Horizon 7.4): Most 2025/2026 models feature native FTMS. You can connect directly to apps like Zwift Run or the Peloton App, allowing the software to automatically adjust the treadmill's speed and incline to match your programmed fat-burning interval profile.
- Walking Pads (e.g., UREVO, King Smith): Most walking pads rely on proprietary, closed-ecosystem Bluetooth apps. They rarely support open FTMS, meaning you will have to manually adjust speeds using a physical remote control during your 30-second sprint windows, which disrupts the flow of the workout and reduces the psychological intensity required for true HIIT.
Safety Tethers and Edge-Case Failure Modes During Sprints
When building a fat burning interval training treadmill station, safety hardware is not optional. Walking pads utilize a magnetic safety key that rests on the console. However, because walking pads lack handrails, if you trip during a 7 MPH power-walk interval, you will simply fall off the side or back.
Traditional treadmills utilize a clip-on lanyard attached to your shirt. Always attach the lanyard to your waistband or shirt hem, never your wrist. If you fall backward during a 12 MPH sprint, a wrist attachment can cause severe shoulder dislocation before the magnetic key pulls free from the console.
'The most common failure mode I see in home gym setups is the walking pad motor thermal shutoff. Users attempt 45-second sprint intervals on a 1.25 CHP motor. The internal thermistor detects the heat spike and kills power to the belt instantly to save the electronics, resulting in an immediate, uncontrolled ejection of the user.' — Home Gym Equipment Technician, 2026 Service Report
Final Verdict: Building Your Ultimate Fat Burning Station
If your primary goal is casual daily step accumulation while working at a standing desk, a walking pad like the UREVO Strol 2E is a masterpiece of spatial efficiency and requires virtually zero installation beyond unboxing and plugging it in.
However, if your objective is genuine, high-intensity fat oxidation through structured interval training, a walking pad is fundamentally the wrong tool. The biomechanical restrictions of a 41-inch belt and the thermal limitations of sub-2.0 CHP motors make them dangerous and ineffective for HIIT. To properly execute a fat burning interval training treadmill routine, you must invest the space, electrical infrastructure, and budget into a traditional, full-sized machine like the Sole F80. By following the subfloor, electrical, and calibration protocols outlined above, you will create a commercial-grade interval training environment that is safe, durable, and optimized for maximum metabolic output.
More gear to consider
All reviews
Escaping the Hedonistic Treadmill: Motor Size & HP Guide
Noise Comparison & Setup for Treadmill Sprints to Lose Weight
Do Treadmills Build Muscle? Compact Cardio Budget Guide

Rowing Machine Buying Guide: Ditch the Treadmill Bar Grip

Stationary Bike Types: Matching a 150 Calories Burn on Treadmill