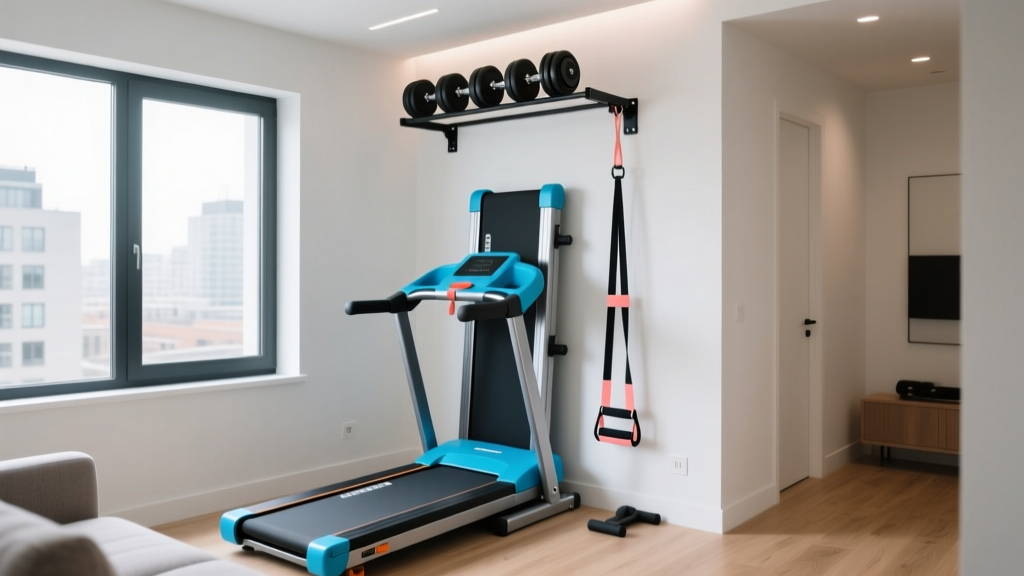
Space-Saving DIY Home Gym: Compact Foldable Solutions
Discover space-saving layouts and the best foldable gear to build a compact DIY home gym in apartments, closets, and small garages.

Urban living and downsizing trends have made square footage a premium commodity, but sacrificing fitness space is no longer necessary. Building a space-saving diy home gym requires a strategic approach to spatial geometry, equipment selection, and structural safety. Rather than cramming traditional commercial gear into a spare bedroom, the modern micro-gym relies on vertical storage, fold-away mechanics, and multi-functional layouts. According to the CDC's physical activity recommendations, adults need at least 150 minutes of moderate-intensity activity weekly—a goal easily achievable in a 40-square-foot footprint if the layout is engineered correctly.
The Spatial Math: Calculating Your Foldable Footprint
Before purchasing equipment, you must map your 'dynamic clearance zones.' Static dimensions (the size of the machine) are irrelevant compared to operational dimensions (the space required to use it safely).
📐 The Clearance Rule of Thumb:• Overhead Presses: Add 14 inches to your total height plus arm length. A 5'8" user needs a minimum 7'4" ceiling clearance to lock out a barbell safely.
• Kettlebell Swings: Require a minimum 6x6 foot 'swing zone' free of walls, mirrors, and breakables.
• Pull-up Stations: Wall-mounted rigs require at least 14 inches of clearance between the top of the pull-up bar and the ceiling to prevent head strikes during muscle-ups or kipping.
When designing your layout, prioritize the Mayo Clinic's guidelines on home fitness, which emphasize safe movement patterns and injury prevention over sheer equipment volume. A well-designed 5x8 foot zone can accommodate a full powerlifting and conditioning routine if the gear folds flush against the wall when not in use.
Top-Tier Foldable & Compact Equipment for 2026
The fitness industry has heavily invested in micro-living solutions. Below is a comparison matrix of the highest-rated compact gear that maintains commercial-grade durability while minimizing its spatial footprint.
| Equipment Type | Top Compact Model | Folded Dimensions (D x W x H) | Approx. Cost |
|---|---|---|---|
| Wall-Mount Rack | PRx Performance Profile Squat Rack | 4" D x 48" W x 90" H | $495 |
| Folding Treadmill | Fitness Reality TR3000 | 15" D x 30" W x 62" H | $450 |
| Adjustable Bench | Flybird Adjustable FID Bench | 10" D x 18" W x 38" L | $150 |
| Dumbbells | Nuobell Adjustable (5-80 lbs) | 16" L x 8" W x 9" H (pair) | $650 |
The Anchor Point: Wall-Mounted Racks vs. Freestanding
For rooms under 100 square feet, a wall-mounted folding rack like the PRx Profile is non-negotiable. When folded, it protrudes just 4 inches from the wall, effectively disappearing. However, this spatial gain shifts the burden of safety to your wall's structural integrity. Freestanding half-racks require a 4x5 foot footprint and heavy counterbalance weights to prevent tipping during failed reps, making them unsuitable for true micro-gyms.
Layout Blueprints: 3 Micro-Gym Floor Plans
Adapt these blueprints based on your specific architectural constraints. The American Council on Exercise (ACE) frequently highlights the importance of dedicated 'transition zones' in home setups to prevent tripping hazards during high-fatigue sets.
Blueprint 1: The 4x6 Closet Conversion
Best for: Apartments and spare bedrooms.
Layout Strategy: Remove the closet door and install a heavy-duty curtain track for privacy. Mount a folding squat rack on the rear wall. Place a 4x6 foot, 3/4-inch thick vulcanized rubber stall mat ($50) on the floor to protect the subfloor and dampen acoustic transfer to neighbors below. Store adjustable dumbbells on a vertical wall rack mounted to the side wall, keeping the central 4x4 foot area completely clear for benching and floor work.
Blueprint 2: The Studio Apartment Corner (6x6)
Best for: Open-concept living spaces.
Layout Strategy: Utilize a room divider or a tall, heavy-duty shelving unit (like the Rogue Monster Lite Storage Rack) to separate the gym from the living area. Position a foldable treadmill in the corner, angled at 45 degrees to maximize walkway space. Use resistance bands anchored to a heavy-duty door hinge or a low-profile floor anchor for accessory work, eliminating the need for a cable machine.
Blueprint 3: The Narrow Garage Bay (8x10)
Best for: Suburban homes with limited driveway space.
Layout Strategy: Mount the folding rack on the side wall rather than the back wall to allow for barbell loading from the front. Install interlocking PVC garage tiles (easier to clean than rubber) over the concrete. Hang a foldable weight bench on the opposite wall using heavy-duty utility hooks when not in use, creating an open 8x8 foot zone for sled pushes or kettlebell flows.
"The most common failure in micro-gyms isn't a lack of equipment; it's a lack of workflow. If you have to move three items to access your fourth, you will eventually stop using the space entirely. Design for frictionless transitions."
DIY Installation & Wall-Mounting Safety Standards
When mounting heavy, dynamic loads to drywall, standard hardware store advice is often dangerously inadequate. Drywall anchors, toggle bolts, and masonry screws into brick veneer will eventually fail under the cyclic loading of a pull-up bar or a racked barbell.
⚠️ CRITICAL SAFETY WARNING: Never mount a folding squat rack or pull-up bar using drywall anchors. You must use a stud finder to locate the center of 2x4 or 2x6 wooden studs (typically spaced 16 inches on-center). Use 3/8-inch by 3-inch structural lag screws, pre-drilling a 7/32-inch pilot hole to prevent the wood from splitting. Drive the lag screws at least 1.5 inches into the solid wood stud.If your wall features metal studs (common in modern condos and commercial conversions), wood lag screws will strip immediately. You must use specialized toggle straps rated for dynamic loads or reinforce the wall by cutting out the drywall, installing horizontal 2x4 blocking between the metal studs, and patching the wall before mounting your gear.
Ventilation and Climate Control in Micro-Spaces
A 40-square-foot closet gym will rapidly accumulate heat, humidity, and carbon dioxide. Without proper airflow, mirrors will fog, equipment will rust, and your cardiovascular performance will plummet due to poor air exchange.
- Exhaust Fans: Install a 110 CFM inline duct fan venting directly outside or into an HVAC return. This creates negative pressure, pulling fresh air from the rest of the house.
- Dehumidification: In basement setups, a compact 35-pint dehumidifier is mandatory to keep ambient humidity below 50%, protecting the knurling on your barbells and the electronics in foldable treadmills.
- Circulation: Mount a Vornado air circulator on the ceiling or high on a wall, angled downward. Unlike standard oscillating fans, air circulators use vortex action to move the entire volume of air in a small room, preventing stagnant heat pockets.
Finalizing Your Compact Setup
Building a highly functional diy home gym in a restricted footprint is an exercise in intentionality. By prioritizing foldable mechanics, respecting dynamic clearance zones, and executing structurally sound installations, you can engineer a training environment that rivals commercial facilities. Measure twice, mount securely, and reclaim your square footage without compromising your fitness goals.
More gear to consider
All reviews
Complete Home Gym Setup & Floor Plans: Best Home Gym Shelf Picks

Apartment vs Basement Home Gym Ideas: A Setup Walkthrough

Latest Home Gym Tech News: Smart Mirrors & Lighting Budgets

Weider 2980x Home Gym Maintenance for Small Apartments

Marcy Home Gym MWM 4965SC vs Bowflex: Remodel Guide
