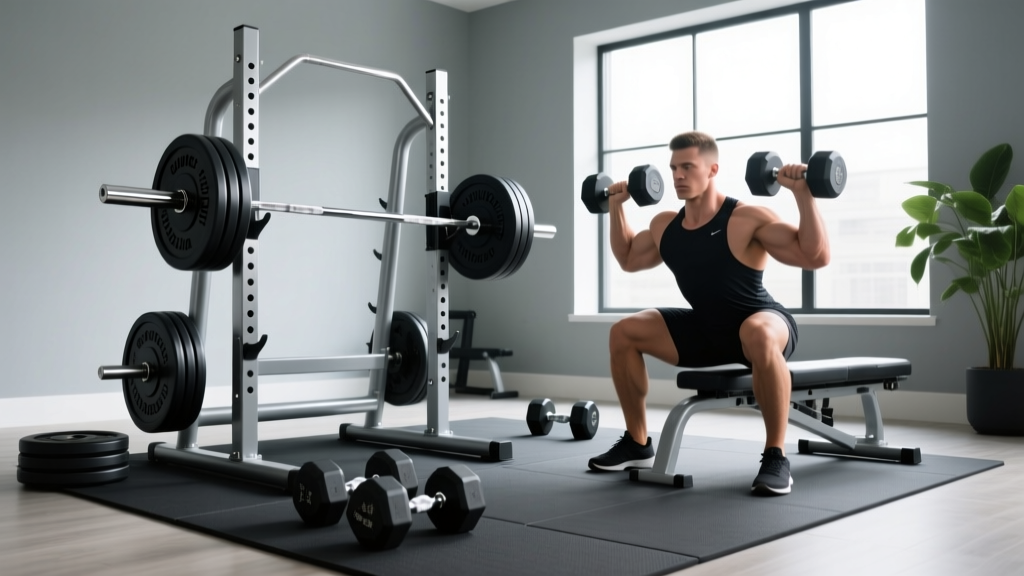
Olympic Barbell Setup: Knurling & Incline Dumbbell Chest Press Form
Master your gym setup with our Olympic barbell buying guide on weight, knurling, and spatial planning for perfect incline dumbbell chest press form.

The Complete Free-Weight Station Setup and Installation Walkthrough
Building a high-performance home or commercial gym in 2026 requires more than just dropping equipment into an empty room. It demands a meticulous understanding of implement specifications, spatial geometry, and biomechanical clearance. This comprehensive setup and installation walkthrough focuses on the cornerstone of your free-weight zone: the Olympic barbell. We will break down the critical nuances of an Olympic barbell buying guide—specifically weight tolerances and knurling profiles—before moving into the physical installation of your power rack and bench. Finally, we will cover the exact spatial calibration required to ensure your rack layout supports flawless incline dumbbell chest press form without hardware interference.
Phase 1: Olympic Barbell Buying Guide — Weight, Tolerance, and Steel Quality
When selecting an Olympic barbell, the stated weight is only the beginning of the specification sheet. The true differentiator between a $150 commercial-grade bar and a $900+ competition-certified implement lies in the manufacturing tolerance and tensile strength of the steel.
Weight Classifications and Tolerances
- 20kg (44.09 lbs) Men's Standard: Features a 28mm to 29mm shaft diameter. Competition bars (IWF or IPF certified) carry a strict weight tolerance of +/- 10 grams. Budget bars often fluctuate by +/- 1% (up to 200 grams off), which matters when calculating exact training loads.
- 15kg (33.07 lbs) Women's Standard: Features a thinner 25mm shaft, optimized for smaller hand sizes and grip mechanics. The sleeve length is slightly shorter, but the loadable capacity remains well over 500 lbs.
- Tensile Strength (PSI): For heavy powerlifting, seek a minimum of 190,000 PSI to prevent permanent deformation (whip-bend) under loads exceeding 400 lbs. Olympic weightlifting bars benefit from 160,000 to 170,000 PSI to allow for the 'whip' needed during the clean and jerk.
According to the Rogue Fitness barbell lineup, modern manufacturing in 2026 heavily utilizes advanced Cerakote and electroless nickel finishes. These coatings protect against oxidation without filling in the microscopic peaks and valleys of the knurling, a common failure mode in older, cheap black-zinc bars.
Phase 2: Decoding Knurling Profiles and Markings
Knurling is the patterned crosshatch machined into the steel shaft. It dictates your grip security and central nervous system confidence under heavy loads. Understanding knurl geometry is a mandatory step in any serious Olympic barbell buying guide.
| Knurl Profile | Geometry & Feel | Best Use Case | Notable Example |
|---|---|---|---|
| Volcano | Sharp peaks with a cratered center; highly aggressive but not skin-tearing. | Powerlifting, Heavy Hypertrophy | Rogue Ohio Power Bar |
| Mountain | Deep, pointed peaks; maximizes surface area contact for chalk retention. | Olympic Weightlifting | Eleiko Sport Training Bar |
| Hill | Rounded, passive peaks; comfortable for high-rep work but slips with heavy sweat. | General Fitness, High-Rep CrossFit | Standard Commercial Gym Bars |
Ring Markings: IPF vs. IWF
Your barbell will feature smooth ring marks etched into the knurling. Powerlifting (IPF) bars feature a single ring at 810mm from the center, dictating maximum legal grip width for the bench press. Weightlifting (IWF) bars feature rings at 910mm. Multipurpose bars often include both, making them ideal for hybrid home gyms. Furthermore, decide if you need a center knurl. Powerlifters prefer it for squat traction against the back, while Olympic lifters and general fitness users often prefer a smooth center to avoid chest abrasion during cleans.
Phase 3: Power Rack Installation and Hardware Torquing
With your barbell selected, the next phase of the walkthrough is installing the power rack. A misaligned rack will cause barbell binding, sleeve wear, and dangerous spatial constraints.
- Base Assembly: Lay the uprights flat. Attach the crossmembers using the provided 5/8-inch Grade 8 hardware. Do not fully tighten the bolts yet; leave them at 50% torque to allow the frame to self-square.
- Squaring the Frame: Measure the diagonal distance from the front-left upright to the back-right upright, and compare it to the opposite diagonal. Adjust the frame until the measurements are identical within 1/16th of an inch.
- Final Torquing: Using a calibrated torque wrench, tighten all structural bolts to the manufacturer's specification (typically 80-90 Nm for standard 5/8-inch hardware).
- J-Cup Alignment: Insert the J-cups at your desired racking height. Ensure the UHMW plastic liners are facing inward to protect your barbell's knurling and sleeve finishes.
Most modern racks feature 1-inch hole spacing in the bench press zone and 2-inch spacing higher up. Always verify that your J-cups are seated in the 1-inch zone to allow for micro-adjustments when setting up for pressing movements, ensuring you do not have to unrack the barbell on your toes.
Phase 4: Spatial Calibration for Incline Dumbbell Chest Press Form
The most frequently overlooked aspect of a free-weight station setup is the spatial relationship between the rack uprights and the adjustable FID (Flat/Incline/Decline) bench. While the rack is designed for barbell work, lifters frequently use the same footprint for dumbbell movements. If your rack is not calibrated correctly, the uprights and spotter arms will physically block your range of motion, severely compromising your incline dumbbell chest press form.
Clearance Metrics and Bench Placement
Standard power racks have an interior width of 49 inches. A standard commercial FID bench is 10 to 12 inches wide at the base, but the backrest pad is often 12 to 14 inches wide. When you set the bench to a 30 or 45-degree incline, the top of the backrest extends backward, closer to the uprights.
According to ExRx biomechanics guidelines, proper incline dumbbell chest press form requires a controlled eccentric phase where the elbows drop below the plane of the torso to achieve a full pectoral stretch. If the bench is pushed too far forward into the rack, the dumbbells or your elbows will strike the steel uprights or sandwich-style J-cups at the bottom of the movement.
- The 6-Inch Rule: Position the front legs of your adjustable bench exactly 6 to 8 inches behind the plane of the front uprights. This ensures that when the bench is inclined to 45 degrees, the top edge of the pad clears the uprights, leaving a minimum of 14 inches of lateral clearance on either side of your shoulders.
- Spotter Arm Removal: When transitioning from barbell benching to dumbbell work, always remove the front spotter arms. Extended spotter arms sit at the exact height where your wrists and dumbbells travel during the concentric phase of the incline dumbbell chest press form, creating a severe collision hazard.
- Footprint Anchoring: If your bench lacks rubber footpads, apply 3M heavy-duty grip tape to the bottom of the bench legs. During heavy incline presses, the backward force vector can cause the bench to slide toward the uprights, instantly eliminating your safety clearance.
Phase 5: Ongoing Barbell and Rack Maintenance Protocol
To preserve the knurling profiles and structural integrity discussed in this Olympic barbell buying guide, implement a strict monthly maintenance routine. Use a stiff nylon brush (never brass or steel, which can strip protective coatings) to remove chalk, dead skin, and dust from the knurling valleys. Follow this by applying three to four drops of 3-in-One oil or a specialized barbell corrosion inhibitor to the shaft, wiping it down with a microfiber cloth. For the power rack, inspect the UHMW plastic on your J-cups and spotter arms quarterly; once the plastic wears down to the steel core, replace them immediately to prevent catastrophic damage to your barbell sleeves.
By mastering both the micro-details of your barbell's steel and knurling, and the macro-geometry of your rack's spatial layout, you create a training environment that supports everything from maximal powerlifting efforts to the strict, unimpeded clearance required for perfect incline dumbbell chest press form. For further reading on equipment standards, refer to the Eleiko official knowledge hub for deep dives into IWF certification tolerances.
More gear to consider
All reviews
Barbell Collar vs Clamp Types for the Lat Focused Dumbbell Row

Rubber vs Urethane: Barbell Row vs Dumbbell Row Care

Barbell Collar Comparison & Neutral Grip Dumbbell Row Setup Guide

Stability Ball Dumbbell Bench Press vs Kettlebell Budget Breakdown

Kettlebells vs Back and Biceps Dumbbell Exercises: Cast Iron Guide
