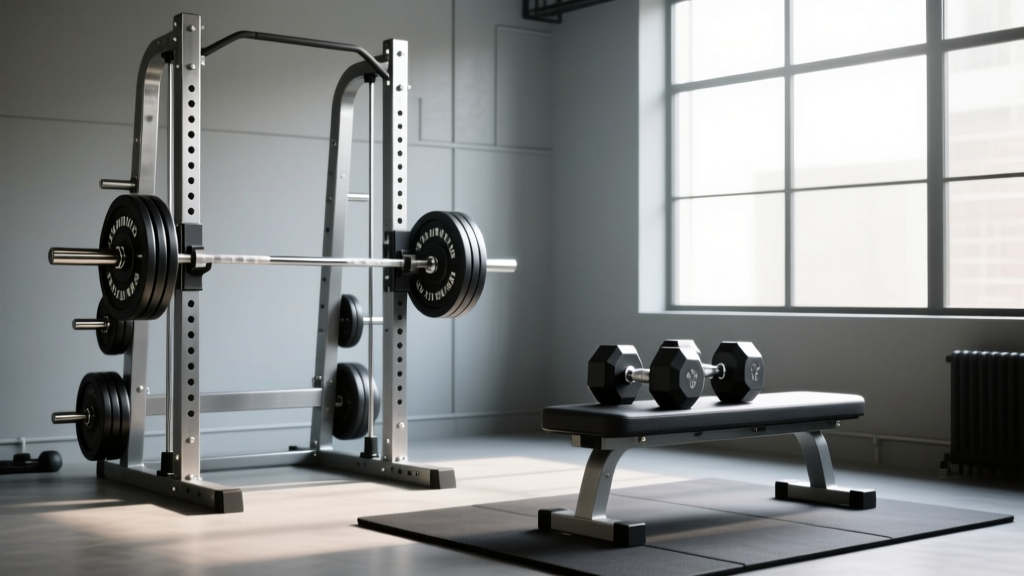
Dumbbell Press vs Bench Press: Olympic vs Standard Plate Setup
Building a pressing station? We compare dumbbell press vs bench press setups and walk through installing Olympic vs standard weight plate systems.

When engineering a dedicated pressing station in your home gym, the foundational decision dictates every subsequent equipment purchase. The ongoing debate of dumbbell press vs bench press is not merely about muscle hypertrophy or biomechanics; it is the primary driver behind whether you invest in an Olympic weight plate ecosystem or a standard plate infrastructure. As of 2026, with home gym real estate at a premium and equipment costs fluctuating, making the wrong hardware choice can result in hundreds of dollars of wasted iron and incompatible sleeves.
The Core Setup Dilemma
Bench Press Route: Requires a 7-foot Olympic barbell, a power rack, and 2-inch Olympic plates. Higher ceiling for absolute strength, but demands significant floor space and structural anchoring.
Dumbbell Press Route: Can utilize heavy adjustable dumbbells or traditional 1-inch standard dumbbell handles with standard plates. Superior for fixing bilateral imbalances and requiring less rack footprint, but limited by the physical constraints of standard plate sizing and handle sleeve length.
The Biomechanical & Spatial Debate: Dumbbell Press vs Bench Press
Before unboxing weight plates and grabbing a hammer drill, we must establish which pressing movement anchors your setup. According to the National Strength and Conditioning Association (NSCA), the barbell bench press allows for maximal absolute load lifting due to the fixed path and unified stabilization requirements. Conversely, the dumbbell press demands higher stabilizer muscle recruitment and allows for a deeper range of motion, which is highly effective for pectoral hypertrophy.
From a spatial perspective, a barbell bench press setup requires a minimum footprint of 8 feet by 6 feet to accommodate a standard power rack, a 3x6 foot lifting platform, and plate storage. The dumbbell press requires only an adjustable FID (Flat/Incline/Decline) bench and a vertical or tiered dumbbell rack, cutting the required square footage by nearly 60%. This spatial reality directly informs whether you will be racking massive 45-pound Olympic plates or threading 10-pound standard plates onto 1-inch dumbbell handles.
Olympic vs Standard Weight Plates: The Hardware Matrix
The physical differences between Olympic and standard plates extend far beyond the center hole diameter. Understanding these tolerances is critical for safety and equipment longevity.
| Feature | Olympic Plates (2-Inch) | Standard Plates (1-Inch) |
|---|---|---|
| Center Hole Diameter | 50.4mm (Fits Olympic sleeves) | 25.4mm (Fits standard handles) |
| Max Weight per Plate | 55 lbs to 100+ lbs (Competition) | Typically caps at 25 lbs or 50 lbs |
| 2026 Avg. Cost Per Pound | $1.50 - $2.50 (Urethane/Rubber) | $1.00 - $1.75 (Cast Iron/Vinyl) |
| Hub Construction | Steel or Brass ring inserts | Painted cast iron (no insert) |
| Diameter Consistency | Calibrated to 450mm (17.7 inches) | Varies wildly by manufacturer |
If your dumbbell press vs bench press decision leans toward the barbell, you must exclusively purchase Olympic plates. Standard plates simply cannot handle the torque, drop forces, or sleeve dimensions of a modern Olympic barbell. However, if you are building a traditional dumbbell station using fixed-weight threaded dumbbell handles, standard plates are the economical choice—though they come with distinct installation and usage caveats detailed below.
Walkthrough: Installing the Olympic Bench Press Station
Committing to the bench press means committing to the Olympic ecosystem. Here is the exact installation protocol for securing a heavy-duty power rack and organizing your Olympic plates.
Step 1: Rack Anchoring and Bolt-Down
Do not rely on the weight of the rack and plates to keep your rig stable during heavy bench press unracks. You must anchor the rack to your concrete slab.
- Positioning: Place the rack on your 3/4-inch thick horse stall mats, ensuring at least 3 feet of clearance on all sides.
- Drilling: Use a hammer drill with a 1/2-inch carbide-tipped masonry bit to drill through the mat and 3.5 inches deep into the concrete.
- Anchoring: Insert 3/8-inch x 3-inch wedge anchors (industry standard brands like Simpson Strong-Tie or Red Head are recommended).
- Torquing: Tighten the nuts with a torque wrench set to 35-40 ft-lbs. This expands the wedge at the base of the anchor, securing the rack against lateral shifting during heavy barbell unracking.
Step 2: Olympic Plate Storage Integration
Olympic plates are heavy and awkward. Install a dedicated plate tree or utilize the rack's built-in weight horns. Pro Tip: Always store 45lb and 35lb plates on the lowest horns to keep the center of gravity low, preventing the rack from tipping if bumped aggressively.
Walkthrough: Configuring the Dumbbell Press Ecosystem
If you opted for the dumbbell press to save space and protect your shoulder joints, your setup revolves around an adjustable bench and standard plate management (if using traditional handles).
Step 1: The Adjustable Bench Placement
Position your FID bench in the center of your lifting zone. Unlike a barbell setup, you need 360-degree clearance to perform the 'dumbbell kick-up' maneuver safely. Ensure the bench's rear support leg is locked into the decline or flat notch, and verify the pop-pin is fully engaged.
Step 2: Standard Plate Threading and Collar Security
Using 1-inch standard dumbbell handles requires meticulous loading to prevent catastrophic failure mid-rep.
- The Spin Problem: Standard dumbbell handles lack the rotating bushings or bearings found in Olympic barbells. When you load standard plates, the entire assembly wants to twist in your grip. Load plates symmetrically and tightly.
- Collar Threading: Most 1-inch handles use threaded star collars. You must tighten these collars until the threads bite firmly into the plate's center hub. If you use smooth 1-inch handles with spring collars, be warned: spring collars frequently slip on 1-inch sleeves during the eccentric phase of a dumbbell press. Upgrade to heavy-duty clamp collars (like Lock-Jaw) adapted for 1-inch sleeves.
- Sleeve Length Limits: A standard 14-inch dumbbell handle only has about 5.5 inches of loadable sleeve space. You can fit a maximum of two 25lb standard cast iron plates per side, capping your dumbbell weight at roughly 60 lbs. To exceed this for heavy dumbbell presses, you must transition to adjustable dumbbells (e.g., PowerBlock or Nuobell) or custom-welded fixed urethane dumbbells.
Real-World Failure Modes & Edge Cases
'The most common home gym injury I see related to equipment isn't from dropping a barbell; it is from a 1-inch standard dumbbell collar vibrating loose during a heavy incline press, causing plates to slide off the sleeve mid-rep.' — Certified Strength and Conditioning Specialist (CSCS)
Olympic Plate Hub Galling
When buying budget-friendly cast iron Olympic plates, the center hole is often un-machined. Repeatedly sliding these raw iron plates onto a chrome or zinc-coated Olympic barbell sleeve will cause 'galling'—stripping the barbell's protective finish and leading to rust and sleeve seizure. The Fix: Always purchase Olympic plates with steel or brass ring inserts (such as the Rogue Fleck or Echo Bumper plates), or apply a light coat of 3-in-One oil to the barbell sleeve before loading.
Standard Plate Vinyl Degradation
Many standard plates are encased in vinyl or cement to reduce cost. In a garage gym environment where temperatures fluctuate, the vinyl becomes brittle and cracks, exposing the internal cement to moisture. Once the cement absorbs humidity, it expands and shatters the plastic shell. Stick to bare cast iron for standard plates if you must use them.
Frequently Asked Questions
Can I use standard plates on an Olympic barbell with an adapter?
While 1-inch to 2-inch sleeve adapters exist, they are highly discouraged for pressing movements. The adapter adds 2-3 inches of lateral sleeve length, altering the biomechanics of the lift and creating a dangerous wobble during the bench press. Furthermore, the adapter reduces the loadable sleeve space, limiting how much weight you can press.
Which is better for a beginner home gym: dumbbell press or bench press?
For beginners, the dumbbell press setup is generally superior. It requires less capital investment (no $600 power rack required), takes up less space, and inherently builds stabilizer muscles while preventing the dominant arm from compensating for the weaker arm. However, once you can comfortably press 80lb dumbbells for reps, transitioning to an Olympic bench press setup becomes necessary to continue progressive overload safely.
Do I need a spotter arm for the dumbbell press?
No, and this is a major safety advantage. In a dumbbell press vs bench press comparison, the dumbbell press wins on safety for solo lifters. If you fail a rep with dumbbells, you simply drop them to the floor or your sides. If you fail a barbell bench press without spotter arms or a spotter, the bar can crush your trachea or sternum. Always set your power rack's safety spotter arms one notch below your chest's lowest point of expansion when benching alone.
More gear to consider
All reviews
Cardio With Dumbbells: 2026 Storage Rack Market Trends
Dumbbell vs Barbell vs Kettlebell Thrusters: Cast Iron Space Guide

Rubber Hex vs Urethane Dumbbells: Expert Review for the Alternating Dumbbell Upright Row
Kettlebell Guide & Chest Supported Incline Dumbbell Row Setups

Best Neoprene Dumbbells for a 25 Minute Dumbbell Workout
