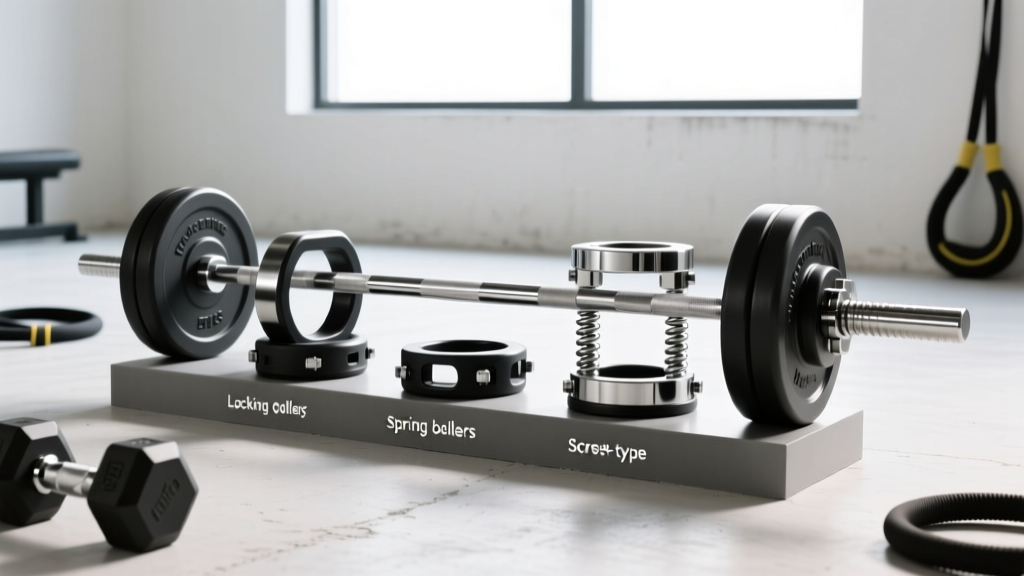
Put Down the Dumbbell Mug: Beginner Guide to Barbell Collars
Sip from your dumbbell mug, then lock down your lifts. Our beginner step-by-step guide compares barbell collar types, prices, and safety failure modes.

Put Down the Dumbbell Mug and Prioritize Safety
You have your pre-workout coffee pouring from your favorite ceramic dumbbell mug, your lifting shoes are laced up, and you are ready to load the barbell. It is a familiar home-gym ritual. But before you step up to the rack and unrack the weight, we need to talk about the most overlooked piece of safety equipment in your garage: the barbell collar. As of 2026, the market is flooded with cheap knockoffs and hyper-engineered competition clamps, making it incredibly confusing for beginners to know what actually keeps 300 pounds of iron from sliding off the sleeve and crushing their toes.
A barbell collar (or clamp) is not just an accessory; it is a critical safety mechanism that also affects the harmonic resonance and 'whip' of your barbell. In this step-by-step beginner guide, we will break down the exact types of collars, their real-world failure modes, and how to choose the right one for your training style.
Step 1: Identify Your Barbell Sleeve Diameter
Before you buy anything, you must measure your barbell sleeve. The fitness industry uses two primary standards, and buying the wrong size is the most common beginner mistake.
- Olympic Bars (2-inch / 50mm): The gold standard for powerlifting, Olympic weightlifting, and CrossFit. The sleeves are exactly 1.97 inches (50mm) in diameter. Almost all high-quality collars are designed for this size.
- Standard Bars (1-inch / 25mm): Typically found in budget department-store sets. The sleeves are 1 inch thick. If you are using a standard bar, you are mostly limited to basic spring clips or spinlock nuts.
Step 2: Compare the 4 Main Barbell Collar Types
According to BarBend's extensive collar testing database, the market is dominated by four primary mechanisms. Here is how they stack up in terms of price, security, and use-case.
| Collar Type | Avg. Price (Pair) | Weight (Each) | Security Level | Best For |
|---|---|---|---|---|
| Spring Clips | $5 - $12 | 0.15 lbs | Low | Light benching, static lifts |
| Quick-Release Clamps | $25 - $45 | 0.25 - 0.55 lbs | High | Home gyms, CrossFit, Powerlifting |
| Spinlock Nuts | $15 - $30 | 1.5 - 2.5 lbs | Medium | Threaded standard bars only |
| Lever / Competition | $80 - $120 | 2.5 kg (5.5 lbs) | Maximum | Olympic lifting, sanctioned meets |
1. Spring Clips (The Budget Trap)
Spring clips are the traditional wire loops you squeeze together. While they are cheap and lightweight, they suffer from severe metal fatigue. After roughly 500 compressions, the tension weakens. Failure Mode: If you drop a barbell from overhead during a push-press, the kinetic energy and vibration will easily cause a worn spring clip to bounce off the sleeve, leading to a catastrophic plate dump.
2. Quick-Release Clamp Collars (The Home Gym Standard)
This is where 90% of beginners should invest their money. These use a polymer or aluminum body with a cam-lever or screw-tension mechanism to lock onto the sleeve.
Top Models to Consider:
- Lock-Jaw LITE 2.0 ($25/pair): Made from glass-reinforced nylon. Weighs only 0.25 lbs each. Excellent for high-rep CrossFit workouts where you need to change weights in seconds.
- Rogue AB-1 Aluminum Barbell Collar ($35/pair): Machined from aircraft-grade aluminum with a rubberized grip. Weighs 0.55 lbs each. The metal construction prevents the cracking issues seen in cheap plastic clones.
3. Spinlock Collars (For Threaded Bars Only)
These are the large metal or plastic nuts that screw onto the threaded ends of 1-inch standard bars. They are highly secure but incredibly slow to remove. If you are doing supersets or drop-sets, spinlock collars will ruin your workout pacing.
4. Lever-Action & Competition Collars (The Heavy Duty Option)
Sanctioned by USA Weightlifting's official safety guidelines, competition collars (like the Eleiko or Werksan models) weigh exactly 2.5 kg each. They use a heavy-duty steel lever that applies massive, even pressure across the sleeve. They are overkill for a beginner home gym but mandatory if you are hosting a sanctioned powerlifting or weightlifting meet.
Step 3: Match the Collar to Your Training Style
Your training modality dictates the exact collar you need. Use this decision framework:
- Powerlifting (Squat, Bench, Deadlift): You need rigid clamps like the Rogue AB-1. Deadlift bars (which are typically 27mm to 29mm in shaft diameter) experience massive 'whip' when pulled from the floor. A heavy aluminum clamp helps dampen the harmonic resonance, keeping the plates flush against the inner sleeve lip.
- Olympic Weightlifting (Snatch, Clean & Jerk): Opt for quick-release polymer clamps (like Lock-Jaw) or official 2.5kg competition collars. If you are training for a meet, you must get used to the extra 5kg (11 lbs) of total weight that competition collars add to the barbell.
- Bodybuilding & Hypertrophy: Standard quick-release clamps are perfectly fine. Since you are rarely dropping the barbell from a height, the extreme shock-absorption of competition collars is unnecessary.
Step 4: Proper Installation and Edge-Case Troubleshooting
Even the best collar will fail if installed incorrectly. Follow these National Strength and Conditioning Association (NSCA) aligned safety protocols:
- Flush Placement: Always push the collar completely flush against the outer edge of the weight plate. Leaving a 1-inch gap between the plate and the collar allows the plate to build up kinetic momentum before hitting the collar, which can crack plastic clamps over time.
- The Cold Weather Edge Case: If your garage gym drops below 45°F (7°C) in the winter, avoid cheap polymer-plastic clamps. The nylon becomes brittle in freezing temperatures and can shatter when the barbell is dropped. Switch to aluminum-bodied clamps like the Rogue AB-1 during winter months.
- Knurling Interference: Some aggressive barbell sleeve knurling (designed to keep plates from spinning) can chew up the inner rubber lining of your clamps. Inspect the inner rubber pads of your clamps every 6 months and replace them if the grip is worn smooth.
Pro-Tip: When loading fractional plates (like 0.5 lb or 1 lb change plates), always place the collar on the outside of the change plate. Never sandwich a thin change plate between a larger 45lb bumper plate and the collar, as the vibration will cause the small plate to warp and slip.
Frequently Asked Questions
Do barbell collars count toward the total weight of the lift?
In casual home gym tracking, most people ignore the weight of standard clamps (which are usually under 1 lb total). However, in sanctioned competition, the 2.5 kg competition collars are absolutely counted in the total weight on the scorecard.
Can I use hose clamps from a hardware store?
While some DIY enthusiasts use stainless steel worm-drive hose clamps, this is highly discouraged. They lack quick-release mechanisms, meaning you will need a screwdriver to change weights, and the metal screw housing can easily scratch and ruin the chrome or cerakote finish on your expensive barbell sleeves.
How often should I replace my quick-release clamps?
High-quality aluminum and reinforced nylon clamps should last 3 to 5 years with regular use. If the cam-lever feels loose when locked, or if the inner rubber pad is torn, it is time to replace them immediately to prevent a plate-slide accident.
Now that you understand the mechanics, safety protocols, and material differences of barbell collars, you can finish your coffee from that dumbbell mug, step up to the rack, and lift with absolute confidence knowing your plates are locked securely in place.
More gear to consider
All reviews
Best Dumbbell Racks to Organize Your Home Dumbbell Program (2026)

Bumper vs Iron Plates: Budget Analysis & Decline Dumbbell Pairings

Top Neoprene Dumbbells for a Flabby Arms Workout Compared

Single Arm Dumbbell Row Muscles Worked: Rack Maintenance Guide

Top Adjustable Dumbbells for Dumbbell Lawnmower Rows 2026
