
Kettlebell Storage Mistakes: Beyond the Eisenlink Dumbbell Stand
Discover common kettlebell storage mistakes, why repurposing an Eisenlink dumbbell stand fails, and how to choose the right rack for your home gym.

As home gym layouts become more sophisticated in 2026, efficient equipment storage is no longer a luxury—it is a safety requirement. When outfitting a garage or basement gym, many lifters attempt to consolidate their storage solutions to save money and floor space. A frequent casualty of this consolidation is the kettlebell. Specifically, lifters often attempt to store their kettlebells on tiered dumbbell racks, such as the popular Eisenlink dumbbell stand. While the Eisenlink dumbbell stand is an excellent, budget-friendly A-frame solution for hex and round dumbbells, applying it to kettlebell storage introduces severe structural and biomechanical hazards.
This troubleshooting guide breaks down the physics of why repurposing dumbbell stands for kettlebells fails, outlines the most common kettlebell storage mistakes, and provides actionable frameworks for selecting and stabilizing purpose-built kettlebell racks.
The Physics of Failure: Why Dumbbell Stands Reject Kettlebells
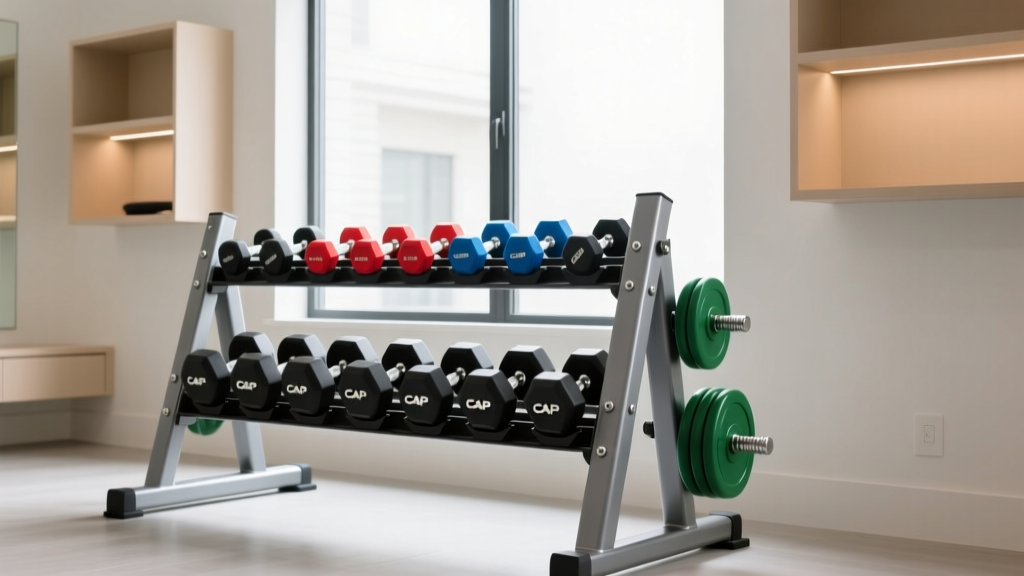
To understand why your storage setup might be failing, you have to look at the geometry of the equipment. The Eisenlink dumbbell stand and similar 3-tier A-frame racks are engineered with a 15-to-20-degree backward slant. This slant relies on the symmetrical, cylindrical center of mass found in standard dumbbells to keep them seated securely against the back lip of the tier.
Kettlebells, however, are fundamentally asymmetrical. The center of mass in a standard cast-iron or competition kettlebell sits 4 to 6 inches below the handle. When you place a 24kg (53 lb) kettlebell on a slanted dumbbell tier, the offset weight creates a forward cantilever effect.
⚠️ Safety Warning: The Tip-Over HazardAccording to basic principles of weight room facility design outlined by the National Strength and Conditioning Association (NSCA), equipment racks must maintain a stable center of gravity under maximum load. When heavy kettlebells are stacked on the top tier of an A-frame dumbbell stand, the forward pull shifts the rack's center of gravity past the front feet. A slight bump or an uneven floor can cause the entire stand to tip forward, potentially crushing toes or damaging flooring.
Furthermore, kettlebell handles are typically 33mm to 35mm in diameter, compared to the 25mm to 28mm handles of standard dumbbells. The wider, arched handle often rests awkwardly on the narrow side rails of a dumbbell stand, leading to metal-on-metal scraping and degraded powder coatings.
Top 5 Kettlebell Storage Mistakes (And How to Fix Them)
Beyond misusing dumbbell stands, lifters frequently make critical errors when deploying dedicated kettlebell racks. Below is a troubleshooting matrix of the most common mistakes observed in home gyms.
| Mistake | Failure Mode | The Fix |
|---|---|---|
| Using open wire shelving | Kettlebell bases slip through wire gaps; uneven pressure bends the wires. | Use solid steel shelves or line wire racks with 3/4-inch plywood. |
| Ignoring floor PSI limits | 600+ lbs concentrated on four 1-inch feet dents luxury vinyl plank (LVP) flooring. | Place the rack on a 3/4-inch thick horse-stall mat to distribute the load. |
| Zero front-clearance | Shins scrape the rack base when performing a kettlebell clean pickup. | Ensure at least 18 inches of clear floor space in front of the bottom tier. |
| Storing competition bells by the handle | Horn-style racks scratch the delicate paint of competition bells and ruin grip surfaces. | Use flat-shelf racks for competition bells; reserve horn racks for cast iron. |
| Overloading single-tier A-frames | Exceeding the 300 lb tier limit causes weld micro-fractures over time. | Check manufacturer load ratings; never exceed 80% of max capacity per shelf. |
Troubleshooting Existing Rack Wobble and Sway
If you already own a dedicated kettlebell rack (such as a 3-tier flat shelf from Rogue or Rep Fitness) and it wobbles when you drop a heavy bell onto it, do not immediately assume the rack is defective. Garage concrete floors are notoriously uneven, and a 1/8-inch variance across a 3-foot span will cause a rigid steel rack to rock.
Follow this step-by-step troubleshooting flow to stabilize your storage:
- The Paper Test: With the rack unloaded, slide a piece of standard printer paper under each of the four feet. The foot that allows the paper to slide freely is your 'short' leg.
- Shim, Don't Bend: Never attempt to bend the rack legs to compensate for uneven floors; this compromises the structural integrity of the base welds. Instead, use high-density rubber shims (available at any hardware store for under $10) under the short foot.
- Check the Gussets: Inspect the triangular gusset plates where the vertical uprights meet the horizontal shelves. If you see hairline cracks in the powder coat, the rack has been subjected to dynamic shock loads (dropping kettlebells from waist height). Tighten all grade-8 bolts to 45 ft-lbs using a torque wrench.
- Anchor for Seismic/Dynamic Safety: If your rack is taller than 40 inches and holds more than 400 lbs, use masonry wedge anchors to secure the rear feet to the concrete slab. As noted in ExRx's Weight Room Safety guidelines, anchoring tall, top-heavy storage units is a non-negotiable standard for commercial and serious home facilities.
Purpose-Built Kettlebell Storage Matrix: 2026 Buyer's Guide
When you are ready to retire the Eisenlink dumbbell stand for your kettlebells, you need a storage solution engineered for spherical, offset loads. Here is a comparison of the three dominant kettlebell storage architectures available on the market today.
1. The Flat-Shelf 3-Tier Rack
Best For: Competition kettlebells, mixed-size collections, and garages with low ceiling clearance.
Typical Price: $220 - $350
Footprint: 36" W x 18" D
Expert Insight: Flat shelves with a 1-inch front lip are the gold standard. They allow you to store bells by their flat bases, protecting the handles from wear. Ensure the shelf depth is at least 14 inches; anything narrower will cause larger 32kg+ bells to overhang dangerously.
2. The Vertical Horn Rack
Best For: Cast-iron kettlebells, minimalist spaces, and CrossFit boxes.
Typical Price: $150 - $250
Footprint: 24" W x 12" D
Expert Insight: Horn racks slide the kettlebell handle over a vertical steel post. While space-efficient, they are terrible for competition bells (the paint will chip immediately). They also require significant overhead clearance to lift the bells on and off the top tier.
3. Wall-Mounted Saddle Brackets
Best For: Small apartment gyms and keeping floor space entirely clear.
Typical Price: $80 - $120 per pair
Footprint: 0 sq ft (wall-mounted)
Expert Insight: You must mount these directly into wooden wall studs or masonry. Drywall anchors will fail under the sheer force of a 24kg kettlebell. Use 3-inch structural lag screws and verify the studs are spaced exactly 16 inches on-center before purchasing.
Expert Verdict: Reclaiming Your Floor Space Safely
The desire to maximize equipment utility is understandable, but the Eisenlink dumbbell stand is strictly a dumbbell tool. Forcing kettlebells onto slanted, narrow-gauge dumbbell tiers is a recipe for ruined equipment coatings, scratched floors, and severe tip-over injuries. By investing in a purpose-built flat-shelf rack, properly shimming the base to account for concrete imperfections, and respecting the unique center of gravity that defines kettlebell training, you will create a safer, more organized, and highly efficient training environment for years to come.
More gear to consider
All reviews
Home Gym Safety: 7 Common Mistakes That Cause Injury (and How to Fix Them)

Home Dumbbell Rack Maintenance and Longevity Care Guide
Cap Dumbbell Rack Troubleshooting: Fix Common Storage Mistakes

Kettlebell Storage vs a Full Dumbbell Rack: 2026 Guide

Space-Saving DIY Dumbbell Rack: Complete Installation Walkthrough
