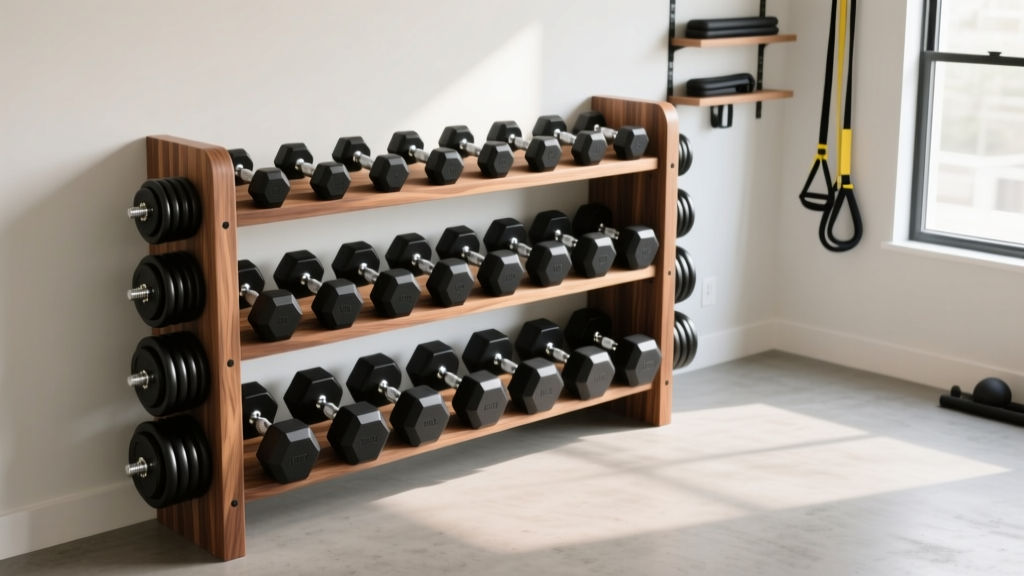
Wood Dumbbell Rack Setup: Complete Installation Walkthrough
Master your home gym layout with our complete wood dumbbell rack setup and installation walkthrough. Learn weight distribution, floor prep, and assembly.

Integrating a wood dumbbell rack into your home gym elevates the space from a sterile garage setup to a premium, boutique-style training environment. However, unlike fully welded steel units, a wood dumbbell rack requires a meticulous approach to assembly, structural alignment, and weight distribution. Wood is a dynamic material that expands, contracts, and settles under heavy point loads. If assembled incorrectly, you risk racking (leaning), shelf warping, or even catastrophic joint failure under the immense weight of cast iron.
This complete setup and installation walkthrough provides the exact engineering principles, hardware torque specifications, and organizational protocols required to build a safe, level, and aesthetically flawless wood dumbbell storage system.
Pre-Installation: Floor Load and Spatial Planning
Before unboxing your hardware, you must evaluate the structural capacity of your gym floor. A fully loaded 3-tier wood dumbbell rack can easily exceed 450 pounds (including the rack's dead weight). Concentrating this mass into a 2-foot by 4-foot footprint creates a significant point load.
Structural Warning: According to the American Wood Council, standard residential floor joists are typically designed for a live load of 40 PSF (pounds per square foot) and a concentrated load of 2,000 pounds. While your rack won't exceed the concentrated limit, placing the rack parallel to a single joist can cause localized deflection. Always position your rack perpendicular to the floor joists to distribute the weight across multiple structural members.Spatial Clearance Requirements
- Front Clearance: Minimum 36 inches to allow for safe lifting and dropping of heavy dumbbells without striking the shelving lips.
- Side Clearance: Minimum 18 inches on both sides to prevent elbow strikes during lateral movements or when racking the weights.
- Wall Clearance: If placing against a wall, leave a 2-inch gap to allow for baseboard clearance and prevent the steel uprights from scuffing the drywall.
Unboxing and Hardware Inventory
Premium hybrid wood dumbbell racks (featuring steel uprights and solid oak or maple shelves) rely on precise hardware. Lay out all components on a protective mat. Do not assemble directly on bare concrete, as dropped bolts can chip the floor or damage the wood finish.
Required Tools:
- 5mm and 6mm Allen wrenches (usually included, but a T-handle set provides better leverage)
- 13mm and 15mm socket wrenches
- Torque wrench (capable of measuring up to 50 Nm)
- Rubber mallet (for seating wood shelves into tight steel brackets)
- 48-inch carpenter's level or laser level
- Carpenter's square
Step-by-Step Assembly Walkthrough
Step rr: Base Frame Squaring
The most common failure mode in rack assembly is tightening the base bolts before the frame is perfectly squared. If the base is racked even slightly, the upper wood shelves will bind, leading to micro-fractures in the hardwood over time.
- Attach the front and rear base feet to the vertical steel uprights using the provided Grade 8 zinc-plated hex bolts.
- Insert the cross-members but do not fully tighten. Leave them finger-tight (about 30% torque).
- Measure diagonally from the bottom-left corner to the top-right corner, and compare it to the bottom-right to top-left measurement. The two numbers must be identical.
- Once squared, use your 15mm socket to torque all base hardware to 45 Nm.
Step 2: Integrating the Wood Shelves and UHMW Liners
High-end manufacturers like those featured on Rogue Fitness utilize UHMW (Ultra-High Molecular Weight) polyethylene liners to protect the wood from the aggressive knurling of iron dumbbells.
- Slide the UHMW plastic strips into the aluminum or steel channels on the wood shelves.
- Mount the heavy-duty steel L-brackets to the underside of the wood shelves using the provided wood screws. Pro-Tip: Use a drill with a clutch setting to drive the screws. Stop exactly when the screw head is flush with the bracket. Over-torquing will strip the hardwood and compromise the pull-out strength.
- Lift the assembled shelves onto the uprights. Use a rubber mallet to gently tap the bracket pins into the upright holes. Never strike the wood directly with a metal hammer.
Step 3: Final Leveling and Anchor Installation
Even a 2-degree tilt will cause cylindrical or hex dumbbells to roll and slam against the end-stops, eventually loosening the rack hardware.
- Place your 48-inch level across the top tier shelf.
- Adjust the leveling feet on the base uprights until the bubble is perfectly centered.
- If your rack includes wall-mounting brackets for seismic safety or anti-tip prevention, use a stud finder to locate the wall studs and secure the brackets using 3/8-inch lag screws. Do not use drywall anchors for a loaded wood dumbbell rack.
Weight Distribution and Loading Protocol
How you load a wood dumbbell rack directly impacts its lifespan. The shelves the optimal weight limits and distribution strategies for a standard commercial-grade 3-tier wood shelf system.
| Tier Level | Target Dumbbell Range | Max Static Load | Loading Strategy |
|---|---|---|---|
| Tier 3 (Top) | 5 lbs - 15 lbs pairs | 120 lbs | Place lighter neoprene/urethane pairs here to keep the center of gravity low. |
| Tier 2 (Middle) | 20 lbs - 35 lbs pairs | 180 lbs | Ensure hex dumbbells are flush against the backstop to prevent rolling. |
| Tier 1 (Bottom) | 40 lbs - 60+ lbs pairs | 300+ lbs | Heaviest weights go here. Center the pairs evenly across the shelf width. |
Long-Term Wood Maintenance and Troubleshooting
Unlike steel, wood is hygroscopic—it absorbs and releases moisture from the surrounding air. If your home gym is in a garage or basement, seasonal humidity swings can cause the wood shelves to cup, bow, or crack.
According to the American Hardwood Information Center, maintaining an indoor relative humidity (RH) between 35% and 50% is critical for solid hardwood furniture and fixtures. If your gym drops below 30% RH in the winter, the wood shelves will lose moisture and shrink, potentially causing the steel mounting brackets to loosen.
The 30-Day Re-Torque Schedule
When a wood dumbbell rack is first assembled and loaded, the wood compresses slightly against the steel brackets, and the UHMW liners seat themselves into the metal channels. This 'settling' period will reduce the tension on your hardware.
- Day 30: Unload the rack completely. Use your torque wrench to re-tighten all wood screws and base bolts to their original specifications.
- Bi-Annually: Perform a visual inspection for micro-fractures around the screw holes. If you notice any splintering, remove the screw, inject a high-quality wood glue into the hole, let it cure for 24 hours, and re-drive the screw.
- Annual Conditioning: Apply a light coat of paste wax or butcher block oil (if the wood is unfinished or sealed with natural oil) to prevent the wood from drying out and to maintain the rich aesthetic of the grain.
By following this precise installation and maintenance protocol, your wood dumbbell rack will remain a structurally sound, visually stunning centerpiece of your home gym for decades.
More gear to consider
All reviews
The Ultimate Gym Dumbbell Rack Setup and Installation Guide

Cold Therapy for Athletes: Science, Protocols, and Home Integration

Space Saving Dumbbell Rack Head-to-Head: 2026 Guide

Kettlebell Storage Solutions vs Wall Mounted Dumbbell Storage

Cold Safety Tips: Protecting Your Home Gym, Equipment, and Body in Sub-Freezing Conditions
