
Beginner Guide: Setting Up Your Rep Dumbbell Stand & Storage Rack
Learn how to choose, assemble, and organize your home gym with a Rep dumbbell stand. Step-by-step guide for beginners to maximize space and safety.

Introduction: Taming the Home Gym Clutter
If you have ever tripped over a stray 25-pound hex dumbbell in the middle of a grueling workout, you already know that proper equipment storage is not just about aesthetics—it is a critical safety requirement. As home fitness spaces evolve in 2026, the shift toward modular, high-density layouts means that every square foot matters. Leaving free weights scattered across your floor creates tripping hazards, damages your flooring, and ultimately kills your workout momentum.
Enter the rep dumbbell stand ecosystem. REP Fitness has engineered some of the most robust, modular storage solutions on the market, specifically designed to handle the brutal wear-and-tear of daily home gym use. However, buying the rack is only the first step. Knowing how to properly select, assemble, and ergonomically load your stand is what separates a chaotic garage gym from a professional-grade training facility. This beginner-friendly, step-by-step guide will walk you through everything you need to know to set up your dumbbell storage rack and organizer solutions safely and efficiently.
💡 Pro Tip for Beginners: Never underestimate the weight of your dumbbell collection. A standard pair of 50lb dumbbells weighs as much as a large bag of concrete. Your storage rack must be rated for high static loads, not just the weight of a single pair.Step 1: Audit Your Dumbbell Collection and Space
Before you purchase any storage equipment, you must understand the physical footprint of your current and future dumbbells. Dumbbell storage racks are not one-size-fits-all, and the shape of your weights dictates the shelf depth required.
Hex vs. Round: The Footprint Math
- Hex Dumbbells (Rubber-Coated): These are the most common for beginners. Their flat edges prevent rolling, but their bulky, wide heads require deeper shelves. A pair of 50lb hex dumbbells can span up to 14 inches in width.
- Round Urethane Dumbbells: More compact and durable, but they require racks with raised lips or contoured cradles to prevent them from rolling off the edge.
Measure the total length of your dumbbell pairs when lined up side-by-side. If you own a 5-to-50lb set in 5lb increments, you are looking at 10 pairs. Lining them up on a single tier would require over 8 feet of horizontal space. This is why vertical organization via a multi-tier rep dumbbell stand is essential for space conservation.
Step 2: Select the Right Rep Dumbbell Stand Model
Choosing the correct model depends on your weight range and ceiling height. According to industry experts at Garage Gym Reviews, matching your rack tier to your heaviest dumbbell pair is the golden rule of home gym organization. Below is a comparison of the most popular configurations available on the REP Fitness Official Dumbbell Rack Lineup versus generic market alternatives.
| Feature | REP 2-Tier Rack | REP 3-Tier Rack | Generic A-Frame Stand |
|---|---|---|---|
| Best For | 5-50lb Pairs | 5-100lb Pairs | Light sets (under 30lbs) |
| Approx. 2026 Price | $149 - $179 | $249 - $299 | $80 - $120 |
| Steel Gauge | 11-Gauge | 11-Gauge | 14 to 16-Gauge |
| Weight Capacity | 800 lbs | 1,000+ lbs | 300 lbs |
| Footprint (L x W) | 35.5 x 23.5 in | 35.5 x 23.5 in | 24 x 24 in |
For most beginners building a comprehensive home gym, the REP 3-Tier Dumbbell Rack is the ultimate investment. It future-proofs your setup, allowing you to expand your collection up to 100lb pairs without needing to buy a secondary Rogue Fitness Dumbbell Storage unit or a secondary stand later on.
Step 3: Assembly and Anti-Tip Safety Protocols
A heavy-duty rep dumbbell stand is constructed from thick steel, meaning assembly requires a bit of elbow grease and mechanical awareness. A common beginner mistake is rushing the bolt-tightening process, which leads to frame tension and a dangerous 'rocking' effect on uneven garage floors.
The Step-by-Step Assembly Framework
- Stage Your Hardware: Unbox and separate the M16 main upright bolts from the M8 crossbar bolts. Lay them out on a towel to prevent scratching your floor or losing washers.
- Hand-Tighten First: Insert all bolts and hand-tighten them to about 50% capacity. Do not use a wrench yet. This allows the 11-gauge steel frame to settle into its natural geometry.
- Seat the Joints: Use a rubber mallet to gently tap the crossbars into the uprights. This ensures the laser-cut steel slots are fully seated, eliminating microscopic gaps that cause squeaking during weight retrieval.
- Level the Feet: Before final torquing, place a carpenter's level across the top shelf. Adjust the threaded plastic foot caps at the base until the rack is perfectly plumb. This is critical for preventing forward tipping.
- Torque in a Star Pattern: Using the included Allen keys or a socket wrench, tighten the bolts in a diagonal star pattern (similar to changing a car tire) to distribute tension evenly across the frame.
Step 4: Ergonomic Loading Strategy (Biomechanics 101)
How you load your dumbbells onto the stand is just as important as the stand itself. Improper loading is a leading cause of shoulder impingement and lower back strains in home gym environments. You must organize your rack based on human biomechanics, not just what looks visually symmetrical.
The Triangle of Stability Rule
Your dumbbell rack should be loaded with the heaviest weights on the bottom tier, medium weights in the middle, and the lightest weights on top. Here is the physiological reasoning behind this rule:
- Bottom Tier (Heavy: 40lbs - 100lbs): The bottom shelf sits roughly 12 to 15 inches off the ground. This allows you to hinge at the hips, grip the heavy dumbbell, and engage your glutes and hamstrings to deadlift the weight into position. This protects your lumbar spine.
- Middle Tier (Medium: 20lbs - 35lbs): Positioned at waist height, this tier is ideal for picking up weights for exercises like lunges, goblet squats, or farmer's carries where the weight starts at hip level.
- Top Tier (Light: 5lbs - 15lbs): The top shelf is usually around 38 inches high. Storing 50lb+ dumbbells here forces the shoulder into extreme flexion under load. Pulling a heavy, unstable load from above shoulder height drastically increases the risk of rotator cuff impingement and bicep tendon strain. Reserve this tier strictly for light isolation weights used for lateral raises or tricep extensions.
Organizing your rack by weight is not just about keeping the center of gravity low to prevent the rack from tipping; it is about aligning the equipment with your body's natural leverages to prevent acute joint injuries over time.
Step 5: Long-Term Maintenance and Upkeep
Even the best rep dumbbell stand requires periodic maintenance to ensure longevity, especially in garages that experience humidity and temperature fluctuations.
- Quarterly Bolt Checks: The repeated slamming of heavy hex dumbbells onto the steel shelves creates micro-vibrations. Every three months, take an Allen key and check the tightness of all crossbar bolts.
- Clean the Shelves: Rubber-coated dumbbells shed microscopic particulate dust over time. Wipe down the shelves with a damp microfiber cloth and a mild degreaser to prevent the rubber dust from mixing with humidity and creating a slick, slippery surface on the metal racks.
- Inspect the Powder Coat: If you accidentally chip the black powder coat while loading weights, touch it up with a matte black rust-inhibitor paint. Exposed 11-gauge steel will oxidize rapidly in humid environments, compromising the structural integrity of the shelf lip over several years.
Final Thoughts on Home Gym Organization
Investing in a high-quality rep dumbbell stand transforms your workout space from a cluttered storage unit into a purpose-built performance center. By auditing your space, selecting the correct tier configuration, assembling the frame with mechanical precision, and loading the weights according to biomechanical safety principles, you ensure that your home gym remains safe, efficient, and ready for years of heavy training. Take the time to set up your organizer solutions correctly today, and your future self will thank you every time you step onto the gym floor.
More gear to consider
All reviews
Synergy Dumbbell Rack vs Weight Plate Storage Trees in 2026

Barbell Storage Horizontal vs Vertical & DIY Wood Dumbbell Rack Trends
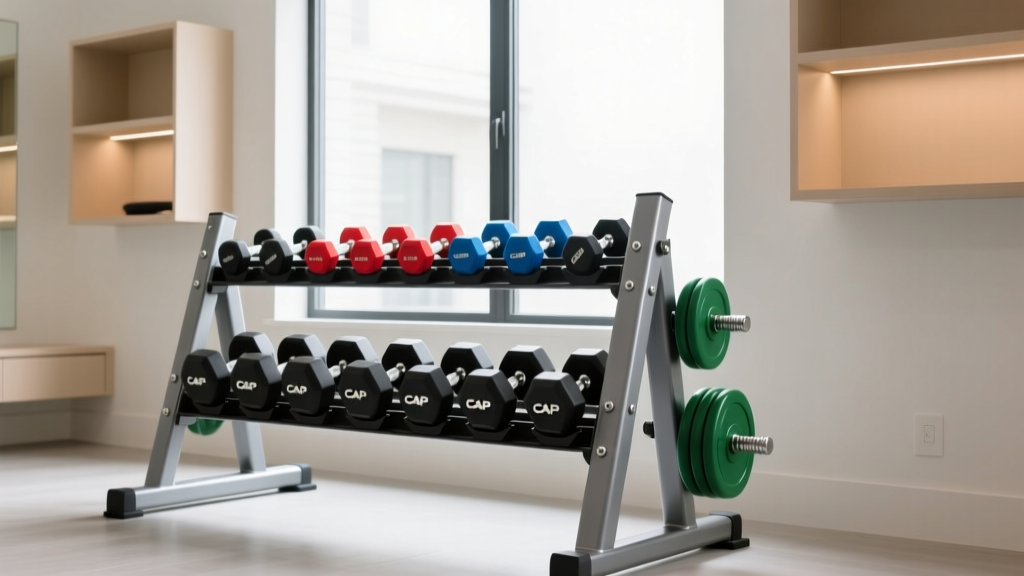
Cap Dumbbell Rack Troubleshooting: Fix Common Storage Mistakes

Small Space Dumbbell Storage Solutions: Mistakes & Fixes

Kettlebell Storage Solutions & Bowflex SelectTech Dumbbell Stand Guide
