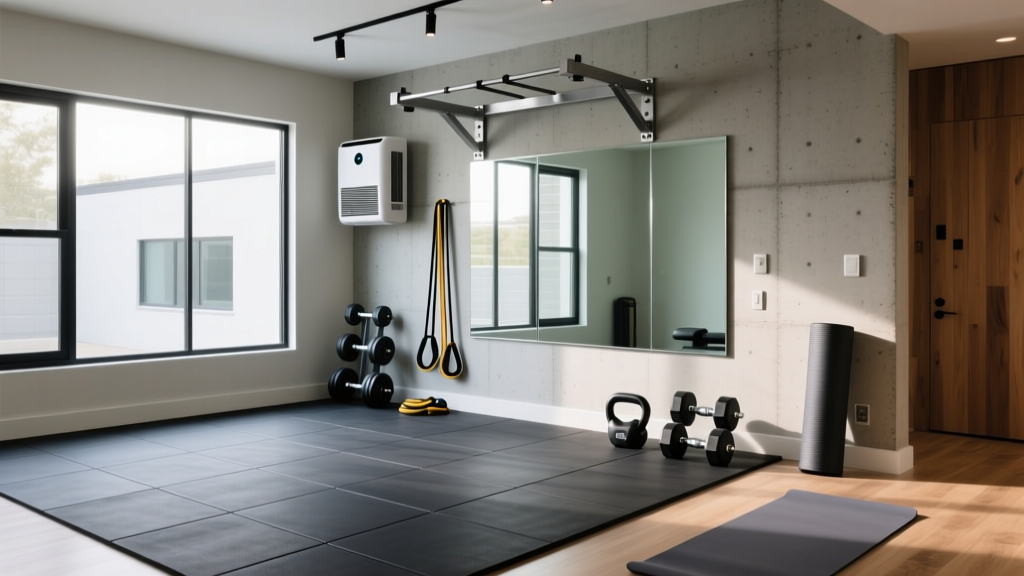
Configuring Your Space for a Weider Home Gym Workout Routine
Learn how to configure your garage or spare room for a complete Weider home gym workout routine, including flooring, clearances, and cable installation.

Executing a highly effective weider home gym workout routine requires more than just assembling a machine and starting your reps. Whether you are installing a cable-and-pulley powerhouse like the Weider PRO 2980 or a glideboard-based system like the Weider Ultimate Body Works, the physical configuration of your space dictates the safety, fluidity, and ultimate success of your strength training program. A poorly placed machine restricts your range of motion, causes premature cable fraying, and turns a seamless superset into a frustrating logistical puzzle.
This comprehensive installation and configuration walkthrough will guide you through the exact spatial requirements, subfloor preparations, and hardware torquing specifications needed to build a dedicated strength training zone. By the end of this guide, your environment will be perfectly calibrated to support progressive overload and uninterrupted workout flow.
The Blueprint: Spatial Requirements for Weider Strength Systems
The most common mistake home gym builders make is measuring the static footprint of the machine while ignoring the dynamic operational footprint. When planning your weider home gym workout routine, you must account for the full extension of limbs, cables, and attachments.
Static vs. Operational Footprints
Weider PRO 2980 (Cable System): The static footprint is approximately 46" W x 70" D x 84" H. However, the operational footprint requires a minimum of 108" W x 120" D to accommodate lat pulldowns, seated rows, and leg extensions without your knuckles grazing the drywall.
Weider Ultimate Body Works (Glideboard): Static footprint is roughly 24" W x 96" D. Because this relies on body weight and power bands, you need a minimum of 48" of lateral clearance on both sides to safely attach and stretch the resistance bands at extreme angles.
According to the Centers for Disease Control and Prevention, adults need muscle-strengthening activities on two or more days a week to maintain optimal health. To guarantee consistency, your gym layout must eliminate physical friction; if you have to move a bench or dodge a wall to perform a cable crossover, adherence to your routine will inevitably drop.
Phase 1: Subfloor Preparation and Shock Absorption
Never install a Weider weight stack machine directly on bare concrete or standard plywood. The dynamic force of a 214-pound weight stack dropping during a failed rep generates significant acoustic vibration and structural shock. Furthermore, uneven floors will torque the machine's frame, leading to misaligned pulleys and snapped cables.
- Acquire Vulcanized Rubber Mats: Purchase 3/4-inch thick vulcanized rubber mats (often sold as horse stall mats) with a durometer rating of 60A. Avoid interlocking EVA foam tiles; they compress unevenly under heavy loads, compromising the machine's leveling.
- Level the Subfloor: Use a 48-inch spirit level across the installation zone. If the concrete slopes more than 1/4 inch over 10 feet, use a self-leveling polyurethane compound before laying the mats.
- Lay and Seal the Mats: Butt the rubber mats tightly together. Use a heavy-duty mat tape or a polyurethane adhesive on the seams to prevent sweat and dust from degrading the concrete underneath, which can cause moisture wicking and rust on the machine's base rails.
Phase 2: Frame Assembly and Hardware Torquing
The structural integrity of your Weider machine is paramount when executing heavy compound movements. The factory hardware is typically Grade 5 zinc-plated steel. During assembly, do not fully tighten any bolts until the entire mainframe skeleton is erected. This allows the frame to 'settle' into its natural geometry.
Once the frame is standing, use a calibrated torque wrench to tighten all primary carriage bolts to 45 to 50 ft-lbs. Over-torquing can strip the threads on the welded nuts inside the steel tubing, while under-torquing will result in a swaying frame during heavy lat pulldowns. Apply a medium-strength threadlocker (blue Loctite 243) to the bolts securing the weight stack guide rods to prevent them from vibrating loose over months of use.
Phase 3: Cable Routing and Pulley Alignment
The lifeblood of any cable-based weider home gym workout routine is the 7x19 strand aircraft cable system. Incorrect routing is the number one cause of warranty claims and mid-set failures.
Expert Warning: Never use metal tools to guide the cable through the pulleys. Scratching the nylon coating on the cable creates a micro-abrasion that will cause the steel core to fray and snap under load. Always use your fingers or a smooth plastic cable guide.
Testing Cable Deflection
Once the cables are routed and secured to the weight stack and the selector pin, you must check the tension. Press your thumb firmly against the midpoint of the longest exposed cable run. The cable should deflect exactly 1/2 inch to 3/4 inch. If it is tighter, it will grind against the pulley bearings; if it is looser, it will slip off the track during rapid eccentric movements. Adjust the tension using the threaded turnbuckles located near the base of the weight stack.
Designing the Zone for Your Weider Home Gym Workout Routine
A well-structured routine relies on supersets, drop sets, and seamless transitions. Your room configuration must support this methodology. The Mayo Clinic emphasizes that proper form and full range of motion are critical for strength training, which is impossible if your spatial layout forces you to compromise your posture to avoid hitting a wall.
| Exercise Zone | Required Clearance | Configuration & Accessory Tip |
|---|---|---|
| Lat Pulldown / High Cable | 36" Frontal | Ensure no overhead obstructions (fans, low joists) within 90" of the floor. |
| Seated Cable Rows | 48" Rear | Place a 60"x72" shatterproof acrylic mirror on the rear wall for spinal alignment checks. |
| Leg Extensions / Curls | 42" Frontal | Keep a dedicated mat strip here; shoes will scuff the floor during heavy extensions. |
| Cable Crossovers / Flyes | 60" Lateral (Both sides) | Clear all dumbbell racks from this zone to prevent tripping during wide stances. |
Integrating Free Weights and Bands
While the Weider system is comprehensive, advanced lifters often supplement their weider home gym workout routine with dumbbells and resistance bands. Position a vertical dumbbell rack exactly 3 feet to the non-dominant side of the machine. This specific distance allows you to grab a pair of dumbbells for a superset (e.g., cable triceps pushdowns immediately followed by dumbbell skull crushers) without breaking your heart rate zone or leaving the primary mat area.
Environmental Controls for Heavy Strength Training
Strength training generates significant body heat, and a stagnant room will degrade your performance by the third or fourth exercise. The U.S. Department of Health and Human Services outlines that progressive overload is key to muscle adaptation, but fatigue from poor ventilation will artificially limit your output before your muscles actually reach failure.
- Airflow Dynamics: Do not point a fan directly at the weight stack or pulleys, as this will blow dust and debris into the bearing tracks. Instead, mount a high-velocity wall fan at a 45-degree downward angle, aimed at the user's torso during the seated row position.
- Lighting Placement: Avoid placing a single overhead light directly above the lat pulldown seat. When you look up to grab the bar, you will be blinded. Use diffuse LED strip lighting mounted vertically on the corners of the room to eliminate harsh shadows and glare.
- Humidity Control: If your gym is in a basement or garage, run a dehumidifier to keep ambient humidity below 50%. High humidity accelerates the oxidation of the weight stack plates and the exposed chrome on the guide rods, leading to a gritty feel when the weights slide up and down.
Maintenance for Long-Term Routine Consistency
To ensure your setup continues to support your fitness goals, implement a strict maintenance schedule. Every 90 days, wipe down the chrome guide rods with a silicone-based lubricant (never use WD-40, which attracts dust and creates a grinding paste). Inspect the 7x19 aircraft cables for 'fish-hooks'—tiny strands of steel poking out of the nylon sheath. If you spot even one, replace the cable immediately. By treating your spatial configuration and machine maintenance with the same discipline as your workout routine, you guarantee a safe, efficient, and highly effective home gym environment for years to come.
More gear to consider
All reviews
Building a Feierdun Home Gym Setup Under $500: Value Analysis
Space-Saving Home Gym Design Layout: Essential Beginner Starter Kit
Parabody 350 Home Gym: Expert Review & Layout Guide
Maintaining Marcy Home Gym Exercise Equipment in Small Spaces
Top Home Gym Tips and Hacks for Budget Renovations