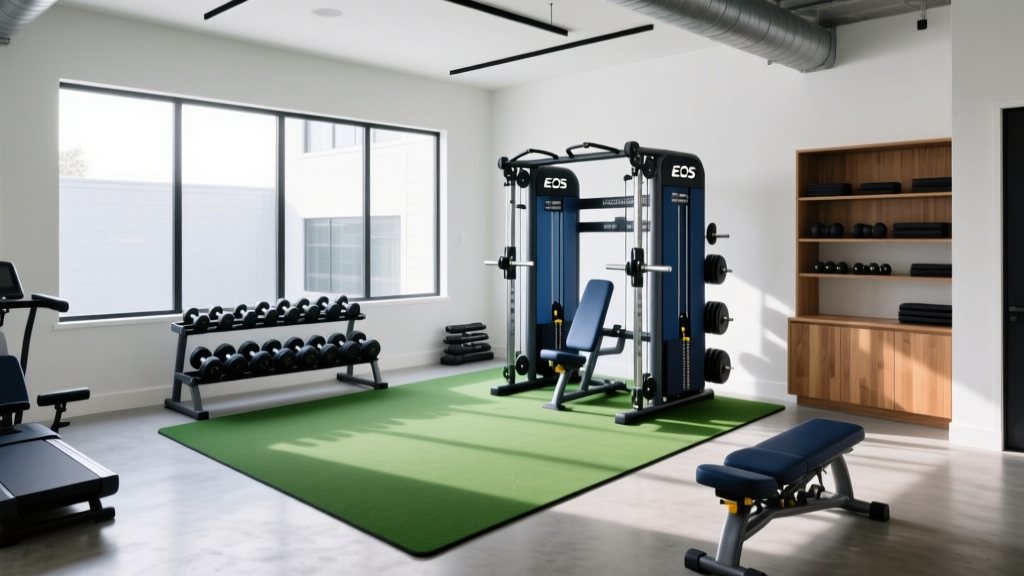
The EōS Change: Complete Home Gym Setup & Floor Plan
Transitioning from commercial fitness? Discover the ultimate EōS change home gym setup, complete with a 400 sq ft floor plan, expert gear picks, and ROI data.

Why Lifters Are Making the EōS Change to Home Gyms
EōS Fitness has built a massive footprint across the Southwest and beyond by offering a premium commercial experience at a budget-friendly price point. With sprawling functional turf zones, heavy plate-loaded Hammer Strength machines, and extensive cable crossover stations, it is a haven for serious lifters. However, an increasing number of strength athletes are initiating an EōS change: home gym transitions that prioritize convenience, hygiene, and long-term financial ROI. According to industry retention data tracked by Club Industry, the shift toward premium home setups has stabilized into a permanent market segment, with lifters willing to invest $5,000 to $8,000 upfront to replicate their favorite commercial zones.
But you cannot simply buy a power rack and call it a day. Replicating the commercial feel requires strategic spatial planning, heavy-duty flooring, and equipment that mimics the biomechanics of commercial plate-loaded leverage machines. In this hands-on guide, we break down exactly how to design a 400-square-foot (20x20 ft) home gym floor plan that captures the essence of an EōS layout, complete with expert-tested equipment picks for 2026.
💡 The ROI Breakdown: EōS vs. Home Gym
An average EōS premium membership costs roughly $40 to $50 per month, plus annual fees and initiation. Over a 5-year period, you will spend approximately $2,700 to $3,300—not including gas, commute time, or waiting for equipment during peak 5:00 PM hours. A $6,500 commercial-lite home gym setup pays for itself in under 10 years while adding tangible property value to your home and reclaiming 3 to 4 hours of commute time weekly.
Deconstructing the Commercial Layout
Before dragging a power rack into your garage, we need to analyze what makes the commercial layout effective. The National Strength and Conditioning Association (NSCA) guidelines for strength and conditioning facilities emphasize distinct zoning to prevent traffic bottlenecks and ensure safety. A standard EōS floor is divided into three primary zones:
- The Power & Plate-Loaded Zone: Dedicated to heavy compound lifts, squat racks, and iso-lateral leverage machines.
- The Functional Turf Zone: Used for sled pushes, kettlebell flows, and dynamic warm-ups.
- The Cable & Isolation Zone: Housing functional trainers, lat pulldowns, and accessory work.
To replicate this in a standard 2-car garage (20 feet wide by 20 feet deep), we must allocate space based on equipment footprints and necessary safety clearances. You need a minimum of 36 inches of clearance around any barbell path, and 48 inches around functional trainer weight stacks.
The 400 Sq. Ft. 'Commercial-to-Home' Floor Plan
Here is the exact floor plan we recommend for a 20x20 ft space with a standard 8-to-10-foot ceiling. This layout maximizes flow while keeping the heavy, high-impact zones away from the garage door tracks and entryways.
Zone 1: The Power & Plate-Loaded Zone (Left Bay: 10x10 ft)
This is your anchor. Place your primary power rack against the left wall, leaving 4 feet of clearance in front for barbell loading and spotting. Position your adjustable bench inside the rack. Directly adjacent to the rack, store your bumper plates on a vertical tree to minimize the footprint.
Zone 2: Functional Turf Zone (Center/Right Bay: 10x15 ft)
Lay down a 10x15 ft roll of heavy-duty artificial turf flush against the back wall. This zone is critical for the 'EōS feel.' It houses your sled, kettlebells, and medicine balls. By placing it in the center-right, you create a natural walking path from the garage door to the power rack without tripping over plates.
Zone 3: Cable & Isolation Zone (Right Front: 8x10 ft)
Position a dual-cable functional trainer in the right front corner. Because functional trainers require plate loading on the sides, ensure you leave 30 inches of clearance on both the left and right sides of the machine. Mount a wall-ball target on the adjacent stud wall.
Expert Hands-On Equipment Matrix (2026 Edition)
After testing dozens of commercial and prosumer setups, we have curated the exact equipment matrix needed to replicate the EōS experience without buying refurbished commercial gear that requires constant maintenance.
| Equipment Type | Expert Top Pick | Est. Price (2026) | Footprint | Commercial Equivalent |
|---|---|---|---|---|
| Power Rack | REP Fitness PR-4000 (with Lat Row) | $1,499 | 4' x 4' | Hammer Strength HD Elite Rack |
| Functional Trainer | Bells of Steel Cable Crossover | $1,499 | 4.5' x 3' | Life Fitness Signature Series |
| Adjustable Bench | Rogue Adjustable Bench 3.0 | $495 | 4' x 2' | Prime Fitness Adjustable |
| Barbell & Plates | Rogue Ohio Bar + Echo Bumpers (230lb) | $625 | N/A | Ivanko / Eleiko Sets |
| Turf & Sled | Fringe Sport 15ft Turf + Rogue S-2 Sled | $750 | 10' x 15' | ProFormance Turf Zones |
Hands-On Reviews: Replicating the Commercial Feel
REP Fitness PR-4000 Power Rack
The PR-4000 is the undisputed king of the prosumer market. Unlike standard home racks, the PR-4000 features 1-inch holes with laser-etched numbering, mimicking the precision of commercial rigs. More importantly, you can attach the Lat Row and Low Row leverage attachments directly to the rack. This is the secret to replacing the massive, room-dominating Hammer Strength iso-lateral machines found at EōS. The biomechanics of the REP lever arms are incredibly close to their commercial counterparts, providing the same converging arc of motion for heavy back days.
Bells of Steel Cable Crossover
Commercial gyms use 400-lb stack functional trainers. Buying a true commercial Life Fitness unit for your home will cost upwards of $6,000 and weigh over 1,000 lbs. The Bells of Steel Cable Crossover is a plate-loaded alternative that costs $1,499. In our hands-on testing, the 2:1 pulley ratio feels exceptionally smooth, and the 180-degree swivel pulleys allow for the exact same cable flye and tricep extension angles you are used to. Pro Tip: Buy two sets of 10lb and 5lb fractional plates to make weight jumps on the cable machine as seamless as moving a commercial pin.
Expert Insight: 'The biggest mistake lifters make when leaving a big-box gym is underestimating the importance of accessory isolation. Do not skip the functional trainer; it is the bridge between raw powerlifting and the aesthetic bodybuilding work that commercial gyms facilitate so well.' — FitGearPulse Testing Team
Flooring, Acoustics, and Climate Control
You cannot drop 300 lbs on a concrete garage slab and expect your equipment—or your neighbors—to survive. EōS uses thick, interlocking rubber tiles over concrete. For your home setup, skip the expensive branded interlocking tiles and opt for 3/4-inch thick vulcanized horse stall mats (available from Tractor Supply Co. for roughly $50 per 4x6 ft mat). They are virtually indestructible and provide the exact same shock absorption as $8/sqft commercial flooring.
Acoustics & Climate: To handle the heat of a garage gym in the summer, install a Vornado 783 Full-Size Whole Room Air Circulator. Unlike standard oscillating fans, the Vornado creates a vortex that moves the entire air mass in a 400 sq ft space. For sound deadening, apply 2-inch thick acoustic foam panels to the drywall directly behind your power rack to absorb the high-frequency 'clank' of dropping barbells.
Step-by-Step Weekend Installation Timeline
- Friday Evening (Clear & Clean): Empty the garage entirely. Power wash the concrete slab and let it dry overnight. Measure and mark your 20x20 zones using chalk lines.
- Saturday Morning (Flooring): Lay down the 3/4-inch rubber mats in the Power Zone and the Turf roll in the Functional Zone. Use double-sided carpet tape only on the seams of the turf to prevent shifting during sled pushes.
- Saturday Afternoon (Heavy Assembly): Assemble the REP PR-4000 and Bells of Steel Functional Trainer. Crucial: Use a socket wrench and a torque wrench to ensure all structural bolts are tightened to the manufacturer's exact ft-lb specifications.
- Sunday Morning (Mounting & Mirrors): Mount wall-ball targets and install shatterproof acrylic gym mirrors (glass is a severe hazard in a garage gym) along the back wall to open up the space visually.
- Sunday Afternoon (Calibration): Load the barbell, test the rack safeties, and run through a full warm-up and working set to ensure the floor plan flows naturally without bottlenecking.
Frequently Asked Questions
Do I need a 20x20 garage to replicate the EōS experience?
No. While a 400 sq ft space is ideal for a dedicated turf zone, you can adapt this floor plan for a 10x20 single-car garage (200 sq ft) by eliminating the turf and replacing the functional trainer with a compact cable attachment mounted directly to your power rack.
How do I handle heavy deadlifts without damaging my foundation?
Commercial gyms use specialized sub-floors. At home, you must use crash pads or build a dedicated 4x8 ft deadlift platform using layered MDF and horse stall mats. Never drop bare steel plates or heavy bumpers directly onto a residential concrete slab, as it can cause micro-fractures in your foundation over time.
More gear to consider
All reviews
Compact Home Gyms Ideas: Apartment Equipment Maintenance
Floor Plan Guide: Snode All-in-One Home Gym Smith Machine Power Rack

Top Home Gym Ideas: Remodeling Costs & Value Analysis

The Best Equipment for Back Strength: A Practical Home Gym Checklist

Budgeting Mirrors & Lighting: Vital Fitness Equipment for Home Workout
