Beyond Perfect Home Gym Images: A Real Strength Setup Walkthrough
Translate idealized home gym images into a heavy-duty reality. Our walkthrough covers flooring, rack anchoring, and spatial planning for strength.

The Illusion of Curated Home Gym Images
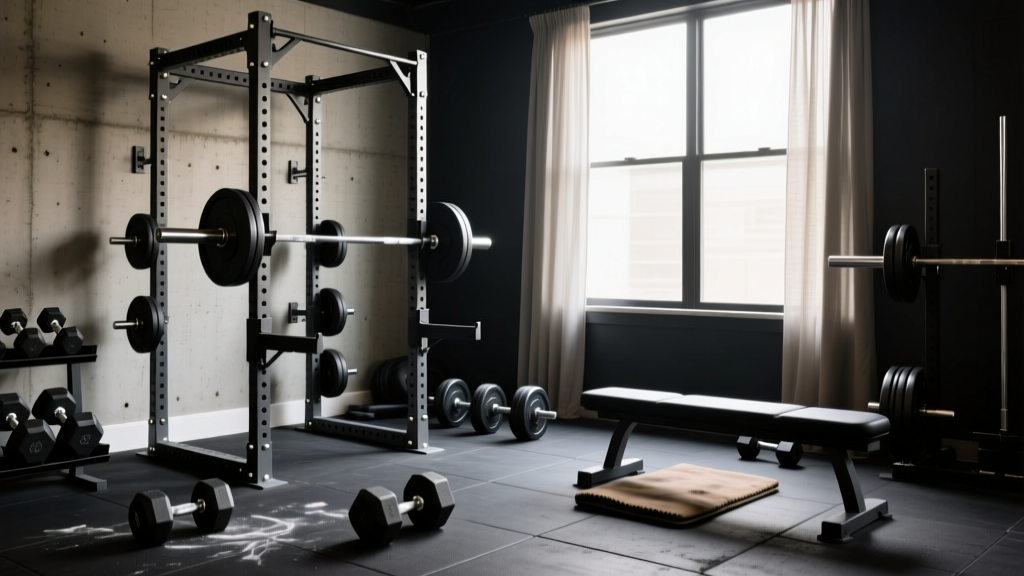
Scroll through any fitness forum or social media feed, and you will be bombarded with perfectly lit, aesthetically pleasing home gym images. These photos often feature pristine rolled rubber flooring, neon LED accents, and power racks placed flush against drywall. However, as any seasoned strength coach or garage gym veteran will tell you, these curated home gym images rarely show the structural realities required for heavy, progressive overload training. They hide the cracked concrete beneath thin rubber mats, the drywall punched out by rogue barbell sleeves, and the low ceilings that make overhead pressing a hazardous endeavor.
Building a dedicated strength training configuration is not about replicating an Instagram aesthetic; it is about engineering a space that can safely absorb thousands of pounds of kinetic energy, accommodate biomechanical ranges of motion, and withstand years of abuse. In this comprehensive 2026 installation walkthrough, we are stripping away the visual fluff and focusing on the hardcore spatial, structural, and mechanical requirements of a true heavy-duty home strength setup.
Reality Check: According to facility design guidelines emphasized by the National Strength and Conditioning Association (NSCA), inadequate flooring and improper equipment clearances are the leading causes of both structural damage to home foundations and acute lifting injuries. Always prioritize load-bearing capacity over visual appeal.Phase 1: Spatial Reality Checks for Heavy Iron
Before purchasing a single piece of equipment, you must audit your space. Many aspiring lifters buy a standard 90-inch power rack, only to realize their 8-foot basement ceiling makes pull-ups impossible. Here is the exact spatial matrix you need for a functional strength configuration.
| Movement / Equipment | Minimum Ceiling Height | Required Floor Footprint | Clearance Zone |
|---|---|---|---|
| Strict Pull-Ups (in 90" rack) | 8' 4" (100 inches) | 4' x 4' | 12" rear clearance |
| Standing Overhead Press | 9' 0" (108 inches) | 4' x 4' | 24" lateral clearance |
| Deadlift Platform (8' x 4') | 8' 0" (Standard) | 8' x 4' | 18" walkway perimeter |
| Flat Bench Press | 7' 0" (Standard) | 4' x 6' | 36" spotter access |
If your ceiling height is strictly 8 feet, you must opt for an 80-inch or 84-inch rack (such as the Rogue RML-390C Short) and accept that strict pull-ups inside the rack will require you to bend your knees or perform them outside the rack in a designated hallway or garage bay.
Phase 2: Subfloor Protection and Flooring Installation
The most deceptive aspect of popular home gym images is the flooring. Thin, interlocking foam tiles or 3/8-inch rolled rubber look seamless on camera, but they are virtually useless for dropping heavy deadlifts. When a 500-pound barbell is dropped from a height of 18 inches, it generates over 1,500 pounds of peak impact force. Without proper dissipation, this force will spall, crack, or pulverize standard residential concrete (which typically cures at 2,500 to 3,000 PSI).
The Sandwich Method for Heavy Drops
For serious strength training, we recommend the 'plywood sandwich' method over bare concrete. This involves laying down a base layer of 3/4-inch tongue-and-groove plywood, topped with a layer of 3/4-inch thick, 4x6 foot vulcanized rubber horse stall mats (widely available at agricultural supply stores for roughly $55 to $65 each).
- Base Layer: 3/4" OSB or Plywood (absorbs and spreads lateral kinetic energy).
- Top Layer: 3/4" Vulcanized Rubber (provides grip, dampens high-frequency vibration, and protects the barbell sleeves).
- Adhesive: Use a polyurethane-based construction adhesive (like PL Premium) only on the seams if you wish to semi-permanently bond the rubber to the wood, though a gravity-held floating floor is often preferred for moisture management.
Phase 3: Anchoring the Power Rack (The Step Most Photos Skip)
You will almost never see the floor anchors in aesthetic home gym images, yet anchoring is the single most critical safety step in your installation. While flat-foot racks (like the Rogue RML-390F) are popular for renters, bolted configurations are mandatory if you plan on using resistance bands, performing kipping movements, or if you have young children or pets in the home.
According to structural fastening standards outlined by Simpson Strong-Tie, wedge anchors are the gold standard for solid concrete slabs. Here is the exact step-by-step installation protocol for securing a 4-post power rack to a standard 4-inch residential concrete slab.
- Position and Mark: Assemble the rack base loosely. Position it exactly where you want it, ensuring it is square. Use a center punch or marker to mark the concrete through the factory-drilled holes in the uprights.
- Drill the Holes: Move the rack aside. Using a hammer drill and a 1/2-inch carbide-tipped masonry bit, drill straight down into the concrete. Drill to a depth of 4 inches (1/4 inch deeper than the 3-3/4 inch anchor length to allow for dust clearance).
- Vacuum the Silica Dust: This is the most skipped step. Use a shop-vac to remove all concrete dust from the hole. If dust remains, the wedge anchor will not achieve its rated pull-out strength, leading to catastrophic failure under lateral load.
- Drive and Torque: Place the rack back over the holes. Insert the 1/2" x 3-3/4" wedge anchors with the washer and nut attached. Tap them down with a hammer until the nut is flush with the base plate. Finally, use a calibrated torque wrench to tighten the nut to exactly 60 ft-lbs. This expands the wedge at the base of the hole, locking it into the concrete.
Phase 4: Lighting and Mirror Placement for Form Checks
Lighting in curated home gym images is usually designed to highlight muscle definition or create a moody atmosphere. For strength training, your lighting must serve a biomechanical purpose: shadow elimination. Overhead lighting directly above a squat rack will cast deep shadows in your eye sockets and obscure the depth of your hip crease, making it incredibly difficult to film your sets for form review or hit proper depth.
The 2026 Lighting Standard: Install 5000K (Daylight) LED panel lights on the walls at a 45-degree angle to the lifting platform, roughly 6 feet off the ground. This cross-illumination eliminates facial and torso shadows.
Regarding mirrors, avoid the cheap, flexible acrylic sheets often marketed as 'gym mirrors.' They warp and distort your reflection, making a 45-pound plate look warped and ruining your depth perception. Invest in 1/4-inch thick, tempered glass mirrors with a safety backing film, mounted using Z-bar clips rather than adhesive, which can tear drywall upon removal.
Troubleshooting Common Installation Failures
Edge Case: Crumbling Concrete Slabs
If your home was built before 1980, your concrete slab may be brittle or degraded. If a wedge anchor spins or pulls out easily during the torque phase, stop immediately. You must switch to epoxy anchors (like the Simpson SET-XP). Inject the two-part epoxy into the drilled hole, insert a threaded rod, and allow it to cure for 24 hours before attaching the rack. This creates a chemical bond that is significantly stronger than mechanical friction in degraded masonry.
Budget Breakdown: The Real Cost of a Heavy-Duty Setup
To give you a realistic perspective for 2026, here is an itemized breakdown of a no-compromise, heavy-duty strength training configuration. This assumes a 10x10 foot dedicated space.
- Power Rack (e.g., Rogue RML-390C with Sandwich J-Cups): $1,050
- Ohio Power Bar (Stainless Steel, 45lb): $395
- Competition Bumper Plates (300lb set): $650
- Adjustable FID Bench (Heavy-duty, 1000lb+ capacity): $450
- Flooring (8x8 area, Plywood + Horse Stall Mats): $450
- Heavy-Duty Deadlift Jack & Accessories: $120
- Total Estimated Investment: $3,115
While this is a significant financial commitment, it yields a commercial-grade setup that will easily outlast a lifetime of training, completely free from the wait times, commute, and membership fees of a commercial facility.
Final Thoughts on Translating Inspiration to Execution
It is perfectly fine to use beautiful home gym images as a starting point for your design inspiration. However, when it is time to pick up the hammer drill, measure the ceiling joists, and calculate the kinetic load of a missed bench press, you must rely on physics and structural engineering, not aesthetics. By prioritizing subfloor protection, precise spatial clearances, and industrial-grade anchoring, you will build a strength sanctuary that is not only safe and functional but will ultimately become the backdrop for your own real-world progress photos. For further reading on safe equipment spacing and facility management, the Rogue Fitness community forums and the NSCA's facility guidelines remain invaluable resources for the dedicated home gym builder.
More gear to consider
All reviews
How to Design a Home Made Gym: Step-by-Step Layout Guide

Get Your Home Gym Act Together: Foldable Setups 2026

2026 Electrical & Safety Requirements for a Home Gym in Garage

Home Gym Ideas Small Space: Garage Flooring & Ventilation Errors

How To Repair Gear: A Practical, Step-by-Step Home Gym Maintenance Handbook
