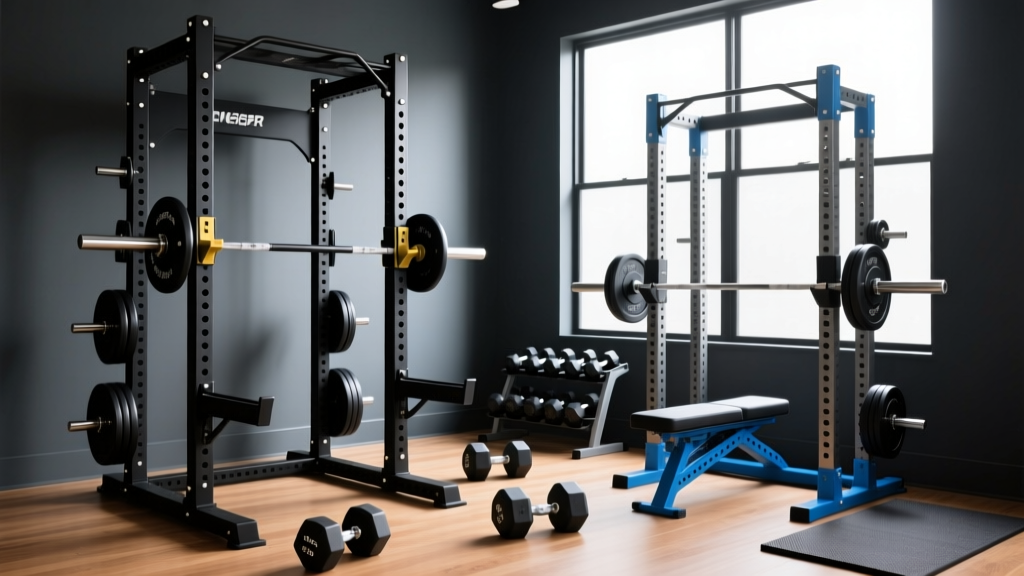
Squat Rack vs Power Rack Setup: Oblique Workouts with Dumbbells
Compare power rack, squat rack, and squat stand setups. Learn how to install your rig while preserving space for oblique workouts with dumbbells.

The Spatial Geometry of the Modern Home Gym
As we navigate the home fitness landscape in 2026, the debate between a power rack, a traditional squat rack, and a squat stand is no longer just about weight capacity or pull-up bar variations. It is fundamentally a battle for floor space. While most buying guides focus entirely on the barbell path, they ignore the 'spatial tax' required for essential accessory movements. Specifically, if your programming includes dynamic oblique workouts with dumbbells—such as woodchoppers, windmills, and lateral swings—your choice of rig will dictate whether you can actually perform these exercises safely.
Setting up a home gym requires balancing the immovable footprint of heavy steel with the lateral clearance needed for rotational core training. This complete setup and installation walkthrough will dissect the differences between the big three rack styles, provide exact 2026 pricing and spatial metrics, and deliver a professional-grade concrete anchoring guide to ensure your rig is both safe and optimally placed.
Why Oblique Workouts with Dumbbells Demand Lateral Clearance
To understand why rack selection matters for core training, we must look at the biomechanics of the obliques. The internal and external obliques are responsible for lateral flexion and torso rotation. According to exercise databases like ExRx.net, movements like the dumbbell side bend or rotational woodchoppers require a wide wingspan and unrestricted lateral movement.
If you bolt a massive 48x48-inch power rack dead center in a standard 10x10-foot spare bedroom, you are left with roughly 34 inches of clearance on either side. Try executing a 35-pound single-arm dumbbell windmill or a high-to-low rotational chop in a 34-inch corridor, and you will quickly find your knuckles colliding with the wall or the rig's uprights. Therefore, the 'best' rack is the one that provides structural safety for squats while allowing you to reconfigure or maximize your open floor space for accessory work.
The Contenders: Footprint, Cost, and Versatility
Before we drill into the concrete, we must select the right steel. Here is how the three primary categories stack up in 2026 regarding spatial efficiency and core-training compatibility.
| Equipment Type | Popular 2026 Model | Base Footprint | Avg. Price Range | Oblique Workout Clearance Rating |
|---|---|---|---|---|
| Full Power Rack | REP Fitness PR-4000 | 49" x 43" (Enclosed) | $899 - $1,299 | Poor (Fixed, eats lateral space) |
| Half Squat Rack | Rogue HRX Half Rack | 49" x 30" (Open front) | $1,150 - $1,400 | Moderate (Allows front-facing rotation) |
| Squat Stand | Rogue SML-2C Monster Lite | 47" x 48" (Independent) | $545 - $695 | Excellent (Can be unbolted/moved) |
The Power Rack: Maximum Safety, Minimum Flexibility
A full power rack is the gold standard for heavy, unspotted squats and bench presses. However, its enclosed 3D cage design permanently consumes a massive chunk of your room's volume. Unless you have a dedicated two-car garage gym, a power rack will severely limit the open floor area required for sprawling oblique workouts with dumbbells.
The Squat Stand: The Hybrid Lifter's Best Friend
Squat stands, particularly independent upright models like the Rogue SML-2C, consist of two independent bases. While they must be bolted down for heavy loading, their lack of a rear cage means you can face outward and utilize the entire depth of your room for rotational dumbbell movements. Furthermore, some modern wall-mounted or folding squat stands can be collapsed entirely, turning your lifting platform into a wide-open studio for high-volume core circuits.
Complete Installation Walkthrough: Anchoring for Safety and Space
Once you have chosen your rig based on your spatial needs, proper installation is non-negotiable. A squat stand subjected to heavy re-racking forces or dynamic dumbbell drops can tip if not anchored correctly. Here is the professional 2026 protocol for securing your rig while optimizing your room's layout.
Step 1: Concrete Diagnostics and Spatial Mapping
Do not drill blindly. Your concrete slab must be a minimum of 3,000 PSI and at least 4 inches thick. Use a stud finder with masonry capabilities or tap the floor to listen for hollow spots, which indicate underlying conduit or insulation. Pro-Tip for Space Planning: Map out an 8-foot circle on the floor using painter's tape. Stand in the center with a dumbbell in each hand and simulate your largest rotational oblique movement. If your tape outline overlaps with your planned rack placement, you need to shift the rig closer to a load-bearing wall to preserve your 'dumbbell zone'.
Step 2: Precision Layout and Drilling
Independent squat stands are notorious for alignment drift. If the left and right uprights are not perfectly parallel, your barbell will bind on the J-cups.
- Tool Required: SDS-Plus Rotary Hammer Drill with a 1/2" carbide masonry bit.
- Technique: Assemble the entire rack loosely on the floor first. Use a laser level across the front uprights to ensure they are perfectly plumb. Mark the anchor holes through the base plates with a Sharpie.
- Dust Extraction: Use a shop vac held directly next to the drill bit while boring. Concrete dust left in the hole will reduce the holding power of your wedge anchors by up to 40%.
Step 3: Anchoring and Torque Specifications
For a home gym in 2026, 1/2" x 3-3/4" zinc-plated wedge anchors (such as Red Head or Simpson Strong-Tie) are the industry standard for solid concrete.
- Drop the anchor through the base plate and into the hole.
- Thread the nut on exactly 3 to 4 threads to protect the bolt's threads from mushrooming.
- Strike the nut with a hammer until the washer is flush against the steel base plate.
- Use a calibrated torque wrench to tighten the nut to 60-80 ft-lbs. As you tighten, the wedge clip at the bottom of the anchor expands into the concrete, creating a permanent mechanical lock.
Designing the Accessory Zone for Core Training
With the rack safely anchored, the final step in the setup walkthrough is establishing your dedicated accessory zone. According to comprehensive facility layout guidelines reviewed by experts at Garage Gym Reviews, maintaining distinct 'zones' prevents equipment clutter and reduces injury risk.
'The most efficient home gyms treat floor space as a modular commodity. Your rack is the anchor, but your open floor is the canvas for functional, multi-planar movements that a barbell simply cannot replicate.' — Home Gym Ergonomics Principle
Optimal Equipment Placement
Place your adjustable dumbbell rack (e.g., a 5-52lb Nuobell or PowerBlock set) exactly two steps outside the lateral boundary of your squat stand. This creates a seamless transition zone. The Superset Workflow:
- Compound Movement: Perform heavy front squats inside the rack.
- Transition: Step out, grab the dumbbells.
- Accessory Movement: Execute 3 sets of 12 Dumbbell Woodchoppers or Single-Arm Farmer's Carves down the length of your open room, maximizing the rotational stretch of the obliques without spatial restriction.
Final Verdict: Which Rig Wins?
If your primary goal is maxing out on low-bar squats and you have a dedicated 400-square-foot space, the Power Rack remains undefeated for safety and attachment versatility (cable pulleys, lat pulldowns). However, for the modern hybrid athlete operating out of a standard bedroom, basement, or single-car garage, the Squat Stand is the superior choice. It provides the necessary vertical support for heavy barbell work while preserving the vital lateral wingspan required for dynamic oblique workouts with dumbbells. By following the precise anchoring and spatial mapping protocols outlined above, you can build a 2026 home gym that refuses to compromise on either heavy strength or functional core mobility.
More gear to consider
All reviews
Best Loadable Dumbbells for the Dumbbell Flye: 2026
EZ vs Straight Bar Maintenance & How to Work Out Lats With Dumbbells

Bumper vs Iron Plates: How Heavy the Dumbbells You Lift Impacts Care
Best Adjustable Dumbbells for Incline Dumbbell Curls: 2026 Review

Power Rack vs Squat Stand: OH Dumbbell Press Mistakes
