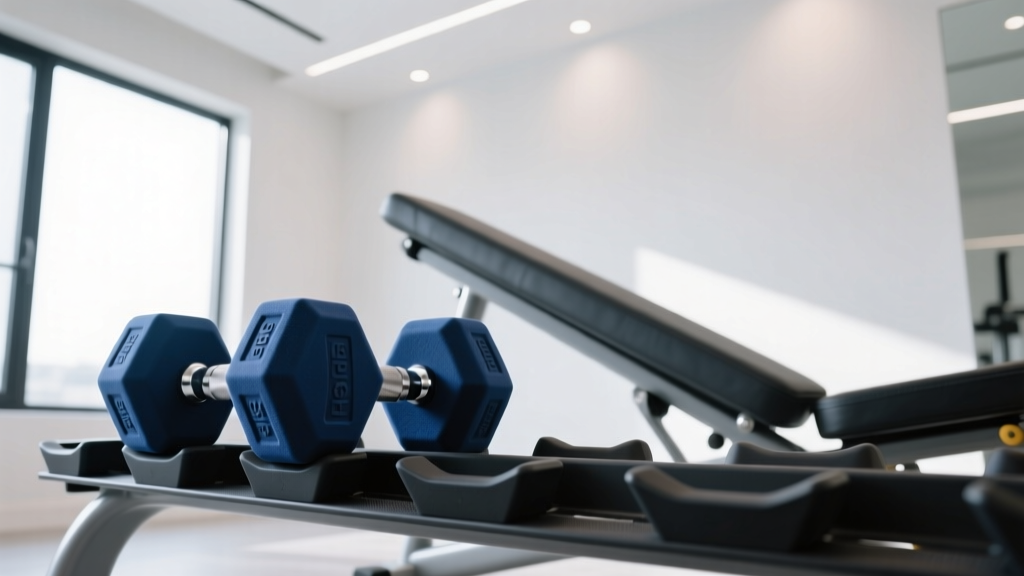
Setup Guide: Upper Back Dumbbell Exercises Using Neoprene Weights
Master your home gym setup for upper back dumbbell exercises. Learn to assemble neoprene weight racks, position benches, and execute perfect rows.

The Case for Neoprene Dumbbells in Home Upper Back Training
When designing a dedicated home gym space for back development, the choice of equipment coating dictates both the longevity of your gear and the acoustics of your training environment. Neoprene (chloroprene rubber) coated dumbbells have become a staple for residential setups. Unlike bare cast iron or knurled steel, neoprene provides a tactile, sweat-resistant grip and significantly dampens the acoustic shock of metal-on-metal contact. However, executing heavy upper back dumbbell exercises requires more than just picking up the weights; it demands a meticulous spatial setup, proper rack installation, and precise bench geometry to isolate the latissimus dorsi, rhomboids, and trapezius without overloading the lumbar spine.
💡 Gear Pulse Insight: Neoprene vs. Urethane
As of 2026, neoprene dumbbells average $1.80 to $2.20 per pound, making them highly accessible compared to premium urethane ($3.50+ per lb). While urethane offers superior tear resistance, high-density neoprene remains the optimal choice for home users prioritizing noise reduction and floor protection during high-volume rowing movements.
Phase 1: Spatial Setup and Rack Installation
Before initiating any upper back dumbbell exercises, your physical environment must be optimized for safety and efficiency. Back training often involves dropping weights or repositioning rapidly; your installation must account for these forces.
Step-by-Step 3-Tier Rack Assembly
A standard 3-tier A-frame or horizontal dumbbell rack is essential for organizing neoprene weights, which lack the knurled handles of competition bells and can become slippery if laid flat on the floor. Follow this installation protocol:
- Base Plate Positioning: Lay the rack base on a minimum 8mm thick vulcanized rubber mat. This prevents the rack from 'walking' across hard floors when you aggressively rack heavy 50+ lb dumbbells.
- Hardware Insertion: Insert the M8 x 60mm carriage bolts through the base plate. Pro-Tip: Leave all bolts 20% loose until the entire frame is assembled. This allows the steel to flex and align the saddle brackets perfectly.
- Saddle Alignment: Attach the neoprene-lined saddle brackets. Ensure the UHMW (Ultra-High-Molecular-Weight) polyethylene liners are facing upward to prevent the neoprene coating on your dumbbells from tearing during racking.
- Torquing and Leveling: Tighten all bolts using a 10mm Allen key. Adjust the threaded leveling feet on the base until the rack sits flush without rocking, which is critical when pulling heavy dumbbells from the top tier.
Weight Distribution Protocol
To prevent tipping during unilateral setups, always install and store your heaviest neoprene dumbbells (e.g., 40-70 lbs) on the bottom tier, directly over the rack's center of gravity. Lighter sets (10-30 lbs) belong on the top tier.
Phase 2: Biomechanical Setup and Bench Configuration
The angle of your adjustable FID (Flat/Incline/Decline) bench drastically alters the muscular bias of your upper back dumbbell exercises. According to biomechanical analyses by ExRx, altering the torso angle shifts the line of pull relative to gravity, changing which muscle fibers bear the brunt of the load.
| Bench Angle | Primary Muscle Bias | Secondary Stabilizers | Recommended Exercise |
|---|---|---|---|
| Flat (0°) | Latissimus Dorsi (Lower) | Erector Spinae, Core | Standard Bent-Over Row |
| Low Incline (30°) | Lats & Teres Major | Biceps, Rear Delts | Chest-Supported Row |
| Mid Incline (45°) | Mid-Traps & Rhomboids | Rear Delts, Biceps | Chest-Supported Row |
| High Incline (60°+) | Upper Traps & Rear Delts | Biceps, Forearms | Incline Shrugs / High Rows |
Phase 3: Execution – Top Upper Back Dumbbell Exercises
With your space installed and bench configured, it is time to execute. The following setups maximize the ergonomic benefits of neoprene-coated handles while targeting the upper back.
1. The 45-Degree Chest-Supported Neoprene Row
This is the gold standard for isolating the rhomboids and mid-trapezius without lower back fatigue.
- The Setup: Set your FID bench to exactly 45 degrees. Straddle the bench, resting your sternum just below the top pad. Your toes should be firmly planted on the floor to create a rigid base.
- The Grip: Grab a pair of 35-50 lb neoprene dumbbells from your bottom rack tier. Use a neutral grip (palms facing each other). The contoured neoprene handles will reduce grip fatigue compared to bare steel.
- The Pull: Retract your scapulae before bending the elbows. Pull the dumbbells toward your hips, not your armpits, to keep the tension on the lats and mid-back. Pause for one second at peak contraction.
2. The Single-Arm 'Tripod' Row
Unilateral work corrects left-to-right strength imbalances common in back development.
- The Setup: Place a flat bench horizontally. Stand to the side, hinging at the hips until your torso is parallel to the floor. Plant your non-working hand and same-side knee on the bench (the 'tripod' stance).
- The Execution: Let the working arm hang straight down. Row the neoprene dumbbell upward, driving the elbow toward the ceiling. Because neoprene hex dumbbells have flat edges, you can safely rest the weight on the floor between sets without it rolling away.
3. Neoprene Dumbbell Renegade Rows
This advanced movement demands core stability and upper back endurance.
- The Setup: Place two hex-shaped neoprene dumbbells shoulder-width apart on your rubber matting. Assume a high plank position, gripping the handles. The flat hex bases prevent the weights from tipping outward under load.
- The Execution: Maintain a rigid pelvic tilt (squeeze glutes to prevent lumbar extension). Row one dumbbell to your ribcage while actively pushing the floor away with the opposite arm. Lower slowly and repeat on the other side.
Form Warning: During renegade rows, avoid rotating your hips. If your hips twist, the load shifts from the upper back to the obliques, defeating the purpose of the exercise and risking lumbar strain.
Phase 4: Neoprene Maintenance and Failure Modes
While neoprene is excellent for home use, it requires specific maintenance to prevent degradation, especially when exposed to the rigors of heavy back training.
Common Edge Cases and Solutions
- Sweat Acidity Breakdown: Human sweat has a pH of 4.5 to 7.0. Over time, the acidic salts from heavy rows can break down the chloroprene bonds, leading to a sticky surface. Solution: Wipe handles with a mild alkaline soap solution (like diluted dish soap) weekly.
- Fingernail Tearing: Unlike urethane, neoprene has lower tensile strength. Aggressive gripping or long fingernails can puncture the 2-3mm coating, exposing the cast iron core to ambient humidity and rust. Solution: Keep nails trimmed and inspect handles monthly for micro-tears; seal any tears with flexible rubber cement immediately.
- UV and Ozone Degradation: If your home gym is in a garage with direct sunlight, UV rays will cause the neoprene to chalk, fade, and eventually crack. Solution: Store your rack away from windows or use a UV-blocking tarp when not in use.
Frequently Asked Questions
Can I use neoprene dumbbells for heavy 1-rep max rows?
It is not recommended. Neoprene handles often lack aggressive knurling, making grip the limiting factor before your upper back muscles reach true failure. For heavy, low-rep rows (1-5 RM), consider upgrading to knurled steel or urethane dumbbells. Neoprene is best suited for hypertrophy ranges (8-15 reps).
How much space do I need for an upper back dumbbell station?
Allocate a minimum footprint of 6 feet by 6 feet. This allows enough clearance for a 3-tier rack, an adjustable bench, and the lateral arm extension required for single-arm rows and dumbbell pullovers without striking walls or mirrors.
Why do my forearms burn out before my back during rows?
This is a common issue with thicker, contoured neoprene handles. Utilize lifting straps for your heaviest sets to bypass forearm flexor fatigue and ensure the target back muscles receive the primary stimulus.
More gear to consider
All reviews
Cast Iron vs Competition Kettlebells Beyond Standard Dumbbell Curls

Gym Layouts: Bumper vs Iron Plates & Stiff Legged Deadlift Dumbbells

Rubber Hex vs Urethane: Is the Round Dumbbell Set Obsolete?

Dumbbell Hammer Curl Ergonomics: Best Storage Racks for 2026
Do Dumbbell Curls Work Forearms? Save Your Grip & Dumbbell Racks
