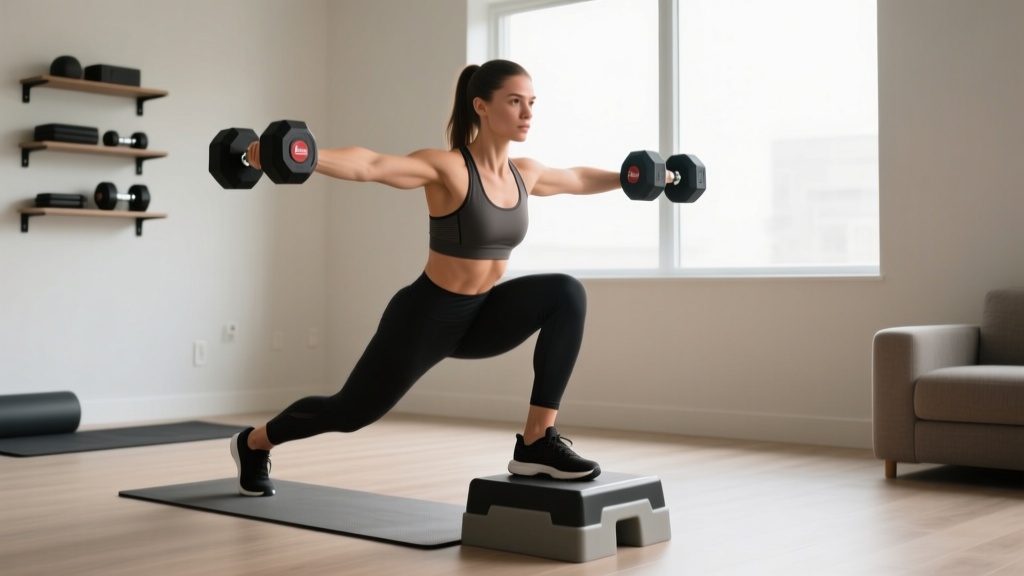
Dumbbell Front Foot Elevated Split Squat: Beginner Home Guide
Master the dumbbell front foot elevated split squat at home. A beginner guide using neoprene weights for better grip, safety, and targeted quad growth.

Why the Dumbbell Front Foot Elevated Split Squat is a Home Gym Staple
When building a balanced, injury-resistant physique at home, unilateral (single-leg) training is non-negotiable. While the Bulgarian split squat gets all the glory on social media, the dumbbell front foot elevated split squat (often called a deficit split squat) is arguably superior for beginners targeting quad and glute hypertrophy without requiring extreme ankle mobility.
By elevating the front working foot rather than the rear foot, you increase the range of motion (ROM) at both the hip and knee joints of the working leg. This deeper stretch triggers greater muscle fiber recruitment in the quadriceps and gluteus maximus. However, performing this movement safely and effectively in a home environment requires the right equipment. This is where neoprene coated dumbbells become your best asset.
Why Neoprene Dumbbells are Ideal for Home Use
Beginners often default to cheap cast iron or rigid hex rubber dumbbells, but neoprene-coated dumbbells offer distinct advantages for home gyms, especially for balance-intensive movements like the front foot elevated split squat.
- Ergonomic Grip: Neoprene is a synthetic rubber with a slightly porous, matte texture. When your hands sweat during a challenging set, neoprene maintains its grip far better than smooth cast iron or slick plastic.
- Floor Protection: If you lose your balance and need to bail, dropping a neoprene dumbbell won't crack your hardwood floors or damage the dumbbell itself. The softer outer layer absorbs impact.
- No Off-Gassing: Unlike cheap recycled rubber hex dumbbells that can smell like a tire shop for months, high-quality neoprene is virtually odorless.
- Manageable Increments: Neoprene sets typically range from 1 lb to 20 lbs per dumbbell. Because the front foot elevated split squat is highly demanding, most beginners will only need 10 to 20 lb dumbbells to reach muscular failure, making these sets perfectly adequate.
Equipment Comparison for Home Gyms
| Feature | Neoprene Coated | Hex Rubber | Cast Iron |
|---|---|---|---|
| Average Cost (per lb) | $1.50 - $2.00 | $1.20 - $1.80 | $1.00 - $1.50 |
| Grip Security | Excellent (Sweat-resistant) | Moderate (Can be slick) | Poor (Requires chalk) |
| Floor Safety | High (Impact absorbing) | Moderate (Can scuff) | Low (Will dent floors) |
| Odor | None | Strong (Off-gassing) | None (but can rust) |
| Max Weight Available | Usually caps at 25 lbs | Up to 100+ lbs | Up to 100+ lbs |
Recommendation: For this exercise, a pair of 10 lb or 15 lb neoprene dumbbells (such as the CAP Barbell or Amazon Basics Neoprene lines, typically priced between $25 and $40 per pair) is the perfect starting point for most beginners.
Step-by-Step Execution Guide
Proper setup is critical. Because you are introducing a deficit (elevation), your balance will be challenged. Follow these steps meticulously.
Step 1: The Setup and Elevation
Find a stable platform that is 2 to 4 inches high. An aerobic step, a sturdy wooden plyo box, or even a stacked pair of thick weight plates works perfectly. Do not use a squishy couch cushion or an unstable balance board; you need a rigid surface to drive force through.
Step 2: The Stance and Grip
Stand with your working foot placed entirely on the elevated platform. Step your non-working foot back about 2 to 3 feet. Pick up your neoprene dumbbells and hold them in a 'suitcase' position (arms hanging straight down at your sides, palms facing your thighs). The neoprene coating will help keep the dumbbells from sliding forward in your grip.
Step 3: The Descent (Eccentric Phase)
Initiate the movement by bending both knees simultaneously. Lower your hips straight down and slightly back. Your goal is to lower your back knee until it gently taps the floor (or a folded yoga mat for cushioning). Tempo: Take 3 full seconds to descend. This slow eccentric phase maximizes quad engagement and prevents you from bouncing off the floor.
Coaching Cue: 'Imagine you are lowering yourself down an elevator shaft. Keep your torso relatively upright (about a 75-degree angle) to bias the quadriceps, or lean forward slightly (45-degree angle) to bias the glutes.'
Step 4: The Ascent (Concentric Phase)
Drive explosively through the entire foot of your working leg (the one on the platform). Do not push off your back toes. The back leg is merely a kickstand for balance. Return to the starting position without locking out the front knee completely to keep constant tension on the muscles.
Biomechanics: What Muscles Are Working?
According to research published in the Journal of Strength and Conditioning Research, unilateral lower body exercises are highly effective at reducing bilateral deficits and improving functional stability. The front foot elevation specifically alters the biomechanics compared to a standard floor split squat:
- Quadriceps (Rectus Femoris, Vastus Lateralis/Medialis): The elevation forces the knee into deeper flexion at the bottom of the movement, placing a massive stretch and subsequent load on the quads.
- Gluteus Maximus: The deeper hip flexion at the bottom of the deficit requires the glutes to work harder to extend the hip during the ascent.
- Core and Stabilizers: The gluteus medius and deep core musculature work overtime to prevent your pelvis from rotating or dropping laterally.
Troubleshooting Common Beginner Mistakes
⚠️ Warning: Knee Valgus and Heel Lift
The Mistake: As you push out of the hole, your front knee caves inward (valgus collapse), or your front heel lifts off the platform.
The Fix: This usually indicates a lack of ankle dorsiflexion or weak hip abductors. If your heel lifts, your elevation is too high. Drop down to a 2-inch platform. Focus on 'screwing' your front foot into the platform and actively pushing your front knee outward over your pinky toe as you ascend.
Balance Issues and Bailing Safely
If you find yourself wobbling, do not abandon the exercise. Instead, perform the movement next to a wall or a sturdy chair. You can lightly touch the wall with one hand while holding a single neoprene dumbbell in the other hand. Furthermore, if you completely lose your balance, simply drop the neoprene dumbbells. Their soft coating ensures they won't damage your home flooring or bounce unpredictably toward your ankles.
Programming Your Home Workout
Because you are likely using lighter neoprene dumbbells (10-20 lbs), you will need to manipulate volume and tempo to achieve progressive overload, rather than just adding weight. Consult the ExRx exercise directory for foundational unilateral programming principles.
Beginner Hypertrophy Protocol
- Frequency: 2 times per week (e.g., Monday and Thursday).
- Volume: 3 sets per leg.
- Repetitions: 8 to 12 reps per leg. If you can easily do more than 15 reps with your current neoprene dumbbells, increase the descent time to 4 seconds, or add a 2-second pause at the very bottom of the stretch.
- Rest: 60 to 90 seconds between legs.
Progression Strategy (Without Buying Heavier Weights)
Once a pair of 15 lb neoprene dumbbells feels easy, you don't necessarily need to buy a heavy, expensive set of 40 lb dumbbells. Instead, try 1.5 rep style training. Go all the way down, come halfway up, go back down to the bottom, and then stand all the way up. That counts as one rep. This keeps the muscles under tension for twice as long, making light weights feel incredibly heavy.
Frequently Asked Questions
Is the front foot elevated split squat better than the Bulgarian split squat?
Neither is universally 'better'; they serve different purposes. The Bulgarian (rear foot elevated) split squat is generally better for overall athletic power and glute focus, but requires significant hip flexor mobility in the trailing leg. The front foot elevated split squat is superior for isolated quad hypertrophy and is much friendlier to beginners with tight hip flexors or lower back issues.
Can I use water jugs instead of neoprene dumbbells?
While you can, water jugs have a shifting center of mass (the water sloshes around), which will severely compromise your balance on an already unstable single-leg movement. Neoprene dumbbells offer a fixed, predictable center of gravity, allowing you to focus entirely on muscle contraction rather than fighting the equipment.
Should I wear shoes or go barefoot?
For home workouts, going barefoot or wearing minimalist, zero-drop shoes is highly recommended. This allows your toes to splay and grip the elevated platform, providing a much more stable base than thick, squishy running shoes, which can actually increase ankle instability during deficit movements.
More gear to consider
All reviews
Olympic vs Standard: How to Get a Bigger Chest Using Dumbbells

Best Adjustable 70 lb Dumbbells: 2026 Buyer's Guide

Step-by-Step Dumbbell Core Exercise Guide for Neoprene Sets

Cast Iron vs Competition Kettlebells & Back and Biceps Dumbbells Space

Best Neoprene Weights for a Dumbbell Routine for Beginners
