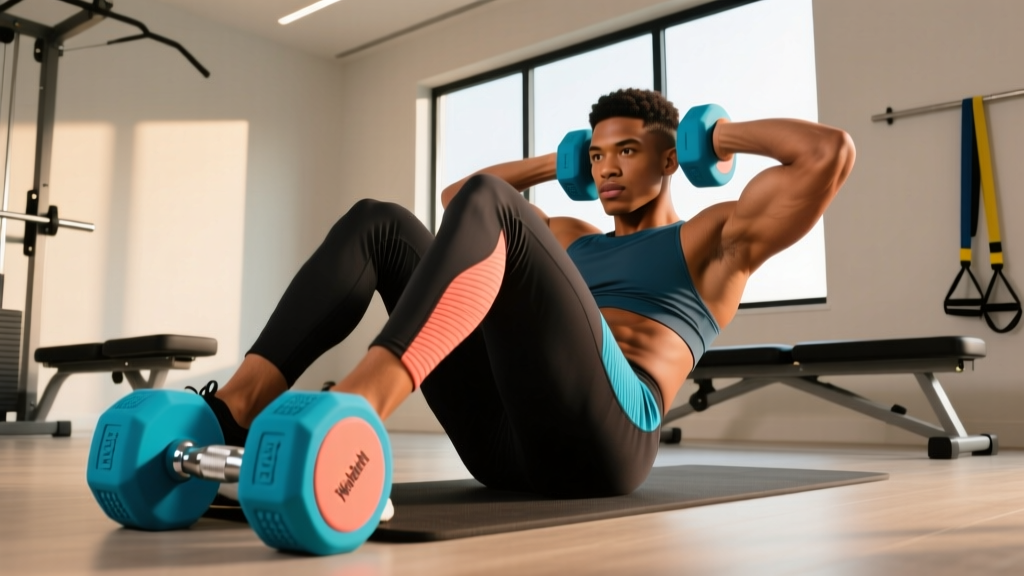
Beginner Guide: Dumbbell Toe Touch Crunch with Neoprene Weights
Master the dumbbell toe touch crunch with our beginner guide. Learn step-by-step form, neoprene weight selection, and core programming tips.

Why Neoprene Dumbbells Dominate Home Floor Workouts
When building a home gym, the equipment you choose for floor-based core exercises matters just as much as the exercises themselves. The dumbbell toe touch crunch is a premier movement for targeting the upper rectus abdominis, but performing it with traditional cast iron or bare steel dumbbells can lead to bruised shins, scratched hardwood floors, and slippery grips. This is exactly why a neoprene coated dumbbell for home use is the gold standard for beginners and seasoned athletes alike.
Neoprene, a synthetic rubber, provides a soft, matte finish that is gentle on both your body and your flooring. Unlike hex rubber dumbbells that can emit a strong chemical odor or urethane weights that carry a premium price tag, neoprene offers an accessible, odor-free, and highly tactile grip. When you are reaching toward your toes with sweaty hands, the slightly porous texture of neoprene prevents the weight from slipping, ensuring your core—not your grip—reaches failure first.
Material Comparison for Core Floor Work
| Coating Material | Floor & Body Safety | Sweat Grip Quality | Average Cost per Pound | Best Use Case |
|---|---|---|---|---|
| Neoprene | Excellent (Soft, no bounce) | High (Matte texture) | $1.20 - $1.80 | Floor crunches, light cardio, beginners |
| Cast Iron | Poor (Damages floors, hard edges) | Low (Slippery when wet) | $0.80 - $1.20 | Traditional rack work, garages |
| Rubber (Hex) | Good (Protects floors) | Medium (Can get slick) | $1.50 - $2.50 | Heavy compound lifts, drop sets |
| Urethane | Excellent (Highly durable) | Medium-High | $3.00 - $5.00+ | Commercial gyms, heavy daily use |
Selecting the Right Neoprene Weight for Beginners
Before you attempt the dumbbell toe touch crunch, you must select an appropriate weight. Beginners often make the mistake of grabbing a weight that is too heavy, which forces the hip flexors and neck muscles to compensate for a weak core contraction.
- Women / Absolute Beginners: Start with a single 5 lb to 8 lb neoprene dumbbell. Models like the Yes4All Neoprene Coated Dumbbells (typically priced around $15-$20 for a single 8 lb weight) offer an ergonomic, contoured handle that fits smaller hands perfectly.
- Men / Intermediate Trainees: A single 10 lb to 15 lb dumbbell is ideal. The Amazon Basics Neoprene Dumbbell Weights are a staple here, costing roughly $1.50 per pound and featuring a hexagonal underbelly that prevents them from rolling away mid-set.
- Advanced Progression: Once you can comfortably perform 3 sets of 20 reps with a 15 lb weight, transition to holding two lighter dumbbells (one in each hand) to increase the stabilization demand on your obliques.
Pro Tip: Neoprene colors are universally coded by weight across most major brands (e.g., 5 lbs are usually red, 10 lbs are blue). This makes it incredibly easy to visually track your progressive overload in a dimly lit home gym.
Step-by-Step Guide: The Dumbbell Toe Touch Crunch
Proper biomechanics are critical to isolating the abdominal wall and protecting your cervical spine. According to core training guidelines outlined by the ACE Fitness Exercise Library, controlled spinal flexion is key to maximizing muscle fiber recruitment without relying on momentum.
Step 1: The Setup
Lie flat on your back on a yoga mat or carpeted floor. Raise your legs so that your thighs are perpendicular to the floor, and your knees are bent at a 90-degree angle. Your shins should be parallel to the ceiling. This posterior pelvic tilt position flattens your lower back against the floor, neutralizing the lumbar spine and preventing lower back strain.
Step 2: The Grip and Placement
Grasp a single neoprene dumbbell with both hands. Hold it horizontally across your chest or vertically extending toward the ceiling. For beginners, holding it vertically (with the top bell pointing at the ceiling) provides a clear visual target to reach for.
Step 3: The Ascent (Concentric Phase)
Exhale sharply as you engage your core to lift your shoulder blades off the floor. Reach the top of the dumbbell directly toward your toes. Crucial cue: Imagine you are trying to touch your sternum to your pelvis. Do not pull on your neck or use the momentum of your arms to swing your torso upward.
Step 4: The Descent (Eccentric Phase)
Inhale as you slowly lower your torso back to the floor over a count of three seconds. Do not let your shoulder blades completely relax at the bottom; keep tension on the abs before initiating the next rep.
Common Form Mistakes and Edge Cases
Warning: Cervical Spine Strain
A frequent complaint among beginners is neck pain during floor crunches. The Cleveland Clinic notes that repetitive, uncontrolled spinal flexion can exacerbate cervical and lumbar issues if form degrades. If you feel neck strain, you are likely leading the movement with your chin. Keep your chin tucked, as if holding a tennis ball under your jaw, and let your sternum guide the movement.
- Mistake 1: Bending the Knees Too Much. If your knees are too close to your chest, you limit the range of motion. Keep them stacked directly over your hips.
- Mistake 2: Using Hip Flexors. If your feet are anchored or your legs are perfectly straight and elevated, the hip flexors (psoas) will take over the movement. The 90-degree knee bend isolates the abs.
- Mistake 3: Dropping the Dumbbell. As fatigue sets in, grip strength may fail. The soft neoprene coating prevents the dumbbell from bouncing off your chest or damaging your collarbone if you lose your grip, but you should always rack the weight to your stomach before resting.
Programming the Movement into Your Routine
To build a resilient, aesthetic core, the dumbbell toe touch crunch should be programmed as a secondary or tertiary movement, after heavy compound lifts like squats or deadlifts, or at the end of a dedicated core circuit.
| Goal | Sets | Reps | Rest | Tempo |
|---|---|---|---|---|
| Muscular Endurance | 3 | 15 - 20 | 30 seconds | 1 sec up, 1 sec down |
| Hypertrophy (Growth) | 4 | 10 - 12 | 60 seconds | 1 sec up, 3 sec down |
| Active Recovery | 2 | 12 - 15 | 45 seconds | Slow and controlled |
Frequently Asked Questions
Can I do this exercise on a bed or soft mattress?
No. Soft surfaces absorb the kinetic energy of your movement and fail to provide the stable base required to neutralize your lumbar spine. Always use a firm floor or a dense, high-density foam yoga mat (at least 6mm thick).
How do I clean my neoprene dumbbells after sweaty core sessions?
Neoprene is non-porous enough to resist sweat absorption but can harbor bacteria over time. Wipe your dumbbells down with a solution of 70% isopropyl alcohol and water, or a mild dish soap mixture. Avoid harsh bleach-based cleaners, as they will degrade the neoprene coating and cause it to peel or fade.
Is the dumbbell toe touch crunch better than a standard sit-up?
For most home gym users, yes. Standard sit-ups require a full range of spinal flexion that heavily involves the hip flexors and places significant shear force on the lumbar discs. The toe touch crunch restricts the movement to the thoracic and upper lumbar spine, providing a safer, more isolated contraction of the upper abdominals.
More gear to consider
All reviews
EZ Bar vs Straight Bar: Is the Close Grip Dumbbell Curl Better?
Home Gym Setup: Using Neoprene Dumbbells for Legs Effectively
Collar and Clamp Comparison: Safety for Dumbbell Exercises for Lats

Back Rows With Dumbbells: Rubber Hex vs Urethane Value Guide

Power Rack vs Squat Rack vs Stand: Dumbbell External Rotation Setups
