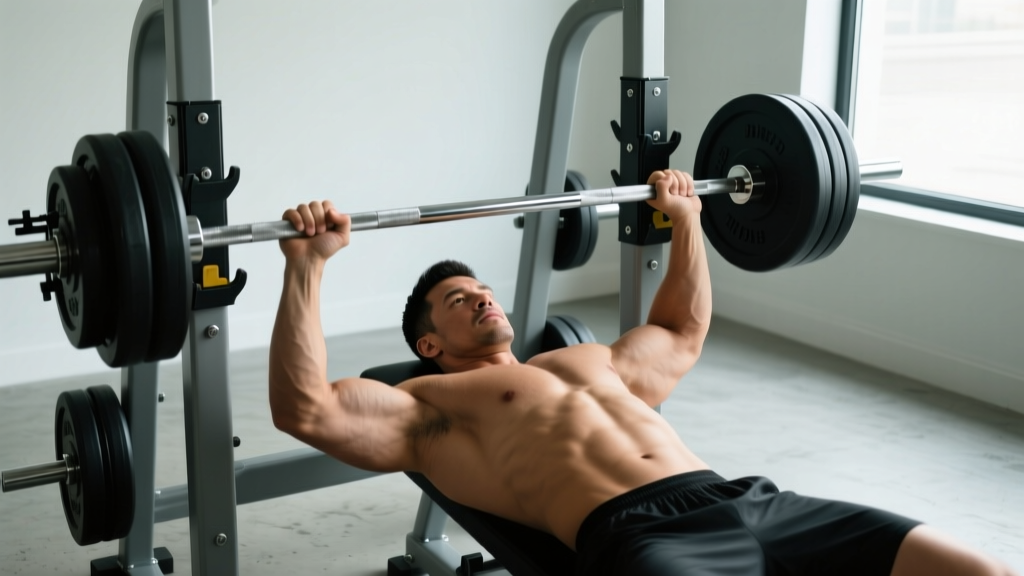
How to Build Pectoral Muscles with Dumbbells & Barbells: Clamp Setup
Master how to build pectoral muscles with dumbbells and barbells. This setup walkthrough covers barbell collar types, installation, and safety specs.

The Biomechanical Shift: Dumbbells vs. Barbells
Understanding how to build pectoral muscles with dumbbells is the cornerstone of unilateral chest development. Dumbbells allow for a deeper stretch at the bottom of the press and increased horizontal adduction at the top, maximizing sarcomere lengthening and targeting the sternal head of the pectoralis major. However, as you approach advanced hypertrophy thresholds, stabilizing two independent heavy loads becomes the limiting factor, not your actual pectoral force output. This is where transitioning to a barbell becomes mandatory for absolute mechanical tension.
But moving to heavy barbell bench pressing introduces a critical safety variable that dumbbell training ignores: lateral plate migration. When pressing 225+ lbs, uneven bar pathing or slight asymmetrical force can cause plates to shift outward. Without a proper collar setup, a shifted plate alters the bar's center of gravity mid-rep, leading to catastrophic tipping and severe joint torsion. This complete setup and installation walkthrough will guide you through selecting, installing, and maintaining the right barbell collars for your 2026 home gym rack.
The transition from dumbbells to barbells isn't just about adding weight; it's about shifting the limiting factor from unilateral stabilization to absolute central nervous system output. Your collar setup is the only thing protecting that output from becoming a kinetic disaster.
The 2026 Collar & Clamp Landscape
As of 2026, the market has heavily shifted toward composite polymer clamps and precision-machined aluminum cams, leaving traditional spring clips behind for heavy compound movements. The standard Olympic sleeve measures exactly 50mm in diameter, but the real estate a collar consumes on that sleeve dictates how many 45lb bumper plates you can load.
For heavy chest days, you need a collar that provides at least 200 lbs of lateral clamping force without eating up 3 inches of sleeve space. Glass-filled nylon (often branded under names like Zytel) has become the industry standard for polymer lock-jaws, offering high tensile strength while resisting the micro-fractures that plagued early 2010s plastic models.
Step-by-Step Installation Walkthrough
Proper installation is just as critical as the hardware itself. A $50 premium collar installed incorrectly will slip just as fast as a $5 spring clip. Follow this exact sequence before every heavy bench session.
Step 1: Sleeve Preparation and De-Chalking
Magnesium carbonate (gym chalk) is the enemy of clamping friction. When chalk mixes with sweat and humidity, it forms a slick, paste-like layer on the steel sleeve. Before loading your plates, take a microfiber cloth and wipe down the entire 16-inch Olympic sleeve. If you see white residue, use a quick spray of 90% isopropyl alcohol to strip the oils and chalk dust, ensuring bare metal-to-collar contact.
Step 2: Plate Loading and Flush Alignment
Load your plates tightly. If you are using machined steel plates, they will sit flush against one another. If you are using rubber hex plates or older bumper plates, the uneven edges can create micro-gaps. Push the plates firmly toward the inner collar of the barbell sleeve. Eliminating these gaps prevents the plates from 'settling' and shifting outward once the bar is un-racked.
Step 3: Collar Seating and Torque Application
- Slide the collar on: Push the collar completely flush against the outermost plate. Do not leave a gap 'just in case' the plates need room to breathe; gaps allow momentum to build during lateral shifts.
- Engage the mechanism: For aluminum cam collars, pull the lever down until it passes the 90-degree center-point, locking it into the over-center position. You should feel a distinct 'snap' and see the lever sit flush against the collar body.
- The Torsion Test: Grip the outer plate and attempt to twist and pull it outward. If the plate rotates independently of the barbell sleeve, the collar's inner O-ring has failed or the cam tension is insufficient. Re-adjust the tension bolt on the cam hinge until the plate is completely immobilized.
Comprehensive Comparison Matrix: Top Clamp Types
Choosing the right hardware requires balancing clamping force, sleeve real estate, and durability. Below is a comparison of the three dominant collar types used in modern home and commercial gyms.
| Collar Type | Model Example (2026) | Clamping Force | Sleeve Real Estate | Best Use Case |
|---|---|---|---|---|
| Spring Clip | Generic Chrome | ~40 lbs | 0.5 inches | Light accessories, floor presses, landmines |
| Aluminum Cam | Rogue HG 2.0 | ~250+ lbs | 1.5 inches | Heavy bench, squats, Olympic lifts |
| Polymer Lock | Lock-Jaw Pro Oly | ~300+ lbs | 2.25 inches | High-volume rack work, garage gyms |
Real-World Failure Modes & Edge Cases
Even premium equipment fails under specific environmental and mechanical stresses. Understanding these edge cases is vital for long-term safety.
⚠️ Safety Warning: The Garage Gym Temperature DropPolymer lock-jaw collars rely on the flexibility of glass-filled nylon and internal rubber O-rings. In unheated garage gyms where temperatures drop below 40°F (4°C), these polymers become highly brittle. Dropping a barbell with cold polymer collars can cause the housing to shatter, instantly releasing the plates. If you train in a cold environment, aluminum cam collars with steel hinges are the only safe choice.
Another common failure mode is asymmetric unloading. When finishing a set, many lifters strip all the plates off one side of the barbell while it is still resting in the J-cups. According to ExRx bench press safety guidelines, this creates a massive lever arm that can flip a 45lb barbell out of the rack, causing severe damage to the floor, the lifter, or the rack's uprights. Always use collars, even when stripping the bar, to maintain a baseline of lateral friction.
Expert Maintenance Checklist
Barbell collars are not 'buy it and forget it' items. The immense lateral forces they endure during heavy pressing and dropping require routine maintenance to maintain their clamping PSI.
Monthly Maintenance Protocol
- Chalk Removal: Use a stiff nylon brush and 90% isopropyl alcohol to clear magnesium carbonate buildup from cam hinges and lever tracks. Chalk acts as an abrasive that will grind down the anodized aluminum finish over time.
- O-Ring Inspection: Check the rubber inner grip rings for flat spots or tears. A compressed or torn O-ring reduces lateral clamping force by up to 40%, allowing heavy bumpers to slide during incline presses.
- Drop Test: Drop the collar from waist height onto a thick rubber mat. Polymer collars should bounce; if they emit a sharp 'clack' or show micro-fractures along the hinge line, the nylon matrix has degraded and the collar must be retired.
- Hinge Lubrication: Apply a single drop of dry PTFE (Teflon) lubricant to the cam hinge pin. Avoid WD-40 or wet oils, which will attract dust and chalk, creating a grinding paste that seizes the lever mechanism.
Final Thoughts on Chest Day Progression
Mastering how to build pectoral muscles with dumbbells teaches you the mind-muscle connection, the stretch, and the stabilization required for true hypertrophy. But when it is time to overload the central nervous system and push past plateaus with heavy barbell work, your safety hardware must be as robust as your work ethic. By selecting the right collar profile for your sleeve real estate, executing a flawless installation, and maintaining the clamping mechanisms, you ensure that every ounce of force you generate is directed safely into building a stronger, thicker chest.
More gear to consider
All reviews
Cast vs Competition Kettlebells for Your Dumbbell Training Schema

2026 Trends: Cast Iron vs Competition KBs & SA Dumbbell Push Press

Bowflex Dumbbells with Bench & The Standard vs Olympic Plate Mistake

EZ Curl Bar vs Straight Bar Longevity & Dumbbell Deadstop Row Care

Barbell Curls vs Dumbbell Curls: Dumbbell Rack Storage & Care
