Rowing Technique, Buying Guide & How to Check Treadmill Belt Tension
Master rowing machine buying and technique for beginners. Plus, learn how to check treadmill belt tension for a complete home cardio gym setup.

Building Your 2026 Home Cardio Hub: Rowers and Treadmills
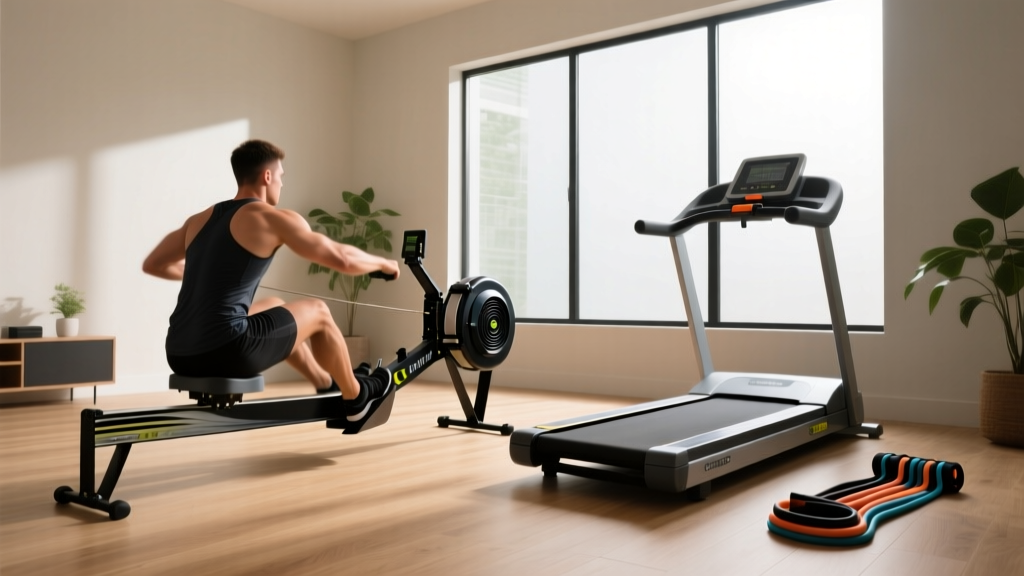
Designing a well-rounded home gym in 2026 requires more than just buying the most expensive equipment on the market; it requires understanding biomechanics, smart purchasing, and routine maintenance. For beginners, the combination of a rowing machine and a treadmill offers the ultimate cardiovascular cross-training setup. Rowing provides a zero-impact, full-body muscular endurance workout, while treadmill training builds foundational lower-body bone density and aerobic capacity.
This comprehensive guide will walk you through everything you need to know about selecting and using a rowing machine. Furthermore, because a home gym is only as good as its maintenance routine, we will also cover a critical, often-overlooked safety procedure: how to check treadmill belt tension to ensure your secondary cardio machine remains safe and functional.
The 2026 Rowing Machine Buying Guide
The indoor rower market has evolved significantly. While traditional air rowers remain the gold standard for competitive athletes, magnetic and water-resistance models have surged in popularity for home users seeking quieter operation and immersive digital experiences. When shopping for a rower, you must consider resistance type, rail length (crucial for users over 6'2"), and smart connectivity.
Resistance Types Compared
| Resistance Type | Pros | Cons | Top 2026 Model Example | Avg. Price |
|---|---|---|---|---|
| Air | Infinite resistance based on effort; highly durable; standard for competitive benchmarking. | Can be noisy; basic monitors on entry-level models. | Concept2 RowErg | $1,100 - $1,300 |
| Water | Authentic 'catch' feel; soothing swoosh sound; beautiful wood aesthetics. | Water tank requires occasional purification tablets; footprint is often wider. | WaterRower Natural | $1,600 - $1,900 |
| Magnetic | Whisper-quiet operation; precise, adjustable resistance levels; compact folding options. | Lacks the dynamic 'infinite' drag of air; max resistance may feel capped for elite sprinters. | NordicTrack RW900 | $1,699 - $2,100 |
| Smart/Hybrid | Immersive HD screens; auto-adjusting magnetic drag; live on-demand classes. | Requires expensive monthly subscriptions; heavy and difficult to move. | Hydrow Apollo | $2,500 - $3,200 |
Beginner Rowing Technique: A Step-by-Step Breakdown
Purchasing the right machine is only half the battle. According to the American Council on Exercise (ACE), improper rowing mechanics are the leading cause of lower back pain in beginners. The rowing stroke is not an arm exercise; it is a sequential power transfer. Remember the 60-20-20 rule: 60% of the power comes from your legs, 20% from your core hinge, and only 20% from your arms.
The 4 Phases of the Stroke
- The Catch: Slide forward until your shins are vertical (do not over-compress past 90 degrees). Keep your arms straight, shoulders relaxed, and core braced. You should feel like a coiled spring.
- The Drive: Initiate the movement by pushing explosively with your legs. Do not pull with your arms yet. Once your legs are nearly straight, hinge backward at the hips (the 20% core phase), and finally draw the handle to your lower ribcage.
- The Finish: Your legs are fully extended, torso is leaning back slightly (about 11 o'clock), and the handle is resting just below your chest. Keep your wrists flat.
- The Recovery: Reverse the sequence smoothly. Extend arms first, hinge forward from the hips, and only bend your knees once the handle has cleared your knees. The recovery should take twice as long as the drive.
The Damper Setting Myth
Many beginners set the side damper lever to 10, assuming higher is better. According to Concept2, a damper setting of 10 is akin to riding a bicycle in the heaviest gear—it causes rapid muscular fatigue before you can achieve cardiovascular benefits. For most aerobic workouts, a setting between 3 and 5 (which yields a drag factor of 110-130) best simulates the drag of a real racing shell on water.
Home Gym Maintenance: How to Check Treadmill Belt Tension
While your new rower will require minimal upkeep (mostly wiping down the rail and chain oiling), your treadmill demands strict mechanical attention. A poorly maintained treadmill belt can lead to catastrophic motor failure, blown control boards, or severe slip-related injuries. Learning how to check treadmill belt tension is a mandatory monthly chore for any home gym owner.
Why Tension Matters
- Too Loose: The belt will slip or hesitate underfoot when you strike the deck, creating a massive fall hazard.
- Too Tight: Excessive friction increases the amp draw on the drive motor. Over time, this generates excess heat, strips the drive belt, and will eventually fry the motor control board—a repair that often costs $300 to $600.
Step-by-Step Tension Testing
Follow this precise procedure to evaluate and adjust your treadmill belt:
- Safety First: Turn off the treadmill and remove the safety key. Unplug the machine from the wall.
- The Lift Test: Stand beside the machine and reach under the center of the walking belt. Lift it straight up. The belt should rise exactly 2 to 3 inches (5 to 7.5 cm) off the walking deck. If it lifts higher than 3 inches, it is too loose. If you cannot get your fingers under it or it barely moves, it is dangerously over-tightened.
- The Slip Test: Plug the machine back in. Start the belt at 3 MPH. Walk on it and intentionally plant your foot firmly to create momentary friction. If the front roller continues to turn but the walking belt stutters or stops, the tension is too loose.
- Adjusting the Rear Roller: Locate the two adjustment bolts at the very back of the treadmill (left and right sides). Using the provided T-handle hex wrench (usually 6mm), turn both bolts clockwise by exactly one-quarter (1/4) turn.
- Re-Test: Perform the Lift Test again. Never adjust by more than 1/4 turn at a time, and always adjust both sides equally to prevent the belt from drifting off-center.
Cardio Showdown: Rower vs. Treadmill Caloric Output
Understanding how these two machines complement each other helps in programming your weekly routine. While caloric burn is highly dependent on individual weight and effort levels, the physiological demands differ significantly.
| Metric | Rowing Machine (Moderate Pace) | Treadmill (Jogging at 5.5 MPH) |
|---|---|---|
| Muscle Engagement | ~86% of total body musculature | ~60% (Primarily lower body and core) |
| Impact on Joints | Zero impact (seated, fluid motion) | High impact (2.5x body weight per strike) |
| Avg. Caloric Burn (180lb individual / 30 mins) | 300 - 350 kcal | 320 - 380 kcal |
| Primary Energy System | Combined Aerobic / Anaerobic Lactic | Aerobic |
Final Thoughts on Your Cardio Setup
Building a sustainable fitness habit in 2026 relies on removing friction. By investing in a high-quality rower that fits your biomechanics and mastering the 60-20-20 technique, you secure a lifelong tool for cardiovascular health. Simultaneously, staying proactive with your equipment maintenance—knowing exactly how to check treadmill belt tension and keeping your machines calibrated—ensures that your home gym remains a safe, effective sanctuary for years to come. Start with 15-minute rower sessions focusing purely on form, and gradually integrate your treadmill intervals as your aerobic base expands.
More gear to consider
All reviews
Curved vs Motorized Treadmills: Converting Treadmill MPH to Pace
Vision Fitness Treadmill T9250 vs Stair Climbers: Home Mistakes

Deer Run Treadmill Coupon Code vs Rowing Machine: Cardio Guide

2026 Market Report: Compact Cardio vs. The Treadmill Mile Pace Chart

Troubleshooting a Treadmill Moving Slowly: Motor Size & HP Guide
