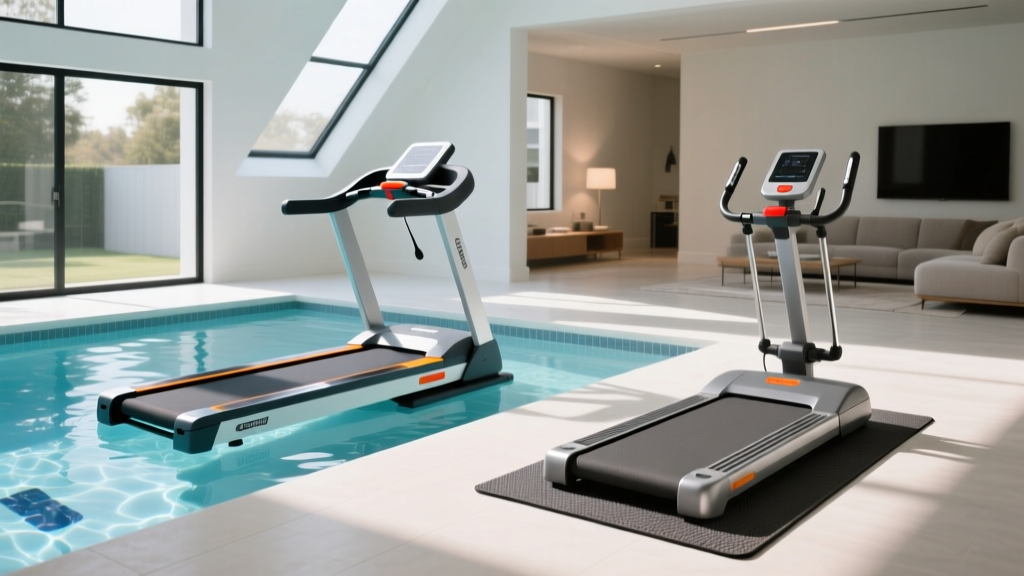
Swimming Pool Treadmill vs Walking Pad: Setup & Review
Compare swimming pool treadmill installation with walking pad setup. Read our 2026 review, cost analysis, and step-by-step assembly walkthroughs.

The Great Low-Impact Debate: Aquatic vs. Dryland Cardio
As home fitness technology advances in 2026, low-impact cardiovascular training has bifurcated into two highly distinct equipment categories: the ultra-convenient indoor walking pad and the premium, high-complexity swimming pool treadmill. Whether you are recovering from joint surgery, managing arthritis, or simply seeking a low-impact daily step count, choosing the right modality requires understanding not just the workout, but the physical footprint and installation realities of the equipment.
This comprehensive guide bridges the gap between our standard walking pad treadmill comparison and review subtopic and the specialized world of aquatic fitness. We will walk you through the exact setup, installation prerequisites, and real-world failure modes of both systems, ensuring you make an informed decision for your home rehab or cardio setup.
Quick Decision Summary:- Choose a Walking Pad if: You have a standard 120V outlet, limited space (under 15 sq ft), a budget under $600, and need a dryland setup completed in under 20 minutes.
- Choose a Swimming Pool Treadmill if: You have an existing in-ground pool (minimum 48' depth), a dedicated 240V GFCI circuit, a budget exceeding $8,500, and require zero-impact hydrotherapy.
Walking Pad Treadmill Review: 2026 Top Picks
Before diving into the installation walkthrough, it is crucial to select a walking pad that can withstand daily use without motor burnout. Unlike traditional treadmills, walking pads utilize compact, low-profile decks and smaller direct-current (DC) motors. Here is how the top 2026 models stack up.
1. KingSmith WalkingPad X21
Price: $549 - $599 | Motor: 1.25 HP (Peak 2.5 HP) | Weight Limit: 265 lbs
The X21 remains the gold standard for foldable walking pads. Its patented 180-degree folding mechanism reduces its stored footprint to just 4 inches thick. The brushless motor operates at roughly 45 decibels, making it ideal for under-desk use. However, the narrow 17-inch belt width requires strict lateral discipline from the user.
2. UREVO Strol 2E
Price: $329 - $379 | Motor: 1.0 HP | Weight Limit: 220 lbs
For budget-conscious buyers, the Strol 2E offers a slightly wider 16.5-inch running area and a sturdy steel frame. It lacks the seamless folding hinge of the KingSmith but compensates with a built-in digital display on the handrail and a more aggressive deck grip tape, reducing slip hazards during barefoot or socked use.
Complete Walking Pad Setup & Installation Walkthrough
While walking pads are marketed as 'plug-and-play,' improper setup is the leading cause of premature belt fraying and motor overheating. Follow this exact sequence to ensure longevity.
- Acclimation and Unboxing: Allow the box to sit in your climate-controlled room for 2 hours before opening. Sudden temperature shifts can cause the PVC belt to contract or expand, affecting initial tension. Remove the unit and place it on a high-density EVA foam mat (minimum 1/2 inch thick) to absorb harmonic vibrations.
- Hinge Unlocking (Foldable Models): For models like the X21, locate the dual safety latches on the central hinge. Press inward simultaneously and lift the front deck until the pneumatic struts lock with an audible click. Warning: Never place your fingers near the hinge joint during deployment.
- Initial Belt Tensioning: Plug the unit into a dedicated 120V/15A surge-protected outlet. Turn the machine on at 1.0 MPH. Observe the belt for 60 seconds. If the belt drifts to the left, insert the provided 4mm Allen wrench into the left rear roller bolt and turn it clockwise by exactly 1/4 turn. Wait 30 seconds for the belt to re-center. Repeat on the right side if it drifts right. Never over-tighten, as this will strip the motor gear.
- App Calibration and Bluetooth Pairing: Download the manufacturer's companion app. Pair via Bluetooth and run the 'Auto-Calibration' sequence. This allows the internal controller to map the motor's voltage curve to the specific friction coefficient of your belt.
Swimming Pool Treadmill: Complete Installation Walkthrough
Aquatic treadmills, such as those manufactured by Hudson Aquatic Systems or Aquatic Access, offer unparalleled buoyancy-assisted cardio. According to the Arthritis Foundation, water exercise reduces joint impact by up to 90% while providing omnidirectional resistance. However, installing a swimming pool treadmill is a major structural and electrical undertaking.
Structural & Electrical Prerequisites
Unlike a walking pad, a swimming pool treadmill cannot simply be plugged into a wall. You must verify the following before purchasing:
- Pool Dimensions: A minimum water depth of 48 inches is required to prevent the user's head from striking the pool floor during a stumble. The pool floor must be structurally reinforced to handle the dynamic load of the treadmill frame plus the user (often exceeding 600 lbs of point-load force).
- Electrical Code Compliance: The U.S. Consumer Product Safety Commission strictly enforces the National Electrical Code (NEC) Article 680 for aquatic environments. Your swimming pool treadmill requires a dedicated 240V/30A GFCI (Ground Fault Circuit Interrupter) breaker. Furthermore, the treadmill's stainless steel frame must be tied into the pool's existing equipotential copper bonding grid using an 8 AWG solid copper wire to prevent lethal stray voltage gradients in the water.
Step-by-Step Aquatic Installation
- Frame Assembly & Anchor Bolt Drilling: Most residential aquatic treadmills feature a 316L marine-grade stainless steel frame. If utilizing a deck-mounted model, use a rotary hammer drill with a 1/2-inch masonry bit to drill into the concrete pool coping. Insert chemical epoxy anchors (not standard wedge anchors, which will crack the coping over time) and secure the base plates.
- Equipotential Bonding: Attach the 8 AWG copper bonding wire to the treadmill's designated grounding lug using a stainless steel lay-in lug. Connect the other end to the pool's main bonding loop. Test continuity with a multimeter; resistance must be less than 0.5 ohms.
- Variable Frequency Drive (VFD) Wiring: Submerged aquatic treadmills use specialized hydraulic or water-cooled electric motors controlled by a dry-land VFD. Mount the VFD enclosure in a weatherproof NEMA 4X cabinet at least 5 feet from the pool edge. Wire the 240V supply to the VFD input, and run the shielded motor cable through liquid-tight flexible metal conduit to the underwater motor housing.
- Submersion & Hydraulic Purge: Lower the treadmill into the pool. Before powering the motor, open the hydraulic bleed valves (if applicable) to purge trapped air from the drive belt casing. Trapped air will cause cavitation, destroying the impeller or drive belt within hours.
- Load Testing: Power on the VFD at 0.5 MPH. Enter the water and apply your full body weight. Monitor the VFD display for amperage spikes. A properly calibrated system should draw no more than 15% above its rated no-load amperage when under human resistance.
Head-to-Head Comparison Matrix
| Feature | Walking Pad (e.g., KingSmith X21) | Swimming Pool Treadmill |
|---|---|---|
| Average Cost | $350 - $600 | $8,500 - $15,000+ |
| Setup Time | 15 - 30 Minutes | 2 - 4 Days (with licensed electrician) |
| Power Requirement | Standard 120V / 15A | Dedicated 240V / 30A GFCI + Bonding |
| Footprint | ~12 sq ft (Folds to 4' tall) | ~15 sq ft (Permanent pool fixture) |
| Maintenance | Silicone belt lubrication every 30 days | Annual VFD service, zinc anode replacement |
| Impact Level | Low (Dryland gravity applies) | Zero (Buoyancy negates joint loading) |
Expert Verdict & Failure Mode Troubleshooting
The choice between a walking pad and a swimming pool treadmill is rarely a direct competition; rather, it is a reflection of your budget, property infrastructure, and physiological needs. Walking pads dominate the accessibility and convenience metrics, while aquatic treadmills remain the undisputed champions of orthopedic rehabilitation.
Expert Troubleshooting Tip: The most common failure mode for indoor walking pads is motor controller burnout caused by 'micro-stops.' Users frequently step off the belt without powering down, forcing the motor to overcome static friction upon restart. Always use the remote to pause the belt before stepping off. For pool treadmills, galvanic corrosion is the silent killer. If your pool's water chemistry drops below a pH of 7.2, the acidic water will rapidly degrade the treadmill's stainless steel weld points. Test pool water weekly.
Ultimately, if you have the capital and the existing pool infrastructure, the swimming pool treadmill offers a lifelong, joint-preserving cardio solution that dryland equipment simply cannot replicate. However, for 95% of home users seeking daily NEAT (Non-Exercise Activity Thermogenesis) improvement, a high-quality walking pad provides an exceptional, low-barrier entry into consistent cardiovascular health.
More gear to consider
All reviews
Is WellFit a Good Treadmill Brand? Motor HP Guide

Commercial 1250 Treadmill Noise vs Top Cardio Machines (2026)

Wellfit TM007 Treadmill Reviews: Cardio Machine Noise Guide

Folding Treadmill Review: Which Treadmill Part Fails in Small Spaces?

Aviron Victory Treadmill Manual? Ultimate Belt Care Guide
