Curved vs Motorized Setup: How to Turn On a NordicTrack Treadmill
Master your home gym installation. We compare curved manual vs motorized treadmill setup and detail exactly how to turn on a NordicTrack treadmill.

The Great Divide: Curved Manual vs. Motorized Treadmill Installation
Setting up a home gym in 2026 requires more than just clearing space; it demands an understanding of the mechanical and electrical nuances of your equipment. The installation and initial boot-up processes for a curved manual treadmill (like the AssaultRunner Elite or TrueForm Runner) and a smart motorized treadmill (like the NordicTrack Commercial 1750) are fundamentally different. While manual models rely on biomechanical calibration and physical assembly, motorized smart treadmills introduce complex electronics, software boot sequences, and strict electrical requirements.
This complete setup and installation walkthrough bridges the gap between these two cardio giants, ensuring your machine is safely assembled, correctly powered, and calibrated for your first run.
Phase 1: Spatial Planning and Electrical Prerequisites
Before unboxing, you must prepare the physical environment. According to the Consumer Reports Treadmill Buying Guide, improper clearance is a leading cause of home gym injuries and equipment damage.
Motorized Treadmill Clearance & Power
- Footprint & Clearance: A standard motorized treadmill requires an 80x30 inch footprint. You must leave at least 2 feet of clearance on both sides and a minimum of 3 feet behind the machine. This rear clearance is critical; if you fall, the motorized belt will continue to push you backward unless the safety key is deployed.
- Electrical Requirements: Smart treadmills like the NordicTrack Commercial 1750 draw significant current, especially during incline shifts and high-speed acceleration. You must plug the machine directly into a dedicated 15-amp or 20-amp wall outlet. Avoid GFCI (Ground Fault Circuit Interrupter) outlets if possible, as the treadmill's initial power surge can trip the breaker. Never use a standard household extension cord; if you must extend the reach, use a heavy-duty 14-gauge appliance cord.
Curved Manual Treadmill Clearance
Curved treadmills (priced between $2,999 and $3,500 for premium models) are entirely self-powered. Because the belt only moves when you push it, there is no risk of being ejected backward at 12 mph. However, you still need 2 feet of side clearance for mounting and dismounting the elevated 6-inch deck safely.
Phase 2: Assembly Walkthrough (Mechanical vs. Electronic)
The physical assembly of these machines highlights their core differences. Both will require two people and roughly 60 to 90 minutes, but the failure points vary drastically.
The Motorized Assembly: Beware the Ribbon Cable
When assembling the uprights on a NordicTrack, the most common point of failure is the internal console wiring. The uprights contain a delicate white ribbon cable that connects the lower motor controller to the HD touchscreen.
⚠️ Installation Warning: When bolting the uprights to the base, do not let the ribbon cable dangle near the bolt holes. Pinching this wire between the metal brackets will sever the data connection, resulting in a blank console and requiring a complete teardown to replace the harness. Use the included zip-ties to secure the wire to the inside channel before tightening the 10mm bolts.The Manual Assembly: Tensioning the Slat Belt
Curved treadmills use a heavy-duty slat belt (often 38 to 42 individual rubber slats on a Kevlar chain). Assembly is mostly bolting the rear stabilizer and uprights. The critical step is checking the belt tension out of the box. If the slat belt feels "sticky" or requires excessive force to push, you will need to use a 6mm Allen wrench to adjust the rear axle tension bolts. Turn both sides exactly one-quarter turn clockwise to maintain alignment.
Phase 3: Powering Up — How to Turn On a NordicTrack Treadmill
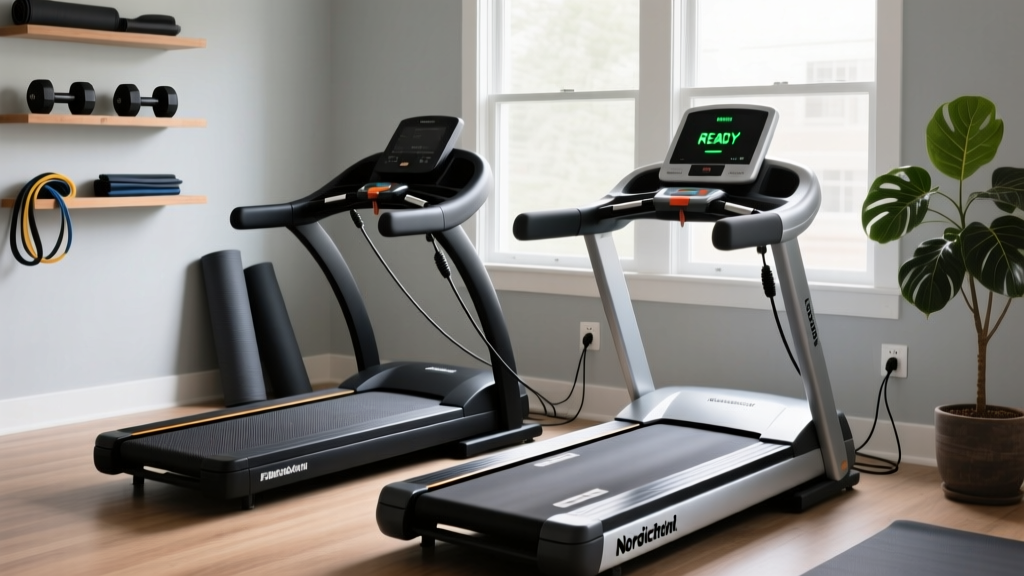
Unlike manual treadmills, motorized smart treadmills require a specific boot sequence to engage the software and the drive motor. If you are wondering how to turn on a NordicTrack treadmill for the first time, follow this exact sequence to avoid software hangs and motor controller errors.
- Engage the Power Switch: Locate the rocker switch on the front of the treadmill base, near where the power cord enters the chassis. Flip it to the "Reset" or "On" position. You should hear a faint click from the internal relay.
- Insert the Safety Key: The console will not send power to the belt motor without the magnetic safety key in place. Clip the lanyard to your shirt and snap the yellow/red magnetic key onto the designated console node.
- Initiate the Boot Sequence: Press the power button on the back or side of the HD touchscreen (depending on your 2025/2026 model). The screen will illuminate with the iFit logo.
- Connect and Update: Connect to your 2.4GHz or 5GHz Wi-Fi network. Note: First-time boot requires a mandatory firmware synchronization. This can take anywhere from 5 to 15 minutes. Do not unplug the machine during this phase, even if the screen appears frozen on the iFit logo.
- Calibrate the Incline: Once the home screen loads, the machine will prompt an automatic incline calibration. The deck will rise to its maximum 15% grade and drop to -3% (if equipped with decline). Stand to the side on the plastic foot rails during this process.
"Turning On" a Curved Manual Treadmill
There is no power switch on an AssaultRunner or TrueForm. However, "turning on" the digital experience requires installing two CR2032 coin batteries into the Bluetooth console, downloading the companion app, and pairing the console via Bluetooth Low Energy (BLE). To start the physical belt, simply step onto the front curve of the deck and push backward with your foot to engage the 8-pound flywheel.
Setup Comparison Matrix: Smart Motorized vs. Curved Manual
| Feature | NordicTrack Commercial 1750 (Motorized) | AssaultRunner Elite (Curved Manual) |
|---|---|---|
| Retail Price (2026) | $1,999 - $2,499 | $2,999 - $3,199 |
| Assembly Time | 90 Minutes (2 People) | 45 Minutes (2 People) |
| Power Requirement | Dedicated 15A/20A Wall Outlet | None (2x CR2032 for Console) |
| First-Boot Process | Wi-Fi Setup, Firmware Update, Incline Calibration | BLE Pairing, Slat Belt Tension Check |
| Rear Clearance Needed | 36 Inches (Minimum) | 24 Inches (Recommended) |
| Primary Maintenance | Silicone Belt Lubrication, Motor Hood Vacuuming | Slat Belt Alignment, Bearing Inspection |
Troubleshooting First-Boot Failures
Even with meticulous assembly, first-time setups can encounter friction. Here is how to handle the most common edge cases based on data from the NordicTrack Official Support Portal and field technician reports.
NordicTrack iFit Stuck on "Connecting" or "Preparing"
If your console hangs on the "Preparing iFit" screen for more than 20 minutes, the machine has likely failed to handshake with the local server due to router firewall settings. The Fix: Power the machine off at the wall switch. Temporarily connect the treadmill to a mobile hotspot (ensure it has at least 15 Mbps download speed). Boot the machine, allow the firmware to push through, and create your user profile. Once the home dashboard loads, you can switch the Wi-Fi settings back to your home network.
Curved Belt Feels "Choppy" or Sluggish
If your newly assembled manual treadmill does not glide smoothly, the slat chain is likely over-tensioned from the factory to prevent shipping damage. The Fix: Locate the two rear tensioning bolts on the back axle. Using the provided hex key, turn both bolts counter-clockwise by exactly one-half turn. Walk on the machine to test the glide. Repeat in quarter-turn increments until the belt moves fluidly with your stride without slipping under heavy forefoot strikes.
Pro-Tip for Longevity: For motorized treadmills, always perform a manual belt alignment check after the first 10 hours of use. The initial break-in period causes the woven backing of the belt to stretch slightly, which can result in the belt drifting to the left or right. Adjust the rear roller bolts to re-center the belt before it begins to fray against the side rails.
Final Safety Checks Before Your First Run
Before logging your first miles, perform these mandatory safety verifications:
- The Lanyard Test: Start the motorized treadmill at 3.0 mph. Pull the safety key from the console. The belt should begin decelerating immediately, coming to a complete halt within 3 to 5 seconds.
- The Deck Flex Test: On a curved manual treadmill, stand in the center of the deck and jump lightly. The shock-absorption elastomers beneath the slats should compress and rebound silently. Any metallic clicking indicates a loose upright bracket that needs re-torquing.
- Auto-Stop Verification: On the NordicTrack, ensure the "Auto-Stop" feature is enabled in the iFit settings. If the machine detects no footfalls on the deck for more than 30 seconds while paused, it will power down the belt motor to prevent overheating.
Whether you are calibrating the heavy-duty flywheel of a curved manual machine or navigating the software ecosystem of a smart motorized deck, proper installation is the foundation of your equipment's lifespan. Take the time to verify your clearances, secure your internal wiring, and run through the complete boot and safety protocols before your first workout.
More gear to consider
All reviews
Rowing Machine Buying Guide & Setup: Smii7y Treadmill Alternative

Stair Climber Home Setup & How Do You Adjust the Belt on a Treadmill
Treadmill Cycling Limits: Walking Pad Mistakes & Fixes

Wooden Manual Treadmill vs Motorized: Top Mistakes & Fixes

HydroWorx Underwater Treadmill: Step-by-Step Buying Guide