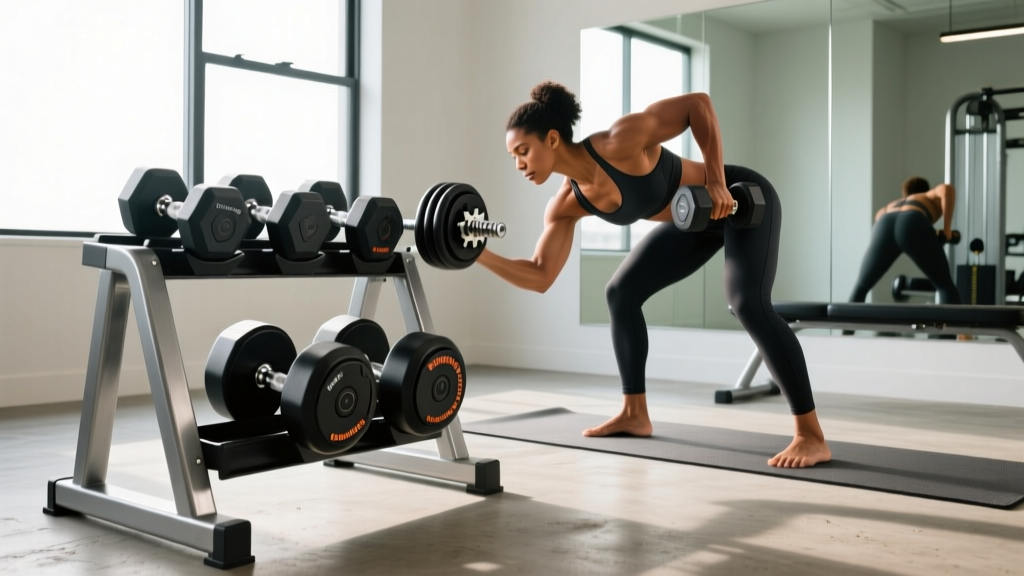
Master the Dumbbell Rows Exercise: Adjustable Dumbbell Setup & Review
Compare top adjustable dumbbells and master your home gym setup for the dumbbell rows exercise with our complete installation and form walkthrough.

The Biomechanical Demands of the Dumbbell Rows Exercise
Building a dedicated back-day station in a home gym requires more than just buying equipment; it demands precise spatial planning. The dumbbell rows exercise is a unilateral staple for developing latissimus dorsi thickness, rhomboid density, and posterior chain stability. However, when you transition from fixed commercial dumbbells to space-saving adjustable models, the biomechanics and physical footprint of the movement change dramatically.
Adjustable dumbbells introduce variable lengths, unique handle geometries, and fragile internal selector mechanisms. If your home gym setup and installation are not calibrated to accommodate these quirks, you risk damaging expensive equipment or compromising your range of motion. This 2026 guide provides a complete setup walkthrough and an expert comparison of the market's leading adjustable dumbbells, specifically evaluated for heavy rowing performance.
2026 Adjustable Dumbbell Comparison Matrix for Heavy Pulling
Not all adjustable dumbbells are created equal, especially when subjected to the high-torque, off-balance forces of heavy unilateral rows. Below is a technical comparison of the top three models currently dominating the home gym market.
| Model (2026) | Max Weight | Handle Geometry & Knurling | Max Length at Peak Weight | Drop Tolerance | Est. Price |
|---|---|---|---|---|---|
| Nuobell 80 LB | 80 lbs | 1.1" dia, medium-aggressive knurl | 16.1 inches | Low (Pin-shear risk) | $445 |
| Bowflex SelectTech 552 | 52.5 lbs | 1.0" dia, mild knurl, plastic end-caps | 16.9 inches | Very Low (Dial shatter risk) | $399 |
| PowerBlock Elite EXP | 50-90 lbs | Cage design, 1.2" effective grip | 12.0 inches (Fixed cage) | Moderate (Welded steel) | $369 |
Complete Setup and Installation Walkthrough
To safely execute heavy rows, your physical environment must be installed and measured to accommodate the unique dimensions of adjustable dumbbells. Follow this step-by-step installation protocol to build your rowing station.
Phase 1: Flooring and Impact Absorption Installation
Adjustable dumbbells house精密 (precision) selector pins and plastic dial housings. Setting them down forcefully on bare concrete or thin foam tiles will cause micro-fractures in the casing.
- Procure 3/4" Vulcanized Rubber Mats: Standard 4x6 foot horse stall mats are the industry standard. They provide the necessary density to absorb the kinetic energy of an 80-lb dumbbell being placed on the floor between sets.
- Seam Locking: Use heavy-duty double-sided carpet tape beneath the mat seams to prevent shifting. A shifting mat during the setup stance of a heavy row can lead to severe lumbar torque.
- Chalk Zone Delineation: If you use lifting chalk for heavy rows, designate a specific 'drop zone' on the mat to prevent chalk dust from accumulating in the adjustable dial tracks, which causes mechanical jamming over time.
Phase 2: Bench Positioning and Spatial Mapping
The most common installation error in home gyms is placing the flat bench too close to a wall or power rack. According to the ExRx Exercise Directory, the unilateral row requires a deep eccentric stretch and a high concentric elbow drive.
- Bench Height Calibration: Ensure your flat bench is exactly 17 to 18 inches from the floor to the top of the pad. This height allows the non-working arm to support the torso while keeping the spine perfectly neutral.
- The 40-Inch Clearance Rule: Because the Bowflex 552 extends to 16.9 inches at its heaviest setting, and your arm adds another 24 inches of reach, you must install your bench with a minimum of 40 inches of lateral clearance on both sides. If the dumbbell strikes a wall during the eccentric lowering phase, it will bend the selector rod.
- Bench Foot Anchoring: If your bench has adjustable feet, calibrate them to eliminate any wobble. A 2mm wobble at the base translates to a 15mm sway at the shoulder joint during an 80-lb row, destroying your mind-muscle connection.
Phase 3: Mechanism Testing and Weight Dialing
Before loading up your working sets, perform a mechanical audit of your adjustable dumbbells.
- Place the dumbbell in its cradle. Ensure the cradle is on a perfectly level surface; an angled cradle will cause the internal weight plates of dial-systems to bind.
- Cycle the dial or selector pin from 5 lbs to max weight and back down three times. Listen for the distinct 'click' of the locking mechanism engaging.
- Perform a 'shake test' at 30 lbs. Hold the handle and gently shake it. Any rattling indicates a loose internal retaining clip, which is a critical failure hazard during pulling movements where the dumbbell is suspended in mid-air.
Failure Modes: What Breaks During Heavy Rows?
Understanding how equipment fails is a core component of E-E-A-T in fitness engineering. The dumbbell rows exercise places unique stress on adjustable mechanisms due to the rotational forces applied to the handle.
WARNING: The Supination SnapMany lifters attempt to supinate (rotate the palm upward) at the top of the row to squeeze the bicep and lower lat. With pin-selector adjustable dumbbells (like the Nuobell), applying heavy rotational torque while the weight is suspended can bend the internal steel selector rod. Always establish your grip orientation before lifting the weight from the cradle.
Furthermore, the plastic end-caps on older or heavily used dial-system dumbbells can crack if the dumbbell is rested on its head on the floor between sets. Always store the dumbbell upright or flat on its side, never leaning against a wall where it can tip over onto the dial housing.
Execution Guide: Optimizing Your Rowing Mechanics
With your station installed and your equipment verified, proper execution is paramount. The ACE Fitness Exercise Library emphasizes spinal neutrality during unilateral pulling. Here is how to adapt your form for adjustable dumbbells:
1. The Staggered Stance Setup
Instead of the traditional 'one knee on the bench' approach, which can compress the hip flexor and limit lat engagement, use a staggered stance. Place your non-working hand on the bench, step the same-side foot back, and hinge at the hips. This setup accommodates the wider profile of adjustable dumbbells, preventing the weight plates from scraping against your thigh or the bench pad during the pull.
2. Managing the Eccentric Stretch
Because adjustable dumbbells are often bulkier than fixed hex dumbbells, the physical casing may hit the floor or the bench leg before your latissimus dorsi reaches a full stretch. To solve this, you must control the eccentric phase and stop the descent exactly when you feel the muscular stretch, rather than relying on the floor as a physical stopper. Lowering an adjustable dumbbell until it 'clunks' the floor is the fastest way to destroy the internal locking pins.
3. The Concentric Drive
Drive the elbow toward the ceiling, keeping the wrist neutral. If you are using a cage-style dumbbell like the PowerBlock, your wrist is naturally locked in a neutral position, which is excellent for preventing wrist flexor strain during heavy 80-lb pulls. Focus on pulling through the elbow rather than the hand to minimize forearm fatigue.
Frequently Asked Questions
Can I use adjustable dumbbells for Pendlay Rows?
While possible, it is not recommended. Pendlay rows require starting the weight from a dead stop on the floor. Repeatedly setting adjustable dumbbells down on the floor, even on rubber mats, will eventually misalign the selector tracks. Stick to chest-supported rows or standard unilateral bench rows where the weight is picked up once and controlled throughout the set.
What is the best bench angle for targeting the upper back with adjustables?
Setting an adjustable bench to a 15-degree incline and performing chest-supported rows is highly effective. This angle removes the lower back from the equation and prevents the bulky ends of adjustable dumbbells from interfering with your torso, allowing for a deeper range of motion and superior rhomboid activation.
'The integration of adjustable dumbbells into a home gym requires a paradigm shift in spatial awareness. You are no longer just lifting weight; you are managing a piece of precision machinery through space.' — Home Gym Engineering Principles, 2026
By meticulously installing your rowing station, respecting the mechanical limits of your equipment, and adapting your biomechanics to the unique profiles of adjustable dumbbells, you can safely build a world-class back without ever needing a commercial gym membership.
More gear to consider
All reviews
Rubber Hex vs Urethane: 2026 Preacher Curl Dumbbell Market Trends

Why Is It Called a Dumbbell? History & Loadable Plate Maintenance
World's Biggest Dumbbell vs. Adjustable Sets: 2026 Guide

EZ Curl Bar vs Straight Bar & Overhead Dumbbell Gym Layouts

Cast Iron vs Competition Kettlebells vs Dumbbells for Glutes (2026)
