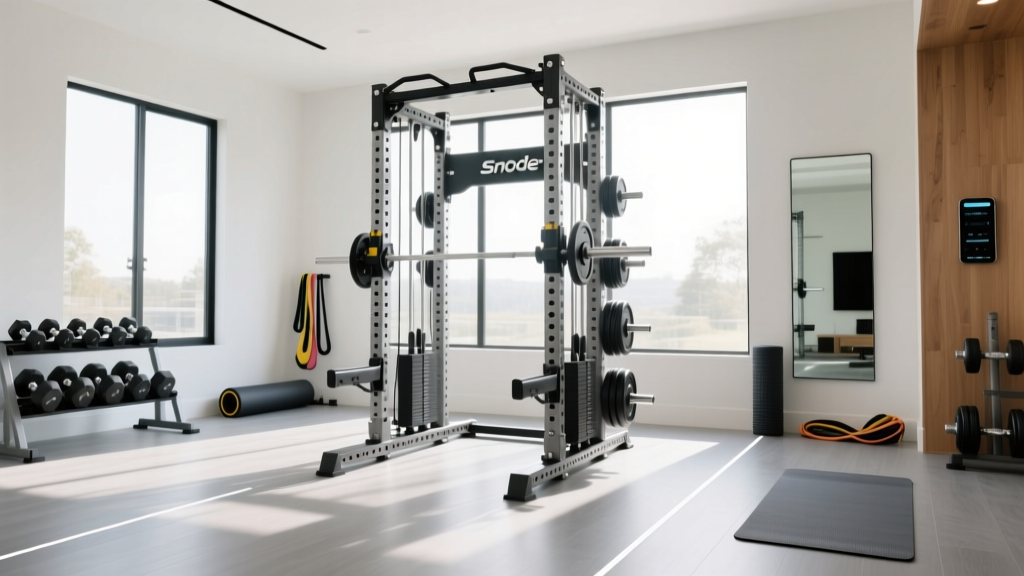
Floor Plan Guide: Snode All-in-One Home Gym Smith Machine Power Rack
Master your home gym layout with our step-by-step floor plan guide for the Snode all-in-one smith machine power rack. Includes dimensions and safety tips.

Building a home gym from scratch can feel overwhelming, especially when your centerpiece is a massive, multi-functional rig. When your equipment of choice is the snode all-in-one home gym smith machine power rack, you are investing in a commercial-grade footprint that demands precise spatial planning. This beginner-friendly, step-by-step guide will walk you through drafting a complete floor plan, prepping your subfloor, and executing a flawless assembly.
Quick Specs for Planning: The 2026 Snode AD-80 Pro All-in-One Rack typically measures 70 inches wide, 58 inches deep, and 86 inches high. You will need a minimum clear space of 12x10 feet to operate safely.Step 1: Decoding the Footprint and Safety Clearances
Before you unbox a single bolt, you must map the physical boundaries of your equipment. The snode all-in-one home gym smith machine power rack is not just a squat stand; it integrates a functional trainer, lat pulldown, and Smith mechanism. This means clearance is required on all sides to ensure safe operation and proper loading.
Minimum Clearance Requirements
- Front Clearance (48 inches): Essential for the seated row and lat pulldown attachments. You need room for the adjustable bench, your seated body, and the full range of motion of the cable stack without hitting a wall.
- Side Clearances (36 inches each): Mandatory for loading and unloading Olympic bumper plates on the Smith bar and the functional trainer weight horns. Failing to account for this will force you to unload plates from the front, which is ergonomically hazardous.
- Overhead Clearance (12 inches): If your ceiling is standard 8 feet (96 inches), an 86-inch rack leaves only 10 inches. Ensure your pull-up bar clearance allows for full overhead extension without knuckle scraping against the drywall or ceiling joists.
Step 2: Drafting the Complete Floor Plan Matrix
A successful home gym layout divides the room into distinct operational zones. According to facility design guidelines referenced by the National Strength and Conditioning Association, optimizing traffic flow and equipment spacing reduces injury risk and improves workout efficiency. Below is the recommended floor plan matrix for a standard 12x14 foot spare room or garage bay.
| Zone Name | Dimensions | Primary Function | Equipment Stored |
|---|---|---|---|
| Zone A: Main Rig | 6' x 5' | Heavy lifting, Smith machine, rack pulls | Snode All-in-One Rack |
| Zone B: Free Weight | 4' x 5' | Dumbbell work, kettlebell swings | Adjustable dumbbells, kettlebells |
| Zone C: Cable Path | 4' x 6' | Functional training, tricep pushdowns | Adjustable bench, cable handles |
| Zone D: Storage & Transit | 2' x 14' | Plate storage, walking path | Wall-mounted plate racks, bands |
Step 3: Subfloor Prep and Heavy-Duty Flooring
Your floor plan is only as good as the surface it sits on. Dropping a 300-pound barbell on bare concrete or standard garage epoxy will eventually cause structural spalling and noise complaints. The American Council on Exercise emphasizes the importance of shock-absorbing surfaces to protect both the lifter's joints and the underlying architecture.
Expert Insight: Do not use cheap interlocking foam puzzle mats. They compress unevenly under the 800+ pound static load of a fully loaded all-in-one rack, causing the rig to wobble and throwing off the Smith machine's linear bearings.
The Solution: Install 3/4-inch (19mm) thick vulcanized rubber stall mats. Lay them down in a staggered brick pattern to prevent seam separation. If your subfloor is uneven by more than 1/4 inch over a 10-foot span, use heavy-duty rubber shims under the rack's base plates before tightening the anchor bolts to prevent frame twisting.
Step 4: Assembly Sequencing and Torque Specifications
Assembling the snode all-in-one home gym smith machine power rack is a two-person job that typically takes 4 to 6 hours. Do not fully tighten any bolts until the entire main frame is assembled. This allows for micro-adjustments to square the frame and ensure the doors and pulleys align correctly.
- Base Frame Assembly: Connect the front and rear base tubes. Ensure the leveling feet are threaded all the way in to prevent cross-threading.
- Upright Installation: Stand the four main 11-gauge steel uprights. Insert the crossmembers at the 24-inch and 72-inch marks using the provided pop-pin or bolt-through hardware.
- Smith Mechanism Integration: Carefully slide the linear bearing carriages onto the guide rods. Warning: Do not let go of the carriage without the safety stops in place, or it will crash to the base and damage the bearings.
- Top Crossmembers & Pull-Up Bar: Secure the top rectangle. Use a digital angle finder to ensure the pull-up bar is perfectly level before final tightening.
- Final Torque: Using a 19mm and 24mm socket wrench, tighten all structural bolts to 60-75 ft-lbs to eliminate any frame sway.
Step 5: Cable Routing and Functional Trainer Setup
The most common beginner failure mode during assembly is incorrect cable routing, which leads to frayed wires, stuck weight stacks, and uneven resistance. The Snode rig utilizes a multi-pulley system for its 200lb dual weight stacks.
Thread the cables starting from the bottom of the weight stack, moving up to the floating pulleys, and finally anchoring at the top carriage. Ensure the nylon-coated cables sit deeply inside the grooves of every aluminum pulley wheel. If a cable jumps a track during a heavy lat pulldown, it can snap under tension. Always perform a 50-pound test pull on every cable attachment before doing a full working set to verify the tracking.
Step 6: Anchoring and Final Safety Walkthrough
While the sheer weight of the snode all-in-one home gym smith machine power rack (often exceeding 600 lbs empty) provides a low center of gravity, dynamic movements like kipping pull-ups or aggressive band work can shift the unit. The U.S. Consumer Product Safety Commission routinely advises anchoring heavy home fitness equipment to prevent tip-overs and structural shifting.
How to Anchor to Concrete
- Mark the pre-drilled holes in the rack's base plates with a paint marker.
- Move the rack and drill 1/2-inch holes into the concrete using a hammer drill and a carbide masonry bit.
- Insert 1/2-inch x 3.5-inch wedge anchors, tap them flush with a hammer, and tighten the nuts with a torque wrench until the washer bites firmly into the steel base plate.
Common Beginner Mistakes to Avoid
- Ignoring the Smith Bar Offset: The Smith bar on these rigs often has a slight forward or backward pitch depending on the specific model year. Always face the correct direction for squats to align with your natural biomechanical path and protect your lower back.
- Overloading the Storage Horns Unevenly: Storing 300 lbs of plates on the left horn and 50 lbs on the right creates a torsional twist on the main frame over time, potentially binding the Smith machine rails and causing a jerky bar path.
- Skipping the Lubrication Schedule: The linear bearings on the Smith machine require silicone-based lubrication every 3 months. Using standard WD-40 or heavy grease will attract chalk dust and destroy the bearings.
Ongoing Maintenance Schedule
Keep Your Rig Pristine:- Weekly: Wipe down the Smith machine guide rods with a dry microfiber cloth to remove chalk and sweat residue.
- Monthly: Inspect all cable tracks for nylon fraying. Check the tightness of the lat pulldown and low row carabiners.
- Quarterly: Apply 100% silicone spray to the linear bearings. Re-torque the main structural bolts to 75 ft-lbs, as metal expansion and vibration can loosen them over time.
Final Walkthrough
Setting up a comprehensive home gym is a rewarding project that pays dividends in convenience and long-term health. By meticulously planning your floor plan, respecting clearance zones, and executing a precise assembly, your snode all-in-one home gym smith machine power rack will serve as a safe, commercial-grade sanctuary for years to come. Grab your tape measure, clear the garage, and start building your ultimate training space.
More gear to consider
All reviews
Roller vs. Massage: Evidence-Based Comparison for Recovery, Cost, and Home Gym Integration

Belt Squat Home Gym Setup: Flooring & Ventilation Mistakes

Planet Fitness Switch: Home Gym Maintenance & Longevity
How to Change Home Gym on Planet Fitness App and Wire Your Garage Safely

Renter-Friendly Home Gym Painting: Mistakes & Fixes
