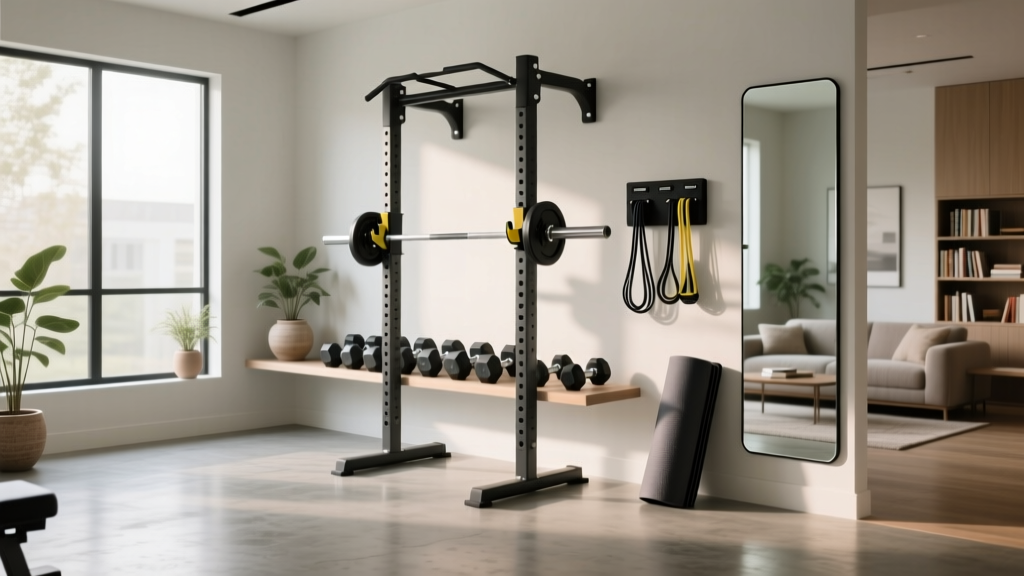
Designing the Perfect Home Gym Layout Around Your Home Gym Bar
Learn how to design and optimize your home gym layout around a home gym bar. This beginner step-by-step guide covers space, flooring, and clearances.

The Blueprint: Designing Your Layout Around a Home Gym Bar
Building a home gym from scratch is one of the most rewarding investments you can make for your long-term health, but a poorly planned layout can turn your sanctuary into a frustrating obstacle course. When your setup revolves around a central piece of equipment—specifically a home gym bar, whether that means a wall-mounted pull-up rig or a barbell power rack—spatial optimization becomes critical. You are not just fitting equipment into a room; you are engineering a dynamic movement zone.
As of 2026, the trend in home fitness has shifted heavily toward functional, rig-based training. However, many beginners make the costly mistake of measuring only the static footprint of their equipment, completely ignoring the dynamic clearance required for safe, effective movement. This step-by-step guide will walk you through exactly how to design, measure, and optimize your home gym layout around your home gym bar, ensuring maximum safety, flow, and training efficiency.
Step 1: Map Your Dynamic Clearances (Not Just Floor Space)
The most common failure mode in home gym design is treating equipment dimensions as static. A power rack might only take up 4 feet by 4 feet of floor space, but the human body and the equipment in motion require significantly more volume.
The Barbell and Pull-Up Swing Zones
If your home gym bar setup includes a standard Olympic barbell, remember that the bar itself is 7.2 feet (86.4 inches) long. You need a minimum of 12 inches of clearance on each side just to load and unload bumper plates safely. This means your absolute minimum width requirement is 9.5 feet.
For wall-mounted pull-up bars, you must account for the 'swing zone'. If you plan on doing kipping pull-ups, muscle-ups, or toes-to-bar, you need at least 24 to 36 inches of empty space behind the bar. Mounting a pull-up bar flush against a wall with only 12 inches of clearance will result in your feet kicking the drywall during dynamic movements, leading to structural damage and potential injury.
⚠️ Overhead Clearance Alert: Standard residential ceilings are 8 feet (96 inches) high. If you are 6 feet tall and add a 12-inch head and arm extension during an overhead press or pull-up, you will strike the ceiling. Always measure your vertical reach with arms fully extended before finalizing your bar height.Step 2: Choose the Right Home Gym Bar Configuration
Not all home gym bars are created equal, and your choice will dictate your room's layout. Below is a comparison of the three most popular configurations for beginners in 2026, factoring in spatial footprint and average market pricing.
| Configuration Type | Best For | Spatial Footprint | Avg. Cost (2026) | Layout Impact |
|---|---|---|---|---|
| Wall-Mounted Fold-Back Rig | Garages & tight spaces | 4' x 2' (Folds to 4' x 4') | $450 - $650 | Requires heavy wall studs; frees up center floor space when folded. |
| Freestanding Power Rack | Basements & dedicated rooms | 4' x 4' base + 3' safety zone | $500 - $850 | Can be placed anywhere; requires 360-degree access for plate loading. |
| Ceiling-Mounted Pull-Up Bar | High-ceiling rooms & CrossFit | 0 sq ft (floor) | $150 - $250 | Requires exposed joists; allows 360-degree movement but blocks overhead lighting. |
For most beginners, a freestanding power rack with an integrated home gym bar (like the Rogue Fitness R-3 or the Titan T-3 Series) offers the best balance of safety and versatility. These units allow you to perform both barbell and bodyweight exercises in a single, consolidated footprint.
Step 3: Structural Mounting and Safety Protocols
If your layout dictates a wall-mounted or ceiling-mounted home gym bar, structural integrity is non-negotiable. A dynamic load (like a kipping pull-up or a dropped barbell) generates exponentially more force than static weight. A 200lb athlete kipping can generate upward of 400lbs of sheer downward force on a mounting bracket.
"Never rely on drywall anchors, toggle bolts, or masonry screws in hollow cinder blocks for dynamic gym equipment. The repetitive shock loading will eventually pulverize the surrounding material, leading to catastrophic failure."
To mount a wall bar safely, you must anchor directly into wooden wall studs or structural steel. Use a high-quality stud finder and verify by drilling pilot holes. According to structural DIY guidelines outlined by Family Handyman, standard studs are spaced 16 or 24 inches apart. If your desired bar width does not align with your studs, you must first install a structural mounting board (a heavy-duty 2x10 or 2x12 piece of lumber) anchored into multiple studs, and then mount your home gym bar to that board. This not only ensures safety but also gives you the flexibility to place the bar exactly where your layout requires it.
Step 4: Flooring and the Impact Zone
Your layout is incomplete without mapping the 'Impact Zone'. When designing around a home gym bar, especially one used for heavy deadlifts, Olympic lifts, or gymnastics drops, your flooring must absorb kinetic energy to protect both your equipment and your home's foundation.
Material Breakdown
- 3/4" Vulcanized Rubber Mats: The gold standard for 2026. These interlocking tiles or large rolls absorb high-impact drops. Expect to pay between $60 and $90 per 4x6 foot section.
- Stall Mats (Horse Mats): A budget-friendly alternative, usually 3/4" thick. While cheaper ($45-$55 per mat), they are heavier, harder to cut, and often emit a strong rubber odor that requires weeks of off-gassing in a well-ventilated space.
- EVA Foam Tiles: Avoid these for barbell zones. They are excellent for yoga or light bodyweight work but will permanently compress and tear under the point-load of a dropped Olympic barbell.
Pro Layout Tip: Do not wall-to-wall carpet your gym. Instead, map out the exact swing and drop zones of your home gym bar and create a dedicated 8x8 foot rubberized 'island' in the center of the room. This saves money, preserves your existing floors, and visually anchors your workout space.
Step 5: The Gym Work Triangle
Borrowing from kitchen design, the most efficient home gyms utilize a 'Work Triangle' to optimize traffic flow and minimize transition times between exercises. When your home gym bar is the focal point, structure your room into three distinct zones:
- The Heavy Zone (The Bar): This is where your rack, barbell, and pull-up bar live. It should be placed against the most structurally sound wall, away from windows and mirrors, to accommodate heavy loading and potential drops.
- The Accessory Zone (Free Weights): Dumbbells, kettlebells, and resistance bands should be stored on racks exactly one step away from the Heavy Zone. This allows you to quickly transition from barbell squats to dumbbell lunges without crossing the room.
- The Recovery & Cardio Zone: Treadmills, rowing machines, and stretching mats belong near the entrance or windows. This separates the high-sweat, high-noise equipment from the heavy impact zone, keeping your heart-rate work distinct from your strength work.
Common Beginner Layout Mistakes to Avoid
Even with a solid plan, small oversights can ruin a home gym layout. Keep these edge cases in mind:
- Door Swing Interference: Ensure that inward-opening doors do not strike your power rack or plate storage trees. If space is tight, replace standard hinges with offset hinges or install a barn-style sliding door.
- Ceiling Fan Collisions: It sounds obvious, but many beginners forget about ceiling fans when doing overhead barbell presses or jumping pull-ups. Relocate fans or replace them with flush-mount LED lighting.
- Knurling Wall Scrape: If your barbell is stored vertically or horizontally too close to a wall, the aggressive knurling (the rough grip texture) will act like sandpaper against your paint or drywall. Always leave a minimum 6-inch buffer between stored barbells and finished walls.
Final Thoughts on Your Setup
Designing a home gym layout around a home gym bar requires a shift in perspective from static interior design to dynamic spatial engineering. By respecting the swing zones, investing in proper structural mounting, and utilizing the Gym Work Triangle, you will create a space that is not only safe but inherently encourages better workouts. Take the time to tape out your dimensions on the floor before drilling a single hole, and consult resources like the American Council on Exercise (ACE) for ongoing safety and ergonomic guidelines. Your future self will thank you every time you step up to the bar.
More gear to consider
All reviews
Home Gym Package Deals: How Much Weight You Actually Need
Body Solid G1S Home Gym Reviews: Weight Stacks & Space Layouts

Your First Home Gym Total: Essential Starter Kit Buying Guide
Shared Home Gym Setup: The Centr 2 Home Gym Functional Trainer Guide
Space-Saving Home Gym Design: Essential Beginner Starter Kit
