
Configuring Your Space for a Strength Home Gym Training Program
Learn how to configure your space, install flooring, and select equipment to perfectly support your strength-focused home gym training program.

Executing a progressive overload-based home gym training program requires more than just buying a barbell and dropping it in the garage. The physical configuration of your space dictates your safety, your range of motion, and your ability to seamlessly transition between compound lifts and accessory work. When your environment is optimized, your training adherence skyrockets. When it is poorly planned, skipped workouts and compromised form become the norm.
In this comprehensive setup and installation walkthrough, we will engineer a dedicated strength-training space from the concrete up. We will cover exact dimensions, specific equipment models, and installation protocols to ensure your facility can handle the rigorous demands of a 5/3/1, Starting Strength, or Push/Pull/Legs home gym training program.
The Foundation: Mapping Equipment to Your Training Variables
Before purchasing a single piece of iron, you must map your physical space to the biomechanical requirements of your programming. A standard hypertrophy or powerbuilding program requires distinct zones: a heavy compound zone, an isolation/accessory zone, and a conditioning corridor.
Pro-Tip: The 36-Inch RuleAlways maintain a minimum 36-inch clearance on all sides of your power rack. This is not just for safety; it is the exact space required to load and unload 45lb bumper plates without scraping your walls or knuckles, a crucial ergonomic factor for high-volume training blocks.
Phase 1: Spatial Planning and Heavy-Duty Flooring Installation
The floor is the most critical piece of equipment in your gym. For a strength-focused setup, standard interlocking EVA foam tiles will compress under heavy deadlifts, ruining your force production and stability.
Selecting the Right Rubber
You need 3/4-inch (19mm) vulcanized rubber mats with a Shore A durometer rating of 60-65. This density provides enough shock absorption to protect your concrete slab from a 500lb dropped deadlift, while remaining firm enough to transfer force efficiently during heavy squats. Premium options like the Rogue Horse Stall Mats or American Floor Mats Heavy Duty typically cost between $65 and $85 per 4x6 foot sheet.
Step-by-Step Flooring Installation
- Prep the Slab: Sweep and degrease the concrete. Fill any major cracks with self-leveling polyurethane sealant.
- Moisture Barrier: Lay down a 6-mil polyethylene vapor barrier. Concrete wicks moisture, which can cause rust on your plates and rack base over time.
- Lay the Mats: Stagger the seams in a brick-like pattern to prevent long continuous fault lines.
- Secure the Seams: Use double-sided carpet tape (like XFasten) under the seams, and apply a matte black duct tape or specialized rubber-floor seam tape on top to prevent chalk and dust from settling into the cracks.
Phase 2: The Core Strength Rig (Rack and Barbell Setup)
The power rack is the anchor of your home gym training program. Your selection must be dictated by your ceiling height and your programming needs.
Rack Selection and Clearance Metrics
For a standard 8-foot ceiling, you are restricted to an 84-inch rack. If you have 9 feet or more of clearance, opt for a 90-inch rack (like the Rogue RML-390F Flat Foot Monster Lite, priced around $595-$695). The 90-inch height allows for full pull-ups without your head striking the ceiling.
Crucial Specification: Ensure your rack features "Westside" hole spacing (1-inch spacing in the bench press and squat zone). This allows you to set spotter arms exactly 1-2 inches below your chest at the bottom of a bench press, which is a non-negotiable safety requirement when training solo without a spotter.
The Barbell: Tensile Strength Matters
Do not buy a sub-$150 barbell for a serious strength program. You need a bar with a minimum tensile strength of 190,000 PSI to prevent permanent deformation (bending) under heavy axial loads. The Rogue Ohio Power Bar (Stainless Steel) at $295 or the REP Fitness AB-4100 at $230 offer aggressive knurling and high tensile strength, ensuring the bar bites into your hands during heavy 1-rep max attempts.
Phase 3: Accessory Configuration for Hypertrophy
A well-rounded home gym training program dedicates 40-60% of its volume to accessory and isolation work to address weak points and drive muscle hypertrophy. How you configure this space will dictate your workout flow.
| Equipment Type | Best For | Top 2026 Model Pick | Approx. Cost |
|---|---|---|---|
| Cable Pulley System | Constant tension, triceps, lat isolations, face pulls | REP Fitness FT-5000 2.0 (Lat Row) | $599 |
| Adjustable Dumbbells | Unilateral work, lateral raises, space-saving pressing | PowerBlock Pro Series (5-50 lbs) | $359 |
| Adjustable FID Bench | Incline pressing, seated rows, chest-supported work | REP AB-5200 2.0 (Zero-gap) | $449 |
According to the American College of Sports Medicine (ACSM), incorporating multi-joint and single-joint exercises is vital for comprehensive muscular fitness. A cable system attached to your rack allows for seamless transitions from heavy barbell squats to cable split squats without having to change plates or move across the room, keeping your heart rate elevated and your rest periods strictly timed.
Phase 4: Biomechanical Feedback (Mirrors and Lighting)
Visual feedback is essential for self-correcting form, especially when recording your lifts for online coaching or personal review.
Lighting Specifications
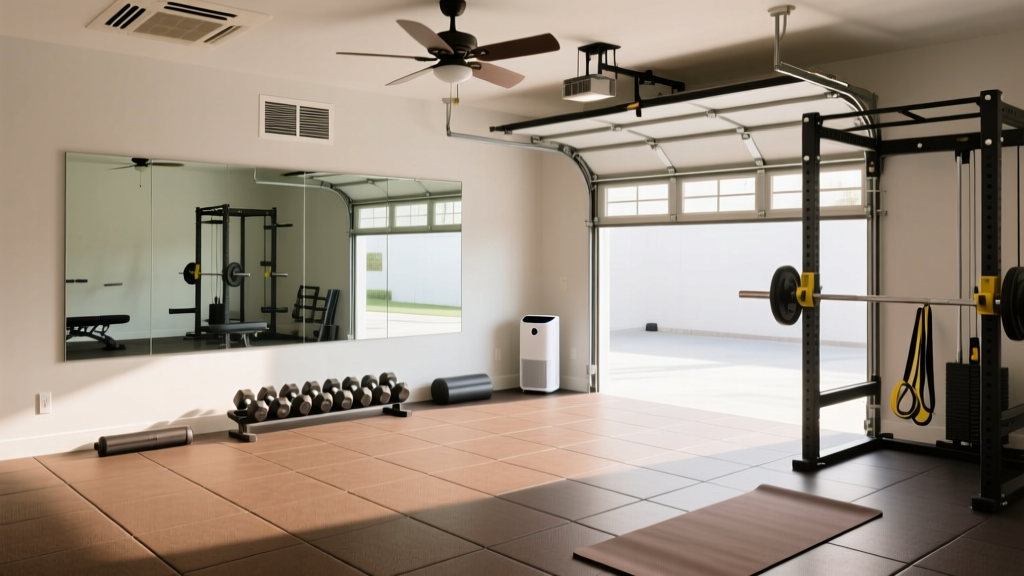
Overhead shadows can hide knee valgus or spinal rounding. Install 5000K (Daylight) LED shop lights aiming for 50-75 lumens per square foot. Ensure the fixtures have a CRI (Color Rendering Index) of 80 or higher. Position the lights at a 45-degree angle to the front of the rack to eliminate harsh shadows directly under your chin and barbell.
Mirror Placement and Safety
Mount 1/4-inch thick glass mirrors on the primary focal wall. Crucial installation detail: Mount the bottom edge of the mirror at least 16 to 20 inches off the floor. This protects the glass from accidental strikes when setting down heavy dumbbells or kettlebells during accessory work.
Real-World Installation Walkthrough: The 12x12 Garage Build
Here is a data-driven breakdown of what it takes to execute this configuration in a standard two-car garage bay (12x12 feet).
Project Data: 12x12 Strength Bay
- Total Square Footage: 144 sq. ft.
- Flooring Required: Six 4x6' rubber mats (Cost: ~$450)
- Primary Rig: 90" Flat Foot Rack + Belt Squat Attachment (Cost: ~$950)
- Free Weights: 300lb Urethane Bumper Set + Ohio Power Bar (Cost: ~$850)
- Accessories: FID Bench + Lat Row Attachment (Cost: ~$1,050)
- Estimated Build Time: 8-10 hours (including floor prep, rack bolting, and mirror mounting)
- Total Capital Expenditure: $3,300 - $3,800
Safety Standards and Long-Term Maintenance
Operating a heavy strength facility in a residential space requires adherence to safety protocols. The National Strength and Conditioning Association (NSCA) emphasizes regular equipment inspection and environmental controls for training facilities.
- Hardware Checks: Every 90 days, use a torque wrench to check the structural bolts on your power rack. Vibration from dropped weights will slowly back out nyloc nuts over time.
- Barbell Maintenance: Wipe down your barbell shaft with a nylon brush and 3-in-One oil once a month to prevent chalk buildup and oxidation in the knurling.
- Ventilation: Strength training in an enclosed garage requires active airflow. Install a 1500 CFM exhaust fan to manage CO2 buildup and humidity, which can accelerate rust on your cast-iron plates.
Furthermore, the Centers for Disease Control and Prevention (CDC) highlights that muscle-strengthening activities should target all major muscle groups on two or more days a week. A properly configured home gym removes the friction of commuting, making it significantly easier to hit these baseline health metrics while pursuing advanced strength goals.
Frequently Asked Questions
Do I need to bolt my power rack to the floor?
If you are using a "Flat Foot" rack (like the Rogue RML-390F) and have over 600 lbs of weight stored on the rear uprights, bolting is not strictly necessary for stability. However, if you plan to use resistance bands for accommodating resistance or perform kipping pull-ups, you must bolt the rack to the concrete using 3/8-inch wedge anchors.
How much weight capacity do I need for my rack?
For a serious home gym training program, look for a rack rated for a minimum of 1,000 lbs static weight. Most 11-gauge steel 3x3" upright racks easily exceed this, providing a massive safety margin even if your squat eventually crosses the 400lb mark.
Can I do a full strength program with just a squat stand instead of a full rack?
While squat stands save space and money, they lack the integrated spotter arms, pull-up bars, and cable attachment points required for a comprehensive, long-term strength and hypertrophy block. For safety and programming versatility, a full 4-post or 6-post rack is the superior investment.
More gear to consider
All reviews
How Much Weight You Need: Iron vs MaxPro SmartConnect Home Gym Review

Bells of Steel All-In-One Home Gym: Outdoor Setup & Weather Guide
Pacific Fitness Del Mar Home Gym vs 2026 Foldable Alternatives

How Much Weight Is a Leg Press Machine Without Weights? Layout Guide
Garage Gym Setup: Flooring, Ventilation & Mirror Installation Service
