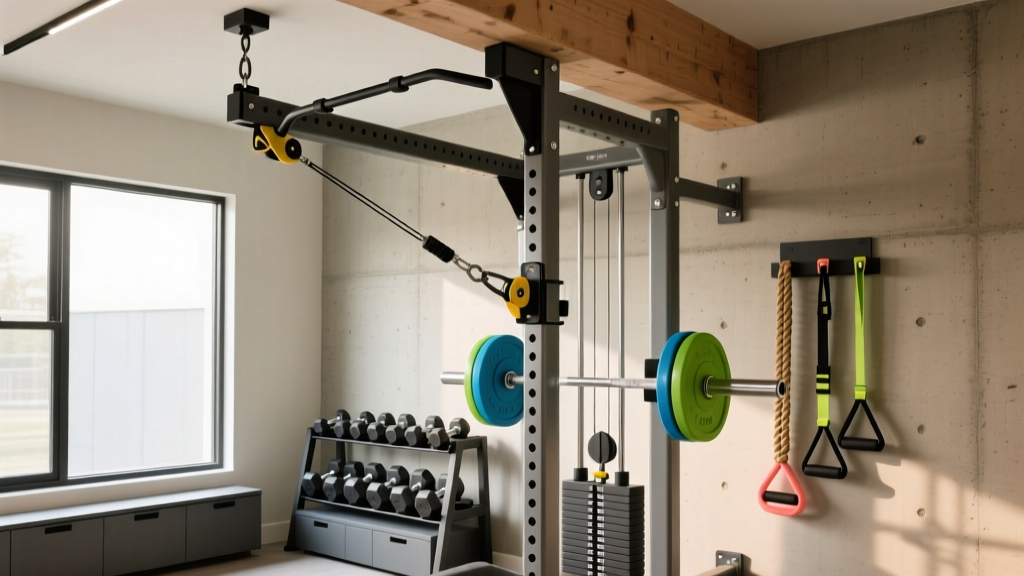
Optimize Layouts with a DIY Pulley System for Home Gym
Learn how to optimize your workout space with a step-by-step guide to building a DIY pulley system for home gym layouts. Save space and money today!

The Layout Dilemma: Reclaiming Your Home Gym Floor Plan
When designing a home gym, the biggest adversary is not a lack of equipment, but a lack of square footage. Commercial functional trainers and dual-cable machines are incredible for isolation work, but they demand a massive footprint—often consuming 40 to 50 square feet of prime real estate. For garage, basement, or apartment gym owners, sacrificing that much space to a single machine disrupts traffic flow and limits your layout options.
The ultimate layout optimization hack? Looking up. By installing a diy pulley system for home gym setups, you can reclaim your floor space, utilize neglected overhead joists, and create a highly functional cable zone for under $120. This beginner-friendly guide will walk you through designing your space, sourcing the exact hardware, and installing a heavy-duty overhead pulley system that integrates seamlessly into your gym's layout.
Space Optimization: Traditional vs. DIY Overhead Layouts
Before drilling into your ceiling, it is crucial to understand how this modification impacts your overall gym design. Integrating a ceiling-mounted pulley allows you to place your cable work in "dead zones"—such as directly behind a power rack or in a narrow corridor between a wall and a squat stand.
| Layout Metric | Commercial Functional Trainer | DIY Overhead Pulley System |
|---|---|---|
| Floor Footprint | 45 - 55 sq. ft. | 4 - 6 sq. ft. (Vertical drop zone) |
| Average Cost (2026) | $2,200 - $3,500 | $85 - $120 |
| Ceiling Clearance Needed | 84 - 92 inches | 86+ inches (for full lat extension) |
| Layout Flexibility | Static (Anchors a corner) | High (Can mount anywhere on joists) |
The Hardware Shopping List: Engineering for Safety
When building a diy pulley system for home gym environments, you cannot rely on cheap, generic hardware store clips. You are suspending dynamic loads over your head. According to guidelines from Simpson Strong-Tie structural fasteners, you must use forged, shoulder-pattern eye bolts that distribute sheer force across the wood grain, rather than bent wire hooks that can snap under lateral tension.
Exact Materials & 2026 Pricing Breakdown
- 5/16" Galvanized Aircraft Cable (7x19 strand): $25 for 50ft. Critical: You must use 7x19 strand cable for flexibility. 1x19 strand will fray and snap when bending over pulley wheels.
- 3" Nylon Sheave Pulleys (Ball Bearing): $35 for a pair. Look for a working load limit (WLL) of at least 350 lbs per pulley.
- 3/8" Forged Shoulder Eye Bolts (Zinc Plated): $9 for two. The shoulder prevents the bolt from bending at the base under load.
- 22kN Screw-Gate Carabiners: $18 for four. Always use climbing-rated, locking carabiners to connect your handles and weight pins.
- DIY Loading Pin Kit (1" Threaded Rod & Flange): $25. This allows you to load standard Olympic plates onto the cable.
- 3/8" Cable Clamps (Fist Grips): $8 for four. Used to terminate the cable loops securely.
Step-by-Step Installation Guide
Proper installation ensures your equipment survives the test of time and keeps you safe. Always consult the American Wood Council (AWC) span tables to verify that your ceiling joists can handle the dynamic downward force (which can briefly exceed 1.5x the static weight during explosive movements).
Step 1: Mapping and Pre-Drilling the Joists
- Use a high-quality magnetic stud finder to locate the center of your ceiling joists. Standard residential joists are typically 2x8, 2x10, or 2x12 lumber spaced 16 or 24 inches apart.
- Mark your primary mounting point. For optimal layout flow, position this directly behind your power rack or in a designated 3x3 foot open corridor.
- Drill a 5/16" pilot hole into the exact center of the joist. The hole must be perfectly vertical to ensure the eye bolt threads straight without cross-threading.
Step 2: Mounting the Primary Hardware
Thread the 3/8" forged shoulder eye bolt into the pilot hole using a wrench. Tighten it until the shoulder sits completely flush against the wood. Do not overtighten, as stripping the wood threads will compromise the structural integrity of the mount. Repeat this process for the secondary directional pulley mount, typically placed 2 to 3 feet away to create a lateral pull angle for chest flyes or face pulls.
Step 3: Threading and Terminating the Aircraft Cable
- Cut a 15-foot section of your 5/16" 7x19 aircraft cable using heavy-duty bolt cutters. Tape the ends with electrical tape immediately to prevent fraying.
- Run the cable through the nylon sheave pulleys. If you are building a simple vertical lat pulldown, you only need one pulley. For a multi-angle system, route it through the primary overhead pulley and down to a secondary wall-mounted directional pulley.
- Create a loop at the top end of the cable using three 3/8" fist-grip cable clamps. Space the clamps 2 inches apart, with the saddle of the clamp resting on the "live" (load-bearing) side of the cable, never the dead end.
Step 4: Rigging the Weight Pin and Handles
Attach a 22kN screw-gate carabiner to the bottom loop of your cable. Clip your DIY loading pin to the carabiner. Slide your Olympic bumper plates onto the pin and secure them with a top collar. Finally, attach your lat bar or tricep rope to the top carabiner. Your system is now live.
Integrating the Pulley into Your Gym Zoning Strategy
A successful home gym layout relies on "zoning"—grouping equipment by movement patterns to minimize transition time and maximize safety. According to functional training principles outlined by the American Council on Exercise (ACE), cable machines bridge the gap between free-weight compound movements and isolation work.
"Optimal gym design dictates that high-traffic isolation zones should not intersect with the swing radius of heavy free-weight zones. Overhead cable systems allow you to push isolation work to the perimeter of the room, keeping the center clear for barbell cycling and dumbbell work."
The Ideal 2-Car Garage Layout Matrix
If you are working with a standard 20x20 foot garage, here is how to zone your space around your new diy pulley system for home gym setups:
- Zone 1 (Center): Power Rack, Olympic Barbell, and Bumper Plates. This requires the most ceiling height and floor protection (3/4" horse stall mats).
- Zone 2 (Perimeter/Corner): Adjustable Dumbbells, Kettlebells, and Plyo Boxes.
- Zone 3 (The Cable Corridor): A 3-foot wide by 6-foot long strip directly beneath your overhead pulley. Keep this zone entirely free of permanent benches or racks. Use a foldable utility bench that can be dragged into the corridor only when performing seated cable rows or lat pulldowns.
While your 5/16" aircraft cable has a breaking strength of over 2,000 lbs, the dynamic shock load of a dropped weight stack can generate massive spike forces. Never exceed 250 lbs of total plate weight on a DIY loading pin without upgrading to a 3/8" cable and heavy-duty steel sheave pulleys. Always lower the weight stack with control; never let it drop and catch abruptly.
Maintenance and Edge Case Troubleshooting
Even the best-designed layouts require maintenance. Because your pulley system relies on friction and tension, environmental factors in garages and basements can affect performance.
Common Failure Modes & Fixes
- Cable "Chattering" or Vibration: This occurs when the cable is not tensioned properly or is rubbing against the metal bracket of the pulley. Fix: Ensure your cable is perfectly centered in the nylon sheave groove and apply a light coat of silicone spray to the cable every six months.
- Eye Bolt Pulling Out: Usually caused by mounting into drywall or the edge of a joist rather than the dead center. Fix: If the wood threads strip, do not just use a larger bolt. Fill the hole with high-strength structural epoxy, insert a hardwood dowel, let it cure for 24 hours, and re-drill your pilot hole.
- Carabiner Cross-Loading: If the carabiner twists and the load rests on the gate rather than the spine, its strength drops by 60%. Fix: Use rubber O-rings to keep the cable and handle perfectly aligned within the carabiner basket.
Final Thoughts on Space-Saving Gym Design
Building a diy pulley system for home gym environments is one of the highest-ROI projects you can undertake. By shifting your cable work to the ceiling, you eliminate the visual clutter and physical bulk of a commercial machine, opening up your floor plan for better airflow, safer barbell drops, and a more versatile training environment. With less than $120 in hardware and an afternoon of careful installation, you can achieve a premium, space-optimized layout that supports your fitness goals for years to come.
More gear to consider
All reviews
Apartment Setup & Marcy Home Gym Exercises: Maintenance Guide

Outdoor Home Gym Must Haves: A Weatherproof Setup Walkthrough

Garage Gym Troubleshooting: Protecting Gym Equipment in Home Setups

Shared Gym Setup: Using Bowflex Home Gym Older Models for Couples

Bells of Steel All-In-One Home Gym: Outdoor Setup & Weather Guide
