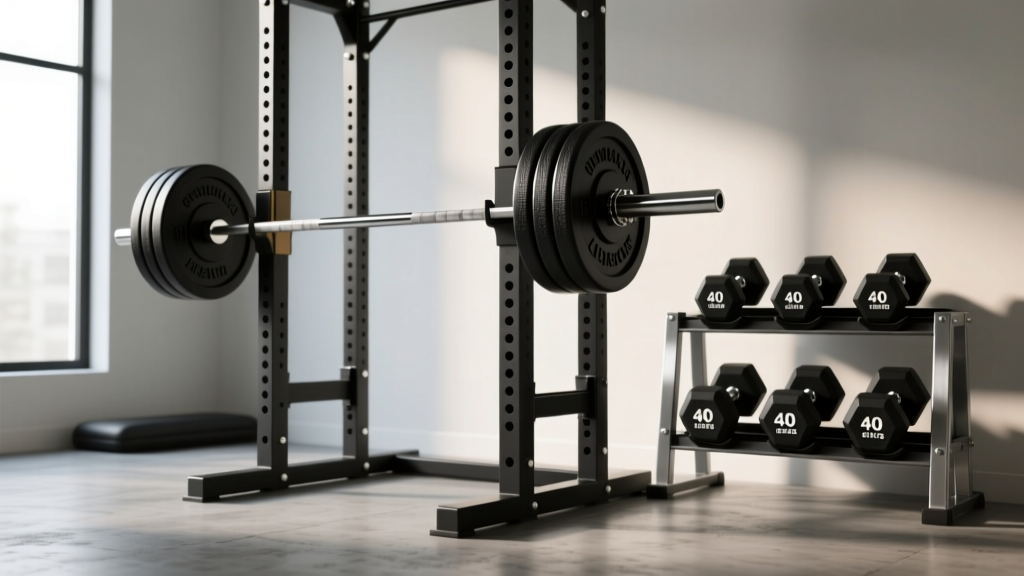
Power Rack vs Squat Stand: Upgrading From Squatting With A Dumbbell
Upgrade from squatting with a dumbbell to a barbell rig. Compare power racks, squat racks, and stands in our complete installation and setup walkthrough.

The Progression: Beyond the Dumbbell Goblet Squat
Most home gym owners begin their lower-body training by squatting with a dumbbell in a goblet or front-rack position. It is an exceptional movement for building core stability, hip mobility, and quad endurance. However, the loading ceiling of commercial dumbbells—typically maxing out between 100 and 150 pounds—quickly becomes the limiting factor for intermediate and advanced lifters. To unlock true posterior chain development and systemic strength, transitioning to barbell squats is mandatory.
This transition requires a fundamental shift in your home gym infrastructure. You are no longer just managing floor space; you are managing kinetic energy, heavy steel, and safety tolerances. As of 2026, the market for home gym rigs has bifurcated into three distinct categories: squat stands, half-racks (squat racks), and full power racks. Choosing the right one dictates your floor plan, your budget, and your safety margins.
Equipment Matrix: Power Rack vs. Squat Rack vs. Squat Stand
Before unboxing any hardware, you must match the rig to your spatial and biomechanical needs. According to independent testing by Garage Gym Reviews, the primary differentiators in 2026 are steel gauge, footprint, and accessory modularity.
| Feature | Squat Stands (e.g., Rogue SML-1) | Half Rack (e.g., REP PR-3000) | Full Power Rack (e.g., Titan T-3) |
|---|---|---|---|
| Footprint (W x D) | 48" x 24" (Minimal) | 48" x 36" (Moderate) | 48" x 48" (Expansive) |
| Steel Profile | 3" x 3" 11-Gauge | 3" x 3" 11-Gauge | 3" x 3" 11-Gauge |
| Weight Capacity | 600 - 800 lbs | 800 - 1,000 lbs | 1,000 - 1,500 lbs |
| Avg. Price (2026) | $395 - $499 | $599 - $799 | $699 - $999 |
| Best For | Garages with low ceilings & tight budgets | Lifters needing weight storage & pull-up bars | Heavy Olympic lifts, kipping, and cable attachments |
Phase 1: Site Preparation and Flooring
Do not assemble a 300-pound steel rack on bare concrete or laminate flooring. When you transition from squatting with a dumbbell to dropping a 300-pound barbell, the impact force transmitted through the floor can crack standard residential concrete slabs or shatter tiles.
The 3/4-Inch Vulcanized Rubber Standard
You need a dedicated lifting platform or high-density rubber mats. The industry standard for home gyms is 3/4-inch (19mm) thick vulcanized rubber horse stall mats (often sourced from agricultural suppliers for roughly $55 per 4x6 mat). For a full power rack, you will need a minimum 8x8 foot footprint to accommodate the rack, the 7-foot barbell sleeves, and your standing clearance.
CRITICAL WARNING: Never bolt a rack directly into drywall or hollow block. If you are bolting down squat stands, you must use 1/2-inch wedge anchors drilled at least 3 inches into a solid, cured concrete slab. If your slab is less than 4 inches thick, you must build a wooden deadlift platform (using 3/4-inch OSB) to distribute the sheer force.Phase 2: Rig Assembly Walkthrough
Whether you opt for the freestanding Rogue SML-1 Squat Stands or a fully enclosed Titan T-3 Power Rack, the assembly sequence dictates the structural integrity of the rig. Follow this exact workflow to prevent cross-threading and upright deflection.
- Stage the Hardware: Unbox and group all bolts, T-nuts, and uprights. Manufacturers often ship 5/8-inch and 3/4-inch hardware in similar bags. Misusing a 5/8-inch bolt in a 3/4-inch hole will cause catastrophic failure under heavy axial loads.
- Assemble the Base First (Freestanding Racks): For half-racks and power racks, bolt the rear and front crossmembers to the base feet before raising the uprights. Use a rubber mallet to seat the T-nuts into the laser-cut holes.
- Raise and Plumb the Uprights: With a second person, lift the uprights. Do not fully tighten any bolts yet. Leave them finger-tight. Use a 48-inch magnetic spirit level to ensure the uprights are perfectly plumb (vertical) on both the X and Y axes.
- Install the Safety Straps or Pin-Pipe Arms: Slide the safety mechanisms into place. If using UHMW plastic-lined safety straps, ensure the protective plastic is facing upward to prevent barbell knurling damage during failed reps.
- Torque Sequence: Using a socket wrench, tighten all bolts in a star pattern (similar to tightening lug nuts on a car wheel). This ensures the frame squares up without twisting. According to ExRx.net's weight room safety guidelines, improperly torqued frames can develop a 'wobble' that worsens exponentially as load increases.
Phase 3: Safety Arm Configuration
When you were squatting with a dumbbell, failing a rep simply meant dropping the weight forward onto the floor. Failing a barbell back squat requires precise safety arm placement to prevent spinal compression or asphyxiation.
'The safety bars should be set exactly one to two inches below the lowest point of your squat depth. If you set them too high, you will clang the barbell into the pins during a normal descent, ruining your bracing mechanics. If you set them too low, you will have to collapse your spine to escape the weight.'
— NSCA Certified Strength and Conditioning Specialist Guidelines on Spotter Mechanics
Straps vs. Pin-Pipes
In 2026, UHMW-lined nylon safety straps (like those offered by REP Fitness and Prime Fitness) have largely replaced traditional steel pin-pipes for home gym owners. Straps absorb the kinetic energy of a dropped barbell, reducing noise by up to 40% and preventing the barbell from bouncing out of the rack—a common failure mode with steel pipes.
Phase 4: Integrating Dumbbell Storage and Accessories
Just because you have upgraded to a barbell rack does not mean your dumbbells are obsolete. In fact, integrating them into your new rig is vital for a streamlined workflow. Most modern 3x3 power racks feature modular attachment points.
- Saddle Dumbbell Holders: These bolt directly to the outside of the uprights, storing pairs up to 50 lbs. This keeps the floor clear and prevents tripping hazards.
- Landmine Attachments: By inserting a barbell into a pivoting landmine base attached to the rack's base crossmember, you can perform rotational presses and hack squats, mimicking the unilateral benefits of squatting with a dumbbell but with the loading potential of a barbell.
- Weight Plate Storage Horns: Always load weight plates onto the rear storage horns of a half-rack or power rack. This acts as a crucial counterbalance, shifting the center of gravity backward and preventing the rack from tipping forward during heavy rack pulls or kipping pull-ups.
Troubleshooting Common Installation Failures
Even with meticulous assembly, home gym owners frequently encounter three specific issues post-installation:
1. The 'Rack Wobble'
Cause: Uneven concrete flooring causing one upright to hover slightly, or failure to use shims. Fix: Loosen all base bolts, insert heavy-duty steel shims under the floating foot until the frame is dead-flush, and re-torque. Do not rely on rubber mats alone to bridge structural gaps in the concrete.
2. J-Hook Height Misalignment
Cause: Laser-cut holes on budget racks can sometimes have a 1/4-inch variance between the left and right upright. Fix: Always count the holes from the bottom up rather than measuring from the floor with a tape measure, as the floor itself may be sloped for garage drainage.
3. Barbell Clearance Issues
Cause: Buying a rack that is too narrow or placing it too close to a wall. Fix: A standard Olympic barbell is 84 inches long. Your rack uprights sit at roughly 48 inches apart. This leaves 18 inches of sleeve on each side. Ensure you have at least 24 inches of lateral clearance on both sides to safely load and unload bumper plates without scraping your drywall.
Final Thoughts on the Upgrade
Moving past the limitations of squatting with a dumbbell is a milestone in any lifter's career. By carefully selecting between a squat stand, half-rack, or full power rack based on your spatial constraints, and by executing a precision installation with proper anchoring and safety tolerances, you are building a foundation that will safely support your training for decades. For the most current specifications and modular attachment compatibilities, always consult the manufacturer's engineering diagrams directly via the Rogue Fitness Rack Catalog or equivalent brand resources before finalizing your layout.
More gear to consider
All reviews
Adjustable Dumbbell Review: Setup & Dumbbell Exercises for Biceps
Bumper vs Iron Plates: Gym Layouts for Neutral Grip Dumbbell Presses

2026 Trend Report: Storing Dumbbells for Toning Arms & Light Weights

Barbell Clamps Compared: Safety for Your Dumbbell Gym Workout

EZ Curl vs Straight Bar Care: Longevity for Arm Days & Exercises for Pectoral Muscles with Dumbbells