
Space-Saving Dumbbell Racks: Clear Room for Dumbbell Pulldowns
Maximize your home gym layout with space-saving dumbbell racks. Learn how to optimize storage, clear floor space for dumbbell pulldowns, and improve flow.

The Spatial Problem: Why Clutter Kills Your Workout Flow
In 2026, the average home gym footprint has shrunk, yet the demand for commercial-grade equipment has never been higher. When you are cramming a power rack, an adjustable bench, and a full set of free weights into a spare bedroom or two-car garage, floor space becomes your most precious commodity. A cluttered gym floor doesn't just look messy; it actively restricts your exercise selection and compromises safety.
Nowhere is this more evident than when performing exercises that require a sweeping range of motion. If your dumbbell storage is poorly planned, you will find yourself constantly tripping over iron or, worse, striking your weights against steel uprights mid-rep. Optimizing your layout with the right dumbbell rack and storage solutions is the difference between a frustrating, cramped workout and a seamless, professional-grade training environment.
The "Dumbbell Pulldown" Clearance Test
To understand why spatial optimization matters, we use what we call the "Dumbbell Pulldown Clearance Test." The EXRX biomechanics directory outlines the extensive range of motion required for sweeping arc movements. When executing dumbbell pulldowns (often performed lying supine on a flat or decline bench, lowering a single heavy dumbbell in a wide arc behind the head to target the lats and serratus anterior), you need a minimum of 36 inches of unobstructed linear clearance behind the bench.
If your freestanding dumbbell rack is pushed too close to your benching zone, you will smash a $300 urethane dumbbell into the rack's steel frame at the bottom of the movement. By rethinking your storage strategy, you can reclaim the 15 to 20 square feet of floor space necessary to perform dumbbell pulldowns, lunges, and mobility work without spatial anxiety.
Zero-Footprint Solutions: Integrating Storage into Your Power Rack
The most effective way to save floor space is to eliminate the floor footprint entirely. If you already own a 3x3-inch upright power rack, utilizing rack-mounted storage is the ultimate space optimization hack.
- Rep Fitness PR-4000 Dumbbell Shelf Attachment ($120 - $150): These bolt-on shelves mount directly to your front or rear uprights. They hold up to 5 pairs of dumbbells (typically 5-25 lbs or 10-50 lbs depending on the tray depth). Because they cantilever off the rack, they consume exactly zero square inches of floor space.
- Rogue Monster Dumbbell Posts ($95 - $130): If you prefer vertical storage, these attach to the side of your uprights. They are ideal for holding 2-3 pairs of heavy dumbbells (e.g., your 60s, 70s, and 80s) that you use for heavy presses, keeping them off the floor and out of your walking paths.
When loading heavy dumbbells onto rack-mounted shelves, always load them on the rear uprights of your power rack, or ensure the rack is heavily bolted to a platform. Loading 150 lbs of iron onto front-mounted shelves can shift the center of gravity and cause an unbolted rack to tip forward during a failed squat.
Freestanding Racks: Minimizing the Floorprint
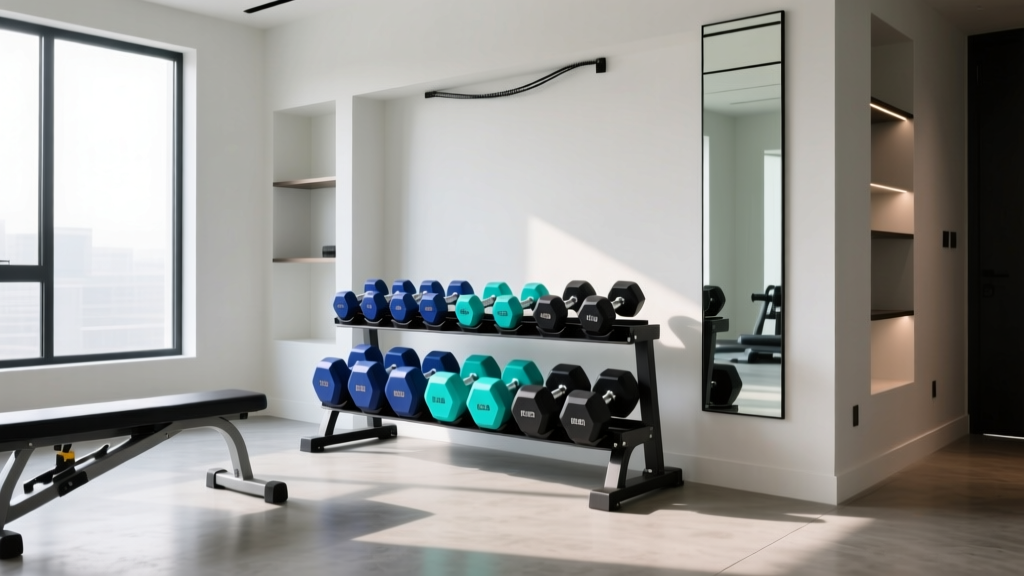
If you don't own a power rack, or if your dumbbell set exceeds 50 lbs per hand, a freestanding rack is mandatory. However, not all racks are created equal when it comes to spatial efficiency. The goal is to maximize vertical storage density while minimizing the X and Y axis footprint.
| Storage Model | Type | Floor Footprint | Capacity | Approx. Cost (2026) |
|---|---|---|---|---|
| Rogue 3-Tier Dumbbell Rack | Freestanding Horizontal | 1,316 sq in (47" x 28") | 10 Pairs (5-50 lbs) | $595 |
| Titan Fitness Vertical Rack | Freestanding Vertical | 576 sq in (24" x 24") | 10 Pairs (5-50 lbs) | $299 |
| A-Frame Dumbbell Stand | Freestanding A-Frame | 800 sq in (32" x 25") | 5 Pairs (10-50 lbs) | $180 |
As the data illustrates, vertical dumbbell racks are the undisputed champions of space optimization. A 24" x 24" vertical post rack takes up less than half the floor space of a standard 3-tier horizontal rack. By storing dumbbells vertically (handle pointing up), you rely on the small footprint of the handle rather than the sprawling length of the dumbbell heads. This leaves significantly more open floor area for setting up an adjustable bench for dumbbell pulldowns or laying down a yoga mat for post-workout stretching.
Designing the Layout: The 36-Inch Rule and Traffic Zones
Acquiring space-saving equipment is only half the battle; arranging it correctly is where the magic happens. The National Strength and Conditioning Association (NSCA) consistently emphasizes strict safety clearance standards in facility design, a principle that translates perfectly to the home gym.
"Free weight areas require a minimum of 36 inches of clearance on all sides to ensure safe passage and accommodate the natural sway and dropping zones of the lifter." — Adapted from NSCA Facility Guidelines.
To implement this in a micro-gym, follow this step-by-step layout framework:
- Anchor the Perimeter: Push your vertical dumbbell rack and power rack against the walls. Never float a dumbbell rack in the center of the room.
- Establish the "Drop Zone": Leave a 36-inch buffer between the dumbbell rack and your primary lifting platform. If you fail a heavy set of dumbbell presses, you need space to safely drop the weights without them bouncing into the rack's steel legs.
- Create the Mobility Corridor: Ensure a straight, 4-foot wide path from the dumbbell rack to your benching area. This allows you to carry heavy dumbbells to your bench without navigating around kettlebells or plate trees.
- The Overhead Arc Check: Place your bench in the center of the open zone. Lie back and extend your arms fully overhead with an imaginary dumbbell. If your hands are within 24 inches of a wall or rack upright, move the bench forward. This guarantees you have the clearance required for dumbbell pulldowns and skull crushers.
Wall-Mounted and Custom Storage for Micro-Gyms
For those operating in extremely tight spaces—such as a converted closet or a small apartment nook—freestanding racks might still be too bulky. Wall-mounted storage is the ultimate frontier for space optimization.
Heavy-duty steel wall shelves, bolted directly into wooden wall studs (never drywall anchors), can hold 2-3 pairs of lighter dumbbells (5-20 lbs) typically used for isolation work, lateral raises, and rehabilitation. By elevating these weights to chest height, you not only free up the floor but also save your lower back from the repetitive bending required to pick up weights from a low tier.
Pro Tip: Urethane vs. Rubber in Enclosed SpacesWhen buying dumbbells for a small, poorly ventilated room, always choose urethane-coated dumbbells over raw rubber. Cheap rubber dumbbells off-gas volatile organic compounds (VOCs) for months, making a small home gym smell like a tire shop. Urethane is odorless, highly durable, and won't degrade when stored tightly on wall shelves.
Final Verdict: Reclaiming Your Gym Floor
Space optimization isn't just about fitting more equipment into a room; it's about engineering an environment that supports your training goals. By transitioning from sprawling horizontal racks to vertical posts or zero-footprint rack attachments, you can easily reclaim 10 to 15 square feet of prime real estate. This newly freed space allows you to properly position your bench, ensure safe drop zones, and finally execute sweeping, full-range movements like dumbbell pulldowns without the fear of colliding with your storage rack. Invest in vertical density, respect the 36-inch clearance rule, and let your home gym's layout work as hard as you do.
More gear to consider
All reviews
Barbell Collar Setup: Safe Racks and Calves Workout with Dumbbells

Barbell Collars Compared: Leg Lift Over Dumbbell Safety
Dumbbell Pectoral Exercises No Bench: Space-Saving Rack Layouts

Thomas Inch Dumbbell & Kettlebell Layouts: Cast Iron vs Competition

Barbell Collars Compared: Heavy Squats vs Split Squat with Dumbbell
