Setup Guide: Neoprene Dumbbells & Dumbbell T Bar Row
Learn how to install a neoprene dumbbell storage rack and configure your home gym space to safely execute the dumbbell t bar row.

The 2026 Home Gym Standard: Neoprene Hex Dumbbells
As home gym footprints continue to shrink in 2026, maximizing the utility of every piece of equipment is critical. Neoprene-coated hex dumbbells have evolved from light aerobics accessories into foundational strength tools. The synthetic rubber coating dampens noise, protects flooring, and resists moisture, while the hexagonal cast-iron core prevents rolling. However, simply buying a set and dropping them on the floor is a missed opportunity. This complete setup and installation walkthrough will guide you through properly racking your neoprene dumbbells and configuring your space to perform one of the most effective, yet underutilized, back builders: the dumbbell t bar row.
Why Neoprene for this Setup?Unlike bare cast iron or urethane, neoprene offers a high-friction surface that grips rubber flooring and drywall corners without scuffing, making it the ideal anchor weight for corner-based rowing variations.
Phase 1: Unboxing, Inspection, and Off-Gassing
Before assembling your rack or planning your workout space, you must properly prep the dumbbells. Neoprene is a synthetic rubber that requires specific handling upon arrival.
The Rattle Test and Seam Inspection
- Core Integrity: Grip the handle of each dumbbell and shake it vigorously near your ear. A high-quality neoprene dumbbell should be completely silent. Any rattling indicates the cast-iron core has separated from the outer mold, which will cause balance issues during unilateral rows.
- Seam Check: Inspect the molding line running along the edge of the hex bells. Minor flashing is normal, but deep splits or peeling indicate poor vulcanization. Reject any dumbbells with exposed iron.
The 72-Hour Off-Gassing Protocol
Brand new neoprene emits Volatile Organic Compounds (VOCs), resulting in a strong chemical odor. Do not immediately install them in a poorly ventilated basement or bedroom. Unbox the dumbbells and lay them flat on a tarp in a garage or well-ventilated space for 72 hours. Wipe them down with a pH-neutral cleaner (avoid bleach, which degrades the neoprene matrix) to remove factory mold-release agents.
Phase 2: Tiered Rack Installation & Torque Specs
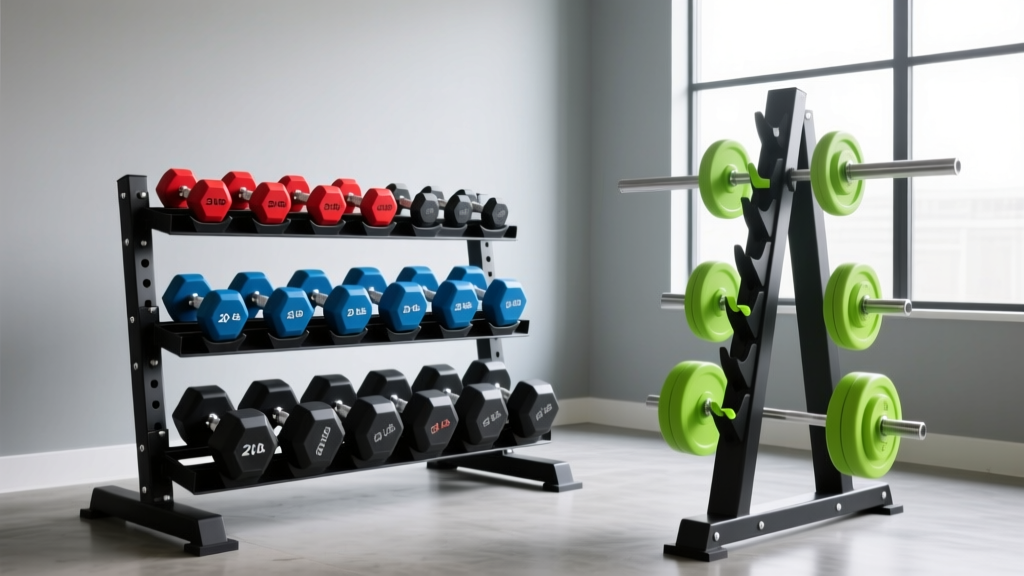
To keep your training area optimized for movements like the dumbbell t bar row, your storage rack must be positioned strategically. A standard 3-tier A-frame or horizontal wall-mounted rack is ideal.
Step-by-Step Rack Assembly
- Clearance Planning: Install the rack at least 24 inches away from your designated rowing corner. This ensures you have enough clearance to load and unload heavy 40-50 lb dumbbells without obstructing your movement path.
- Hardware Sorting: Lay out all M10 or M12 carriage bolts, washers, and nylon-insert lock nuts. Apply a single drop of medium-strength threadlocker (e.g., Loctite 243) to the bolt threads to prevent vibration loosening.
- Torque Specifications: Using a 3/8-inch drive torque wrench, tighten all structural bolts to 35-45 ft-lbs. Over-tightening can crack the powder-coated steel tubing, while under-tightening will cause the rack to sway when you pull heavy dumbbells off the tiers.
- Anti-Slip Padding: Adhere 1/8-inch thick EVA foam tape to the bottom of the rack's feet to prevent it from 'walking' across your rubber mats during heavy lifting sessions.
Phase 3: Configuring the Dumbbell T Bar Row Station
The traditional T-bar row requires a barbell and a landmine attachment. The dumbbell t bar row is a brilliant home gym hack that utilizes a heavy neoprene hex dumbbell (typically 40 to 50 lbs) as the anchor. The flat edges of the hex dumbbell wedge perfectly into a 90-degree corner, and the neoprene coating protects your baseboards from severe impact damage.
Floor and Wall Protection Matrix
| Component | Specification | Purpose |
|---|---|---|
| Floor Matting | 3/4-inch Vulcanized Rubber | Absorbs shock and prevents the dumbbell from sliding on hardwood/concrete. |
| Wall Backer | 1/2-inch Plywood Sheet (2x2 ft) | Protects drywall from the dumbbell head during aggressive eccentric drops. |
| Dumbbell Anchor | 40-50 lb Neoprene Hex | Provides a non-slip, non-marring base pivot point. |
| Handle Interface | 1.5-inch Nylon Lifting Strap | Creates a secure V-grip loop around the dumbbell shaft. |
Step-by-Step Corner Wedge Setup
- Position the Mat: Place your 3/4-inch rubber mat flush into the corner of the room.
- Install the Backer: If you are in a finished room, temporarily mount or wedge a 1/2-inch plywood board against the baseboard in the corner. Never wedge bare iron or even coated dumbbells directly into drywall corners; the point-load pressure will puncture the gypsum.
- Seat the Dumbbell: Stand the 50 lb neoprene hex dumbbell on its end, wedging it tightly into the 90-degree angle where the floor meets the wall.
- Rig the Handle: Take a heavy-duty, 600-lb rated nylon lifting strap. Loop it around the steel handle of the dumbbell, pulling it completely down so it rests flush against the bottom hex bell. If the strap is too high on the handle, it will slide upward during the concentric pull, altering your grip mechanics.
Expert Insight: For a more ergonomic grip, you can thread a specialized T-bar row V-handle (commonly used for cable machines) through the loop of your lifting strap. This allows for a neutral, pronated grip that heavily targets the rhomboids and middle trapezius, aligning with ExRx.net's back exercise biomechanics directory for optimal scapular retraction.
Biomechanics and Execution of the Dumbbell T Bar Row
With your station installed, it is time to execute the movement. According to Mayo Clinic's comprehensive guide to strength training, maintaining a neutral spine during hinged back exercises is paramount for injury prevention.
- The Stance: Straddle the dumbbell. Bend your knees slightly and hinge at the hips until your torso is at a 45-degree angle to the floor. Keep your core braced.
- The Grip: Grab the lifting strap loop (or V-handle) with both hands. Your arms should hang straight down, fully stretching the lats.
- The Pull: Drive your elbows up and back, squeezing your shoulder blades together at the top of the movement. Because the pivot point is a dumbbell rather than a 7-foot barbell, the arc of the movement is slightly shorter, which increases time-under-tension for the mid-back.
- The Eccentric: Lower the weight slowly (3-second negative) until the bottom of the strap loop gently taps the top of the dumbbell handle. Do not let the neoprene dumbbell head crash into your plywood wall backer.
Troubleshooting & Edge Cases
Even with a perfect installation, home gym setups present unique variables. Here is how to troubleshoot common failure modes associated with this specific configuration:
- Strap Slippage: If your nylon strap creeps up the handle during the set, the neoprene coating on the handle is likely too smooth. Fix: Wrap a layer of athletic tape around the dumbbell handle where the strap sits to create a high-friction ridge that locks the strap in place.
- Baseboard Crushing: If you notice dents in your plywood backer board, your eccentric control is lacking, or the dumbbell is too light to act as a stable anchor. Fix: Upgrade to a 50 lb or 60 lb neoprene hex dumbbell to increase the anchor mass, reducing the kinetic transfer to the wall.
- Asymmetrical Pulling: Because a dumbbell handle is shorter than a barbell sleeve, your hands will be closer together (roughly 6-8 inches apart). This narrow grip emphasizes the lats and rear delts more than a wide-grip barbell row. Adjust your elbow path to stay tucked close to your ribs to maximize lat engagement and protect the rotator cuff.
Maintenance and Long-Term Care
To ensure your neoprene dumbbells and rack installation last for years, implement a monthly maintenance routine. Check the torque on your rack bolts every 90 days, as the repetitive loading and unloading of heavy weights can induce micro-vibrations that loosen hardware. Wipe down the neoprene dumbbells weekly with a damp microfiber cloth and a mild dish soap solution to remove sweat salts and chalk residue, which can prematurely dry out and crack the synthetic rubber coating. By treating your equipment with the same precision as your training, your home gym will remain a safe, highly functional space for every variation of the dumbbell t bar row you choose to master.
More gear to consider
All reviews
Bumper vs Iron Plates: Setup for Squats & Sitting Dumbbell Curls

Value Analysis: Loadable Dumbbells & Dumbbell Leg Extension Attachment

How to Train Shoulders With Dumbbells: Hex vs Urethane for Small Gyms

Budget Racks for Good Back Workouts With Dumbbells 2026

Dumbbell Rack Storage & Value: Does Setup Impact Skull Crusher Form?