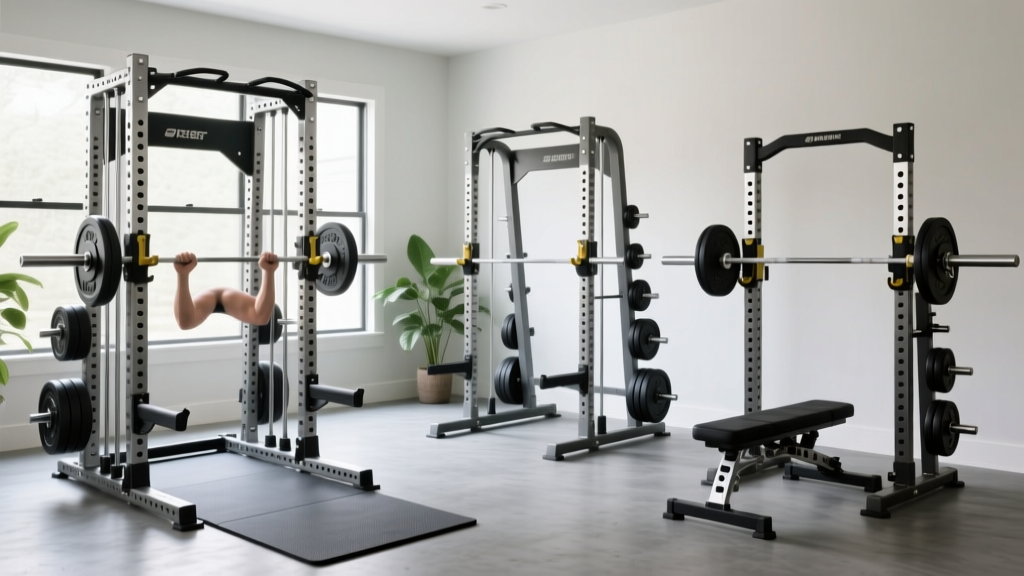
Power Rack vs Squat Rack vs Stand: Beyond the Bar Dumbbell Phase
Upgrade from a bar dumbbell setup safely. We troubleshoot common mistakes and compare power racks, squat racks, and stands for your home gym.

The Evolution: From Bar Dumbbell Routines to Heavy Rack Training
Many lifters begin their home gym journey relying on a convertible bar dumbbell set, adjustable dumbbells, and floor-based movements. While a bar dumbbell setup is fantastic for high-rep hypertrophy, goblet squats, and floor presses, it eventually becomes a bottleneck. Once your working weights for squats and bench presses exceed 150 pounds, transitioning to a standard Olympic barbell and a dedicated steel rack is mandatory for safety, joint health, and progressive overload.
However, upgrading your rig introduces a new set of challenges. The market is flooded with power racks, half racks (squat racks), and independent squat stands. Choosing the wrong one for your space, ceiling height, or training style leads to wasted money and, worse, severe safety hazards. In this troubleshooting guide, we break down the exact differences, highlight the most common mistakes buyers make in 2026, and provide actionable solutions for installation and stability issues.
Comparison Matrix: Power Rack vs. Half Rack vs. Squat Stand
Before troubleshooting, you must understand the structural baseline of each rig type. According to extensive footprint and load testing by Garage Gym Reviews, the choice ultimately comes down to safety enclosures versus floor space.
| Feature | Power Rack (e.g., Rogue R-3) | Half Rack (e.g., Titan T-2) | Squat Stand (e.g., Rogue SML-2C) |
|---|---|---|---|
| Footprint | 48" x 48" (Enclosed) | 48" x 48" (Open Front) | 48" x 48" (Minimalist Base) |
| Steel Gauge | 11-Gauge (3mm) | 11-Gauge (3mm) | 11-Gauge (3mm) |
| Weight Capacity | 1,000+ lbs | 800+ lbs | 600 - 800 lbs |
| Avg Price (2026) | $650 - $900 | $450 - $650 | $350 - $550 |
| Safety Profile | Full enclosure; safest for solo lifting | Front spotter arms; good for squats | Independent arms; high tip-risk for benching |
4 Critical Mistakes Buyers Make When Upgrading
When moving away from a simple bar dumbbell routine, lifters often underestimate the spatial and mechanical requirements of a full-sized rig. Avoid these four common pitfalls:
1. Ignoring Ceiling Height and Pull-Up Bar Clearance
Standard power racks are typically 90 inches tall. If you have standard 8-foot (96-inch) ceilings, a 90-inch rack leaves only 6 inches of clearance. This makes it impossible to perform strict pull-ups without hitting your head or the ceiling drywall. The Fix: Opt for a "Short" rack variant (usually 82 inches tall) or sink the rack into a platform if your subfloor allows.
2. Mismatching Hole Spacing for Attachments
Racks generally feature two types of hole spacing: Standard (2-inch spacing throughout) and Westside (1-inch spacing in the bench press zone). If you buy a squat stand with standard 2-inch spacing, you will struggle to find the exact J-cup height for bench pressing, leading to awkward unracking and shoulder strain. Always prioritize 1-inch Westside spacing in the bench zone for micro-adjustments.
3. Using Squat Stands for Solo Bench Pressing
Independent squat stands are incredibly popular for garage gyms due to their low profile and easy storage. However, the National Strength and Conditioning Association (NSCA) heavily emphasizes the necessity of continuous, secured spotting mechanisms for supine lifts. Squat stands lack a rear crossmember. If you fail a bench press and dump the bar forward, the stands can tip over. The Fix: If you must use squat stands for benching, bolt them to a continuous wooden platform or upgrade to a half-rack with a rear weight-storage crossmember for counterbalance.
4. Overlooking Upright Deflection
Cheaper import racks often use 12-gauge or 14-gauge steel. When loaded with 400+ pounds, these uprights physically bow (deflect), causing J-cups to bind and making reracking dangerous. Always verify the rack uses a minimum of 11-gauge (3mm) steel for the main uprights.
⚠️ Safety Warning: Never exceed the rated capacity of your spotter arms. Many budget squat stands feature a 600 lb total rack capacity, but the independent spotter arms are only rated for 300 lbs. Always check the specific manufacturer specifications for spotter arm limits before attempting heavy singles.Troubleshooting Rig Stability and Hardware Failures
Even high-end racks from premium manufacturers can wobble or feel unstable if assembled incorrectly. Here is how to troubleshoot the most common installation issues.
Problem: The Rack Wobbles Laterally on an Uneven Floor
Garage concrete slabs are rarely perfectly level. A 1/4-inch variance across a 48-inch footprint will cause a power rack to rock diagonally, loosening bolts over time.
- Do not use cardboard or wood shims. These compress under heavy dynamic loads (like dropping a barbell).
- Use steel washers or specialized plastic shims. Place them under the base plates where the gap exists.
- Tighten bolts in a star pattern. Just like changing a tire, tighten the bottom base bolts first, then the top crossmember bolts, alternating sides to pull the frame square.
- Anchor to concrete. Use 1/2-inch Red Head wedge anchors. Drill a 1/2-inch hole through the base plate directly into the concrete, clean the dust out with a shop vac, and torque the anchors to 60 ft-lbs.
Problem: J-Cups are Scratching Your Barbell Knurling
If you upgraded your rig but kept the cheap, metal-on-metal J-cups that came in the box, you are destroying your barbell's center knurl and sleeves. The Fix: Purchase UHMW (Ultra-High Molecular Weight) plastic-lined J-cups. They cost roughly $45 to $60 a pair, feature a high-density plastic insert that grips the bar without scratching the zinc or cerakote finish, and significantly reduce the noise of reracking.
Problem: Spotter Arms Slide or Shift During Use
On squat stands and half racks, the spotter arms rely on friction and gravity. If you bump them while stepping back for a squat, they can slide outward. The Fix: Ensure your spotter arms utilize a positive locking mechanism. Modern 2026 models feature a secondary pin or a screw-down clamp that bites into the upright. If your current arms lack this, wrap heavy-duty grip tape around the upright at the insertion point to increase friction, or upgrade to sandwich-style J-cups that bolt through the upright.
Making the Final Decision for Your Home Gym
Leaving the bar dumbbell phase behind is an exciting milestone in your lifting career. To summarize your next steps:
- Choose a Power Rack if: You train completely alone, perform heavy squats and bench presses, and have the ceiling height and floor space to accommodate a 4x4 footprint.
- Choose a Half Rack if: You want the safety of spotter arms but need open space in front of the rig for Olympic weightlifting variations (cleans and snatches) where a failed lift requires dumping the bar forward.
- Choose a Squat Stand if: You are severely limited on space, need to move the rig between workouts, and primarily focus on squats and overhead presses rather than heavy, unassisted bench pressing.
"The transition from basic adjustable weights to a dedicated barbell rig is where most home gym injuries occur, simply because lifters fail to respect the new safety parameters. A rack is only as safe as its installation and its spotter mechanisms." — Home Gym Engineering Safety Guidelines
By avoiding the common mistakes outlined above and properly troubleshooting your installation, your new rack will provide a safe, stable foundation for decades of progressive overload.
More gear to consider
All reviews
Dumbbell Curl Weight for Beginners: A Neoprene Home Guide
Best Loadable Handles for a 17 lb Dumbbell Setup (2026)

Beyond the Best Workout with Dumbbells: Olympic Barbell Buying Guide
Avoid Fake Bowflex Dumbbells: Barbell Collar and Clamp Guide

EZ Curl Bar vs Straight Bar: Maintenance & Tricep Dumbbell Care
