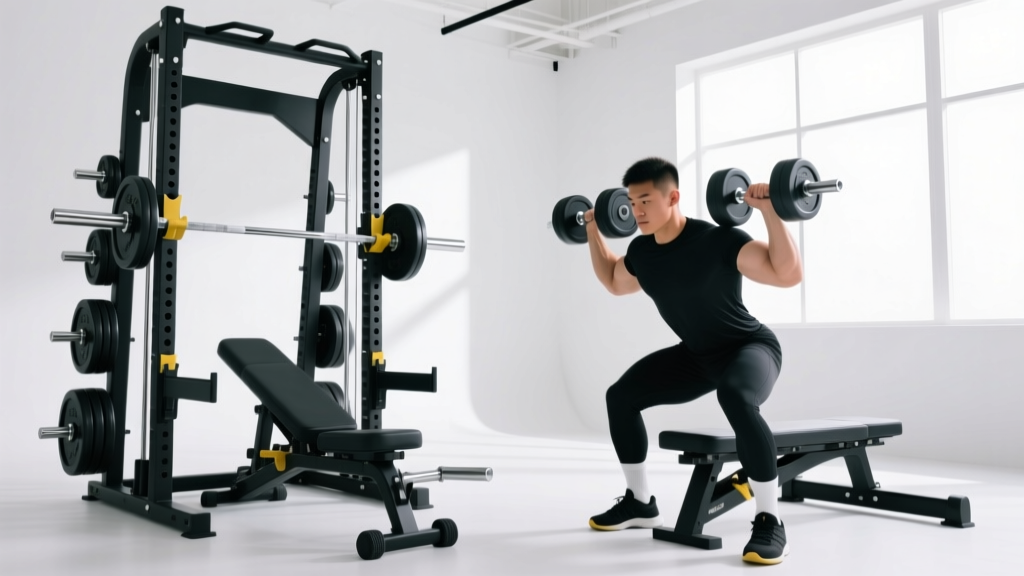
Power Rack vs Squat Stand: Dumbbell Chest Fly Bench Angle Fixes
Troubleshoot your dumbbell chest fly bench angle inside power racks vs squat stands. Fix upright collisions and optimize incline geometry for chest growth.

When building a home gym or upgrading commercial facilities, lifters and facility managers often obsess over barbell clearances, pull-up bar heights, and plate storage. However, a frequently overlooked spatial conflict arises during dumbbell isolation work. If you are running an adjustable bench inside a rack, the dumbbell chest fly bench angle you select is heavily dictated by your rack's footprint, upright placement, and interior depth. A 45-degree incline fly requires vastly different spatial clearances than a flat fly. Choosing the wrong equipment pairing leads to knuckle-scraping uprights, compromised biomechanics, and unsafe spotter arm alignments.
In this troubleshooting guide, we break down the exact geometry of performing incline dumbbell flyes inside power racks, 6-post squat racks, and independent squat stands. We will provide actionable fixes for spatial interference, ensuring your chest isolation remains safe and effective in 2026 and beyond.
The Biomechanical Sweet Spot: Why Angle Dictates Rack Choice
To understand the spatial conflict, we must first establish the biomechanical requirements of the movement. According to kinesiological analyses documented by ExRx, the optimal incline for targeting the clavicular (upper) head of the pectoralis major without shifting the load entirely to the anterior deltoids is between 30 and 45 degrees.
As the bench backrest elevates to achieve this ideal dumbbell chest fly bench angle, the user's head, neck, and torso move significantly closer to the rack's rear or front uprights. Simultaneously, the eccentric (lowering) phase of a chest fly requires a wide, sweeping arc. If the rack's uprights are positioned too close to the user's coronal plane, the dumbbells will strike the steel before the pectoral muscles reach a full stretch, completely negating the hypertrophic stimulus of the exercise.
Power Racks: Maximum Clearance for Steep Inclines
Full 4-post power racks (such as the Rogue R-3, typically priced around $1,250 in 2026) are the gold standard for accommodating steep incline dumbbell work. These racks feature a 49-inch interior width and a deep interior footprint—often 34 to 43 inches depending on the specific model and whether you are using standard or deep crossmembers.
This depth allows you to slide an adjustable bench (like the Rogue Adjustable Bench 3.0) completely inside the cage. When you set the bench to a 45-degree angle, your head rests comfortably between the front and rear uprights. The dumbbells have a completely unobstructed eccentric path, allowing you to achieve a deep stretch without the fear of colliding with the rack.
⚠️ Safety Warning: Spotter Arm Placement on InclinesWhen performing steep incline flyes inside a power rack, standard J-cups and spotter arms must be adjusted. If the bench is set to 45 degrees, the spotter arms should be placed on the rear uprights. They must be positioned high enough to catch the dumbbells if your shoulders fail during the stretch, but low enough not to impede the bottom arc of the fly. Always use UHMW plastic-lined spotter arms to protect the dumbbell handles and reduce bounce if a drop occurs.
Squat Racks & Stands: Navigating Upright Interference
Squat stands (such as the Titan T-3 Short Squat Stand, ~$350) and 6-post squat racks present a unique troubleshooting nightmare for incline dumbbell work. Because the base footprint is compact and the uprights are often positioned directly where the user's head needs to be, setting a steep dumbbell chest fly bench angle becomes physically obstructed.
In a 6-post squat rack, the distance between the front and rear uprights is usually only 18 to 24 inches. If you elevate the bench to 45 degrees, the top of your head will likely press against the rear uprights, forcing you to scoot the bench forward. Scooting forward, however, places your dumbbells directly in line with the front uprights, guaranteeing a collision at the bottom of the movement.
Clearance Matrix: Rack Type vs. Fly Angle Compatibility
| Rack Type | Interior Depth | Max Fly Angle Before Interference | Common Failure Mode |
|---|---|---|---|
| 4-Post Power Rack (Standard) | 24" - 30" | 30° - 45° | Rear base leg hitting crossmember |
| 4-Post Power Rack (Deep) | 34" - 43" | 45° - 60° | Spotter arm misalignment |
| 6-Post Squat Rack | 18" - 24" (between uprights) | 15° - 30° | Dumbbell striking front upright |
| Independent Squat Stands | Variable (User defined) | 45° (if spaced wide) | Base plate tripping hazard |
Troubleshooting Matrix: 4 Common Mistakes and Fixes
If your current rack setup is restricting your movement, do not abandon the exercise. Use these targeted troubleshooting steps to correct the geometry.
1. The 'Flat-Fly' Compromise
The Mistake: To avoid hitting the uprights on a 6-post squat rack, lifters often drop the adjustable bench to a 15-degree incline. This effectively turns the movement into a flat fly, shifting the tension away from the upper pecs and onto the sternocostal head, defeating the purpose of the incline setup.
The Fix: Offset the bench. Instead of centering the bench perfectly between the uprights, shift it 4 to 6 inches to the left or right. This diagonal placement creates just enough extra clearance for the dumbbells to clear the front uprights during the eccentric sweep, allowing you to maintain a true 30-degree dumbbell chest fly bench angle.
2. Eccentric Upright Collisions on Squat Stands
The Mistake: When using independent squat stands as makeshift bench supports, lifters place the stands too close together to mimic a standard rack. During the bottom stretch of the fly, the dumbbells strike the vertical posts.
The Fix: Widen the stands to 54 or 60 inches (measured from the outside edges of the base plates). As noted in the setup guides for Titan Fitness Squat Stands, independent stands can be spaced to any width. By pushing them wider than your wingspan, you create an open-air environment where steep incline flyes can be performed without any lateral obstruction.
3. Base Footprint Lockout
The Mistake: The rear adjustment leg of heavy-duty adjustable benches often features a wide, T-shaped base. When pushed deep into a power rack to accommodate a 45-degree incline, this rear base collides with the rack's bottom rear crossmember, preventing the bench from sitting flush.
The Fix: Upgrade to a bench with a folding rear leg or a tripod base design (such as the Rep Fitness AB-4100 or similar 2026 models). Alternatively, if your power rack has removable rear crossmembers, unbolt the rear bottom bar. Most modern Rogue Fitness Power Racks utilize bolt-together crossmembers that can be safely removed without compromising the structural integrity of the cage during benching movements.
4. Improper Spotter Arm Height for Incline Arcs
The Mistake: Setting spotter arms at the same height as a flat barbell bench press. When performing an incline fly, the dumbbells travel in an arc that dips much lower relative to the user's torso. If the spotter arms are too high, they will block the stretch; if too low, they won't catch a failed rep in time.
The Fix: Set the spotter arms on the rear uprights, exactly 4 inches below your wrist height when you are at the bottom of the fly's stretch. Use uprights with 1-inch hole spacing in the bench zone to allow for micro-adjustments.
"The most common home gym error isn't buying the wrong rack; it's failing to map the rack's interior Z-axis clearance to the user's biometrics during wide-arc dumbbell movements. A 45-degree incline requires a minimum of 38 inches of unobstructed depth behind the user's hips." — FitGearPulse Engineering Team
Expert Configuration: Step-by-Step Setup for Restricted Spaces
If you are locked into a small 6-post squat rack or a shallow wall-mounted rack, follow this step-by-step protocol to salvage your upper-chest isolation work:
- Drop to 30 Degrees: Abandon the 45-degree angle. A 30-degree incline still heavily recruits the clavicular fibers but requires roughly 6 inches less posterior clearance.
- Utilize a Staggered Stance: Plant your feet firmly, but stagger one foot 12 inches behind the other. This stabilizes your pelvis and prevents you from sliding backward down the incline pad, which often causes the head to drift into the rear uprights.
- Switch to a Neutral Grip: Instead of a traditional supinated (palms up) fly arc, rotate your wrists to a neutral (palms facing each other) grip. This narrows the lateral footprint of the dumbbells by 3 to 4 inches on each side, providing crucial clearance against narrow uprights.
- Consider Cable Attachments: If spatial interference remains unsolvable, mount a lat row or cable fly attachment to the rear of your rack. Cable crossovers performed on an incline bench eliminate the need for wide dumbbell arcs entirely, bypassing the upright collision issue while maintaining constant tension on the pectorals.
Final Verdict: Matching Your Rack to Your Biomechanics
Optimizing your dumbbell chest fly bench angle is not just about adjusting the bench pin; it is about understanding the three-dimensional space your body occupies during extreme ranges of motion. If your primary training goal involves heavy, steep-incline dumbbell work, a deep 4-post power rack is a non-negotiable investment. However, if you are limited to squat stands or shallow cages, utilizing offset bench placements, widening stand footprints, and modifying grip orientations will allow you to continue building the upper chest safely and effectively without compromising your equipment or your joints.
More gear to consider
All reviews
Dumbbell Hammer Curl Form: Rubber Hex vs Urethane Test

Budget Storage Racks for Single Dumbbell Workouts: 2026 Value Guide
2026 Trends: Rubber Hex vs Urethane Dumbbell Chop Exercise

Power Rack vs Squat Rack vs Squat Stand & Dumbbell Workout App

Bumper vs Iron Plates vs Homemade Dumbbells: Budget Breakdown
