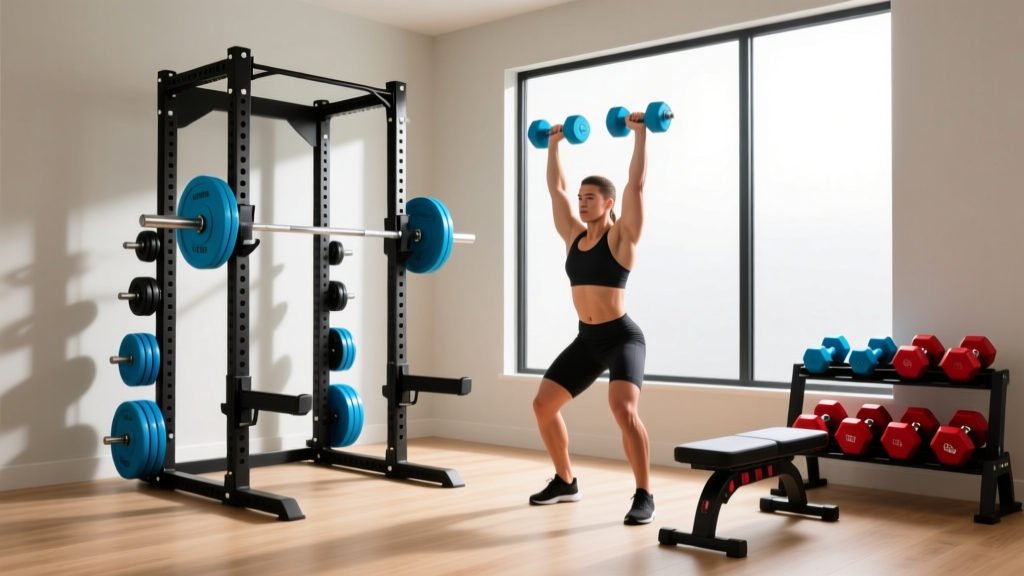
Squat Stand vs Power Rack Setup: Space for the Dumbbell Upward Row
Compare power racks, squat racks, and stands. This installation walkthrough optimizes your home gym layout for the dumbbell upward row and heavy lifts.

The Spatial Dilemma: Rack Footprints vs. Exercise Clearance
Designing a functional home gym in 2026 requires balancing the safety of heavy barbell lifts with the spatial freedom needed for functional accessory movements. When deciding between a power rack, a squat rack, and squat stands, most buyers focus solely on footprint and weight capacity. However, a critical failure point in home gym design is neglecting lateral clearance for exercises like the dumbbell upward row.
The dumbbell upward row is a biomechanically demanding movement. It requires pulling dumbbells from the waist to the clavicle with elbows flared outward at roughly 45 to 90 degrees. An average male with a 72-inch wingspan holding standard 12-inch dumbbells requires approximately 84 inches of clear lateral space to execute the movement safely. If your equipment layout forces you into a confined space, you risk striking the uprights, damaging your drywall, or compromising your shoulder mechanics.
This complete setup and installation walkthrough will guide you through selecting the right rack system and installing it to maximize both heavy lifting safety and accessory movement clearance.
2026 Equipment Matrix: Power Rack vs. Squat Rack vs. Squat Stand
Before unboxing hardware, you must choose the chassis that fits your room dimensions and training style. Below is a comparison of three industry-standard setups based on current 2026 pricing and specifications.
| Equipment Type | Model Example (2026) | Footprint (W x D) | Avg. Price | Dumbbell Upward Row Compatibility |
|---|---|---|---|---|
| 4-Post Power Rack | Rogue RM-3 Monster Lite | 49" x 43" | $895 | Poor (Interior); Excellent (Exterior front) |
| 2-Post Squat Rack | Titan T-2 Power Rack | 48" x 24" | $449 | Good (Can stand between uprights if set wide) |
| Independent Squat Stands | Rep Fitness XS-1100 | Variable (Usually 48"+ apart) | $249 | Excellent (Unrestricted lateral space) |
Step-by-Step Installation Walkthrough
Proper installation ensures your rack can handle dynamic loading and prevents tipping during aggressive re-racking. According to facility layout guidelines published by the National Strength and Conditioning Association (NSCA), structural integrity and safe clearance zones are paramount in any lifting environment.
Phase 1: Subfloor Preparation and Layout Mapping
- Map the Clearance Zone: Use painter's tape to outline the rack footprint on your floor. Then, tape a secondary box extending 36 inches outward from the front and sides. Stand in this outer zone and simulate a dumbbell upward row with a broomstick to verify you have full elbow clearance before assembling the rack in that exact spot.
- Install Subfloor Matting: Lay down 3/4-inch thick vulcanized rubber stall mats. Do not assemble the rack directly on bare concrete; the steel base plates will slide under heavy loads, and dropping weights will spall the concrete surface.
Phase 2: Hardware Assembly and Torque Specifications
Whether you are building the Rogue RM-3 or the Titan T-2, the structural integrity relies on proper bolt tension. Most premium racks utilize 5/8-inch Grade 8 hardware.
- Hand-Thread First: Assemble the entire upright and crossmember skeleton by hand-threading all bolts. Do not use a drill or wrench until every bolt is threaded. This prevents cross-threading and ensures the frame squares up naturally.
- Apply Calibrated Torque: Using a calibrated torque wrench, tighten all 5/8-inch structural bolts to 85 ft-lbs. Overtightening to 100+ ft-lbs can strip the threads on welded nuts or warp the UHMW plastic lining on the uprights.
- Square the Frame: Measure the diagonal distance from the top-left corner to the bottom-right corner, and compare it to the opposite diagonal. The measurements must be within 1/16th of an inch to ensure the rack is perfectly square.
Phase 3: Anchoring to Concrete
If you are installing a 2-post squat rack or independent squat stands, anchoring is non-negotiable. A 4-post power rack with a 43-inch depth and rear storage saddles can sometimes remain flat-footed, but 2-post systems will tip forward if a barbell is left on the J-cups.
- Drill the Holes: Use a rotary hammer drill with a 1/2-inch carbide-tipped masonry bit. Drill to a depth of 3-1/2 inches through the rubber mat and into the concrete slab.
- Clean the Holes (Critical Step):strong> Use a wire brush and a shop vacuum to remove all concrete dust from the hole. According to Simpson Strong-Tie anchoring specifications, leaving dust in the hole can reduce the pull-out strength of wedge anchors by up to 40%.
- Set the Anchors: Insert 1/2-inch x 3-3/4-inch Red Head wedge anchors. Tighten the nut with a torque wrench to 60 ft-lbs to expand the wedge clip securely against the concrete walls.
Optimizing Weight Storage for Lateral Movements
One of the most common setup mistakes in 2026 is placing weight storage pegs on the front uprights of a squat rack to save space. While this looks organized, it creates a severe hazard for the dumbbell upward row and other frontal accessory work like dumbbell front squats or lateral raises.
Pro-Tip: Always mount weight storage saddles or pegs on the rear uprights of your rack. If you are using a 2-post squat rack that lacks rear uprights, purchase a freestanding weight tree or A-frame rack and position it at least 4 feet behind your primary lifting zone.
For those using independent squat stands (like the Rep Fitness XS-1100), you have the ultimate flexibility. You can widen the stands to 60 inches to allow you to perform the dumbbell upward row between the stands, provided your barbell is long enough (a standard 7-foot Olympic barbell has a 51.5-inch shaft, meaning 60-inch spacing will leave the sleeves resting precariously close to the edge of the J-cups). For safety, keep the stands at 48 inches and perform your dumbbell rows in front of them.
Common Installation Failure Modes and Edge Cases
Even with meticulous planning, home gym installations frequently encounter structural edge cases. Here is how to troubleshoot the most common issues:
1. Uneven Concrete Slabs (The Wobble Effect)
Garage floors are rarely perfectly level; they are graded toward the door for water runoff. If your power rack wobbles, do not overtighten the bolts to force the frame down. This induces torsional stress on the welds. Instead, use galvanized steel shims (available in 1/16-inch and 1/8-inch thicknesses) under the base plates to level the rack before anchoring.
2. Low Ceiling Clearances
Standard power racks are 90 inches tall. If you have an 8-foot ceiling (96 inches) and factor in 3/4-inch matting, you only have 5.25 inches of clearance. This makes loading bumper plates onto a barbell resting on the top J-cups nearly impossible. If your ceiling is under 96 inches, opt for an 82-inch short rack model. You can still perform the dumbbell upward row comfortably, but you will need to do pull-ups on the floor or use a dedicated wall-mounted pull-up bar.
3. Drywall Strike Zones
When stepping outside the rack to perform a dumbbell upward row, the rearward swing of the dumbbells (if you use momentum or fatigue sets in) can easily punch through standard 1/2-inch drywall. Install 3/4-inch OSB boards or dedicated rubber wall protectors on the wall directly behind your designated accessory lifting zone.
Final Thoughts on Spatial Gym Design
Choosing between a power rack, squat rack, and squat stands is not just about the price tag or the aesthetic; it is about how the equipment integrates with your complete exercise repertoire. By prioritizing lateral clearance for movements like the dumbbell upward row during the initial layout and installation phases, you create a gym space that is both exceptionally safe for heavy barbell loads and highly functional for hypertrophy and accessory work. Measure twice, torque to spec, and respect the clearance zones.
For more detailed specifications on rack uprights and attachment compatibility, refer to the Rogue Fitness RM-3 product documentation to ensure your 2026 setup meets commercial-grade standards.
More gear to consider
All reviews
Rubber Hex vs Urethane: Care for a Dumbbell Chest Workout for Size

2026 Dumbbell Rack Trends: Storage for Dumbbell Russian Twists

Dumbbell Squat to Overhead Press: Cast Iron vs Competition
EZ Curl Bar vs Straight Bar Budget Breakdown & The Bulgarian Split Squat One Dumbbell Alternative
Top Neoprene Dumbbells for Dumbbell Weight Lifting at Home (2026)
