
Squat Stand vs Power Rack: Leg Exercises with Dumbbells for Beginners
Compare power racks, squat racks, and stands. Get a complete 2026 installation walkthrough to maximize space for leg exercises with dumbbells for beginners.

Bridging the Gap: From Dumbbells to the Rack
When programming leg exercises with dumbbells for beginners, spatial awareness is just as critical as load management. Movements like walking lunges, goblet squats, and dumbbell Romanian deadlifts require an open 'runway' of at least 6 to 8 feet. However, as your strength outgrows 50-pound adjustable dumbbells, investing in a power rack, squat rack, or squat stand becomes mandatory for safe progression into barbell work and heavy rack pulls.
The challenge for home gym owners in 2026 is balancing the massive footprint of a full power rack with the open floor space still required for foundational dumbbell movements. This comprehensive setup and installation walkthrough will help you choose the right rig, prepare your floor, and safely anchor your equipment without sacrificing your dumbbell training zone.
Equipment Matrix: Power Rack vs. Squat Rack vs. Squat Stand
Before unboxing hardware, you must select a rig that aligns with your spatial constraints and training goals. Below is a comparison of three industry-standard models frequently used in home gyms.
| Model (2026 Market) | Type | Footprint (W x D) | Avg. Price | Impact on Dumbbell Runway |
|---|---|---|---|---|
| Rogue SML-1 Monster Lite | Squat Stand | 49" x 48" | $425 | Minimal; leaves maximum open floor for lunges and step-ups. |
| Titan T-2 Short Power Rack | Power Rack | 48" x 24" | $499 | Moderate; shallow depth allows bench placement outside the cage. |
| Rep Fitness PR-4000 | Full Power Rack | 47" x 47" | $699 | High; encloses space, forcing dumbbell movements outside the rig. |
According to facility guidelines published by the National Strength and Conditioning Association (NSCA), residential training environments must maintain a minimum of 36 inches of clearance on all sides of a lifting platform to prevent tripping hazards and allow for spotter movement. If your primary focus remains on leg exercises with dumbbells for beginners while slowly introducing barbell squats, a squat stand or a shallow-depth power rack (like the Titan T-2) preserves the open square footage you need.
Phase 1: Subfloor Preparation and Matting
Do not assemble your rack directly on bare concrete or hardwood. The repetitive dropping of heavy dumbbells and barbell plates creates acoustic shockwaves and micro-fractures in residential slabs.
The 2026 Standard Home Gym Floor Stack
- Base Layer: 8mm thick EVA foam or rubber underlayment (acts as a moisture barrier and sound dampener).
- Impact Layer: 3/4-inch (19mm) vulcanized rubber horse stall mats. These typically measure 4x6 feet and weigh roughly 100 lbs each.
- Lifting Surface: 2x4 wooden framing topped with 3/4-inch OSB or plywood, covered by a dedicated rubber mat, creating a raised platform for deadlifts while keeping the rack on the flat mat perimeter.
Beginners frequently use squat stands to hold a bench for heavy dumbbell step-ups or Bulgarian split squats. If the stand is not bolted to the floor or heavily weighted with plate storage on the rear pegs, the lateral shifting of your body weight can tip the uprights. Always anchor squat stands before performing unilateral leg work near the rig.
Phase 2: The Installation Walkthrough
Whether you are building a 4-post power rack or a 2-post squat stand, the mechanical principles of assembly remain identical. Follow this exact sequence to ensure your rack is plumb, square, and structurally sound.
Step 1: Inventory and Hardware Sorting
Lay out all uprights, crossmembers, and hardware on a soft surface (like a moving blanket) to prevent scratching the powder coat. Verify you have the correct Grade 5 zinc-plated bolts. Most modern racks use 5/8-inch or 1-inch diameter hardware. Pro Tip: Use two separate magnetic parts trays—one for long crossmember bolts and one for short accessory bolts.
Step 2: Base Assembly (Leave Loose)
Attach the front and rear crossmembers to the base plates or uprights. Crucial Rule: Only tighten these bolts to about 60% of their final torque. If you fully tighten the base before the uprights are squared, you will introduce a twisting tension that makes inserting the safety spotter arms impossible later.
Step 3: Erecting Uprights and Squaring
- Stand the uprights vertically and loosely attach the top crossmembers.
- Measure the diagonal distance from the top-left corner to the bottom-right corner, and compare it to the top-right to bottom-left measurement.
- Adjust the frame until both diagonal measurements are identical (within 1/16th of an inch).
- Once perfectly square, use a 1/2-inch drive torque wrench or impact driver to fully tighten all structural bolts in a star pattern.
"A rack that is out of square by even a fraction of an inch will cause the safety spotter arms to bind. This prevents you from smoothly racking the barbell after a heavy set of squats, creating a dangerous bottleneck when your legs are fatigued."
— Home Gym Engineering Best Practices
Step 4: Anchoring to the Subfloor
The American College of Sports Medicine (ACSM) emphasizes that environmental stability is a core component of injury prevention in resistance training spaces. An unanchored rack is a severe liability.
- For Concrete Slabs: Use 3/8-inch x 3-inch zinc-plated wedge anchors. Drill a 3/8-inch hole using a hammer drill, vacuum out the concrete dust (essential for the anchor to grip), and torque the nut until the washer compresses fully against the steel base plate.
- For Wooden Platforms: Use 1/2-inch x 4-inch structural lag screws. Pre-drill a 5/16-inch pilot hole through the steel base plate, the rubber mat, the plywood, and into the 2x4 floor joists to prevent splitting the wood.
Phase 3: Integrating Dumbbell Leg Workflows
Once your rack is bolted down, you must configure the surrounding space to maintain your beginner dumbbell routines. Here is how to optimize the layout based on your chosen equipment:
Configuring for the Rogue SML-1 Squat Stand
Because the SML-1 has an open rear profile, you can position an adjustable weight bench directly behind the uprights. This allows you to seamlessly transition from barbell back squats (inside the stand) to heavy dumbbell Bulgarian split squats (using the bench just outside the stand). Keep your dumbbell tree angled at 45 degrees and positioned at least 4 feet behind the rack to allow room to pick up heavy bells without scraping the uprights.
Configuring for the Titan T-2 Power Rack
The T-2's 24-inch shallow depth is a game-changer for small garages. You can leave the bench inside the rack for barbell work, but easily slide it out to the side when it is time for leg exercises with dumbbells for beginners. The open interior footprint gives you just enough room to perform dumbbell goblet squats and stationary lunges inside the cage, utilizing the overhead pull-up bar as a visual centering guide to ensure your posture remains upright.
Final Safety Inspection Checklist
Before loading your first 45-pound bumper plate or picking up your heaviest dumbbells, run through this 5-point inspection:
- Wobble Test: Grip the uprights at chest height and attempt to shake the rig. There should be zero lateral movement.
- Hardware Check: Verify that every bolt has a nylon-insert lock nut or a split washer, and that no threads are exposed past the nut by more than 1/4 inch.
- Spotter Arm Clearance: Insert the safety spotter arms into the lowest and highest possible holes. They should slide in with one hand without requiring upward or downward pressure.
- J-Cup Alignment: Ensure both J-cups are on the exact same laser-cut hole on their respective uprights to prevent the barbell from rolling off at an angle.
- Mat Seams: Check that the rubber stall mats under the rack have not shifted during the bolting process, leaving no exposed concrete where a dropped dumbbell could chip the floor.
By meticulously planning your footprint, executing a precision installation, and respecting the spatial requirements of foundational movements, your home gym will safely support your journey from beginner dumbbell routines to advanced barbell periodization for years to come.
More gear to consider
All reviews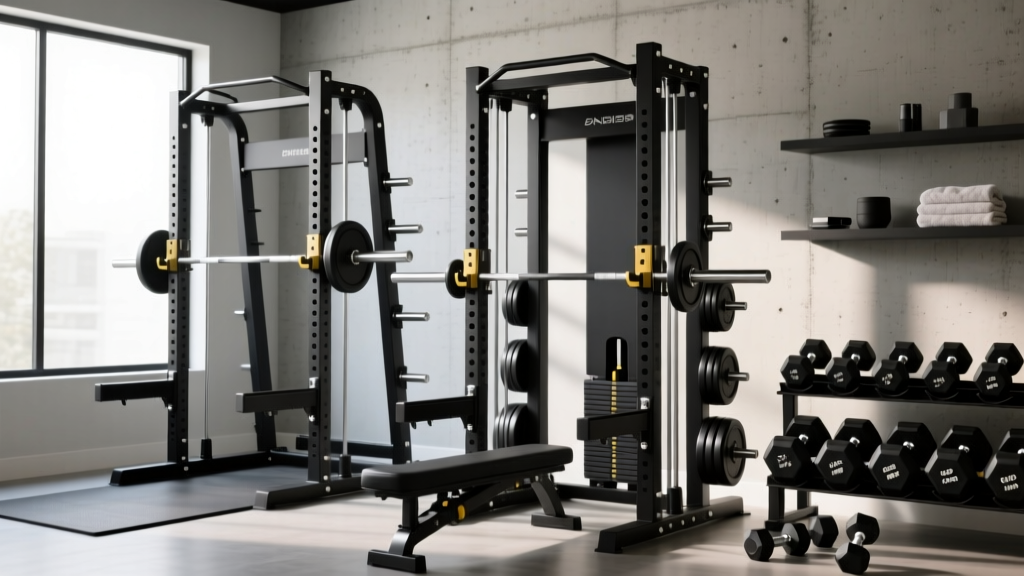
Power Rack vs Squat Stand: Setup for Dumbbell Workout Squats

Beyond the Dumbbell Weight for Women: Barbell Collar Mistakes

Cast Iron vs Competition Kettlebells & Single Dumbbell Exercises for Arms

Barbell Collar Clamp Comparison & Preacher Curl Dumbbell No Bench
EZ vs Straight Bar Maintenance & One Arm Dumbbell Snatch Tips
