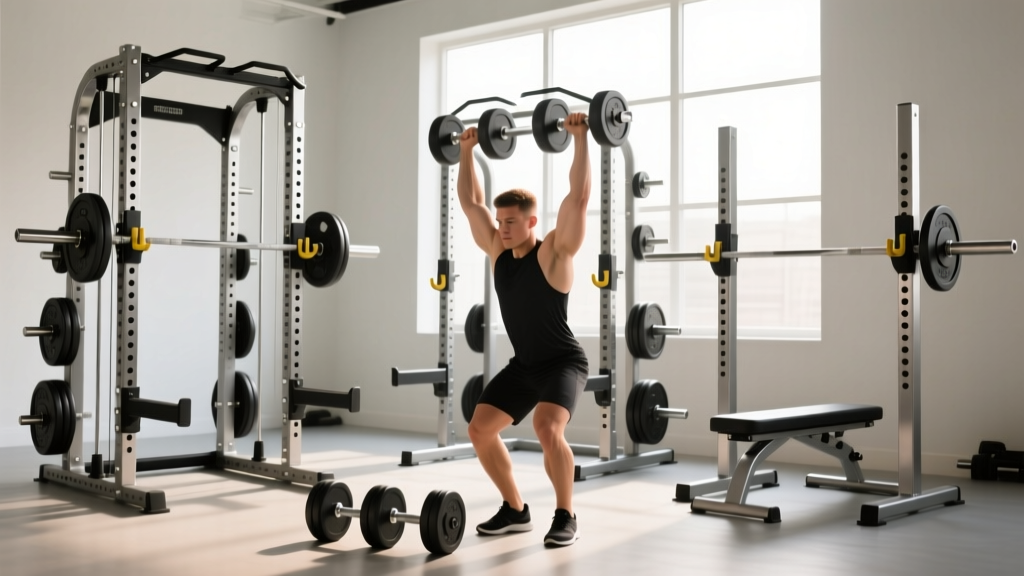
Squat Rack vs Power Rack Setup & Chin Up Alternative with Dumbbells
Compare power rack, squat rack, and squat stand setup. Plus, master the best chin up alternative with dumbbells if your rig lacks a pull-up bar.

The Home Gym Rig Dilemma: Space, Budget, and Back Training
Building a home gym in 2026 requires navigating a mature but highly segmented fitness equipment market. When selecting your primary lifting station, the debate almost always narrows down to three options: a full power rack, a half squat rack, or a pair of squat stands. While your choice heavily dictates your floor plan and budget, it also introduces a hidden programming challenge. Most squat stands and entry-level half racks lack a structurally stable pull-up bar. If you opt for a smaller footprint rig, you must immediately integrate a reliable chin up alternative with dumbbells to ensure your latissimus dorsi and upper back do not suffer from neglect.
This comprehensive walkthrough covers the exact installation protocols for all three rig types, followed by a biomechanically sound dumbbell back-training setup to compensate for missing pull-up bars.
Rig Comparison Matrix: Power Rack vs. Squat Rack vs. Squat Stand
Before unboxing any hardware, you must match the rig to your structural environment. Below is a 2026 market snapshot of the three primary categories, featuring benchmark models like the Rogue R-3, Titan T-2 Half Rack, and Rep Fitness PR-1100 Squat Stands.
| Feature | Full Power Rack (e.g., Rogue R-3) | Half Squat Rack (e.g., Titan T-2) | Squat Stands (e.g., Rep PR-1100) |
|---|---|---|---|
| Footprint (L x W) | 90" x 49" (with spotter arms) | 48" x 48" (base only) | 48" x 48" (base only) |
| Avg. 2026 Base Cost | $1,250 - $1,450 | $550 - $650 | $250 - $320 |
| Pull-Up Bar Stability | Excellent (Multi-grip, bolted) | Moderate (Can sway during kipping) | Poor / Non-Existent |
| Anchoring Required? | Highly Recommended | Mandatory for safety | Mandatory for safety |
| Weight Capacity | 1,000+ lbs | 800 - 1,000 lbs | 600 - 800 lbs |
As noted by the equipment testing team at Garage Gym Reviews, squat stands offer unparalleled space-saving benefits but require strict adherence to bolting protocols and weight limitations to prevent catastrophic tipping during heavy unracking.
Step-by-Step Installation Walkthrough
Improper installation is the leading cause of home gym equipment failure. Follow these exact steps to secure your rig to a standard 4-inch residential concrete slab.
Phase 1: Subfloor Preparation and Layout
- Clear and Clean: Sweep the concrete slab. Any debris left under your flooring will cause uneven pressure points.
- Lay the Mats: Use 3/4-inch thick vulcanized rubber horse stall mats (typically 4x6 feet). Do not use thin interlocking foam tiles; they compress under the point-load of a loaded barbell, causing your rack to shift.
- Position the Rig: Center the rack on the mats. Ensure you have at least 24 inches of clearance on all sides for plate loading and emergency bail-outs.
Phase 2: Drilling and Anchoring
If you are installing a squat stand or half rack, bolting down is non-negotiable. You will need a hammer drill, a 1/2-inch masonry bit, and 1/2-inch wedge anchors or sleeve anchors.
CRITICAL EDGE CASE: When drilling into concrete, you must use a shop-vac to remove the concrete dust from inside the hole. If you leave the dust in the hole, the wedge anchor will grip the dust instead of the concrete wall, leading to a pull-out failure under heavy lateral loads.- Mark the anchor holes through the base plate gussets using a grease pencil.
- Move the rig aside and drill 3.5 inches deep into the concrete at your marks.
- Vacuum the holes thoroughly.
- Move the rig back into place, insert the wedge anchors, and hand-tighten the nuts.
- Use a torque wrench to tighten the nuts to the manufacturer's specification (typically 60-80 ft-lbs for 1/2-inch anchors) until you see one full thread exposed above the nut.
Phase 3: Upright and Crossmember Assembly
When assembling the uprights, always use the provided nylon lock nuts (nylocs). Standard hex nuts will vibrate loose over time due to the acoustic resonance of dropped barbells. Tighten all structural bolts to 50 ft-lbs, but leave the accessory attachments (like J-cups and safety straps) slightly loose to allow for micro-adjustments before final tightening.
The Pull-Up Bar Deficit: Why You Need a Dumbbell Alternative
If your budget or spatial constraints forced you into a pair of squat stands, you likely do not have a safe place to perform vertical pulling movements. Attempting to mount a aftermarket pull-up bar to independent squat stands is incredibly dangerous; the lateral torque of a muscle-up or even a strict chin-up can easily overturn a 150 lb stand.
To maintain structural balance and shoulder health, you must program a chin up alternative with dumbbells. While dumbbells cannot perfectly replicate the exact motor pattern of a bodyweight chin-up, they can effectively target the latissimus dorsi, teres major, and rhomboids through extended range-of-motion horizontal and pullover movements.
Setting Up the Ultimate Chin Up Alternative with Dumbbells
To replace the vertical pulling stimulus of a chin-up, we utilize two primary dumbbell movements. Here is how to set up your bench and dumbbell station for maximum efficacy and safety.
1. The Dumbbell Pullover (The Lat Isolator)
According to biomechanical analyses cataloged by ExRx.net, the dumbbell pullover places the latissimus dorsi under a massive stretch under load, mimicking the initial phase of a chin-up or pull-down.
- The Setup: Place a flat utility bench perpendicular to your squat stands. Select a single hex dumbbell (hexagonal is mandatory to prevent rolling off your chest or the floor). Start with 25-35 lbs to master the groove.
- The Execution: Lie with your upper back and head on the bench, feet planted firmly. Press the dumbbell straight up, cupping the inside plate with both hands. Lower the weight backward over your head, keeping a slight bend in the elbows, until you feel a deep stretch in your lats.
- Safety Edge Case: If you are lifting heavy (50+ lbs), do not let your hips drop too low, as this hyperextends the lumbar spine. Keep your core braced and glutes squeezed.
2. The Heavy Tripod Single-Arm Dumbbell Row
While technically a horizontal pull, the heavy single-arm row allows for the massive load and unilateral focus required to build back thickness when vertical pulling is unavailable.
- The Setup: Position a flat bench parallel to your rig. Place your non-working knee and same-side hand on the bench, creating a stable 'tripod' base. Your spine should be perfectly neutral, parallel to the floor.
- The Execution: Grab a heavy dumbbell (60-100+ lbs for intermediate lifters). Pull the weight toward your hip pocket, not your chest. Driving the elbow toward the hip specifically targets the lower lats, closely mirroring the contraction of a narrow-grip chin-up.
Expert Insight: To truly replace the bicep and brachialis engagement of a chin-up, pair your dumbbell back movements with strict, supinated (underhand) dumbbell hammer curls or Zottman curls immediately following your pullovers.
Real-World Troubleshooting and Maintenance
Even with a perfect installation, home gym rigs require ongoing maintenance. Here are the most common failure modes we see in 2026 home setups:
- Concrete Spalling: If you drilled your anchor holes too close to the edge of a concrete seam or a control joint, the concrete may crack and spall. Always maintain a minimum distance of 4 inches from any concrete edge or seam.
- UHMW Plastic Wear: The plastic liners on your J-cups will eventually wear down from the knurling of your barbell. Inspect them every 6 months. If the metal core becomes exposed, replace them immediately to prevent damaging your barbell's zinc or cerakote finish.
- Dumbbell Bench Tipping: When performing heavy pullovers as your chin up alternative with dumbbells, the weight distribution shifts entirely behind your center of gravity. If using a lightweight, foldable bench, it can tip backward. Always use a solid, welded-steel flat bench with a wide rear footprint for pullovers.
Frequently Asked Questions
Can I safely add a pull-up bar to independent squat stands?
No. Independent squat stands are designed strictly for vertical load-bearing (supporting a barbell). The lateral and rotational forces generated by a human body performing a pull-up will easily exceed the tipping threshold of the stands, even if they are bolted to the floor. Always use a dedicated, structurally integrated pull-up bar on a full rack or half rack.
How many sets of dumbbell alternatives should I do to replace chin-ups?
If your previous programming called for 3 sets of 8-10 chin-ups, replace it with 4 sets of 10-12 heavy dumbbell pullovers supersetted with 3 sets of 10 single-arm rows per side. The goal is to match the total time-under-tension and mechanical tension that the vertical pull previously provided.
Do I need to anchor a full power rack?
While a fully loaded power rack weighs upwards of 350 lbs and has a massive footprint, anchoring is still highly recommended. During dynamic movements, failed reps, or if you eventually add band pegs for accommodating resistance, the upward and lateral forces can cause the rack to 'walk' across your rubber matting over time.
More gear to consider
All reviews
Arm Exercises with Dumbbells Women: Olympic vs Standard Plate Setup

Upper Body Dumbbell Workout Men: Hex vs Urethane Gym Layout Guide

2026 Kettlebell Market: Cast Iron vs Competition & Skull Crusher Data
EZ Curl Bar vs Straight Bar: Replacing the Two-Arm Dumbbell Row
Top 2026 Dumbbell Racks to Support Dumbbell Row Muscles Workouts
