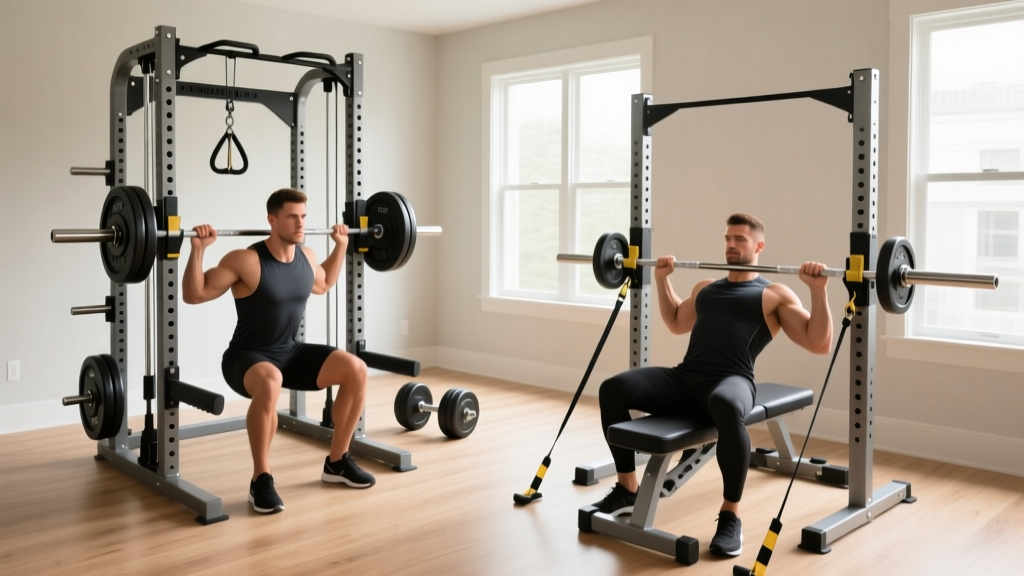
Power Rack vs Squat Stand: Seated Row Dumbbell Alternative Setups
Compare power rack vs squat stand to build the ultimate seated row dumbbell alternative. Step-by-step installation and rigging guide for home gyms.

The Rack Dilemma: Framing Your Back Day
When outfitting a home gym, most lifters obsess over the squat and bench press, often treating back training as an afterthought. While heavy dumbbell rows are a staple, they present distinct biomechanical limitations: grip fatigue often precedes lat failure, and the sheer loading potential is capped by your largest dumbbells. This is why finding a reliable seated row dumbbell alternative is critical for long-term hypertrophy. By leveraging your primary lifting frame, you can engineer a high-tension rowing station that far exceeds free weights.
But which frame is actually suited for the job? The debate between a power rack vs squat rack vs squat stand isn't just about footprint or price; it is fundamentally about structural integrity under horizontal shear forces. In this complete setup and installation walkthrough, we will dissect which rack type supports the best rowing attachments and guide you through the exact installation process to rig a world-class back station.
Structural Comparison: Power Rack vs. Squat Rack vs. Squat Stand
Before unboxing hardware, you must understand how horizontal pulling forces interact with different rack geometries. When you use a rack as a seated row dumbbell alternative—whether via heavy resistance bands, landmine attachments, or DIY pulley systems—you introduce forward-pulling shear forces that vertical squatting does not.
| Feature | Full Power Rack (e.g., Rogue R-3) | Half Rack / Squat Rack (e.g., Titan T-2) | Squat Stand (e.g., Rogue SML-1) |
|---|---|---|---|
| Avg. Footprint | 49" x 49" | 48" x 48" (with stabilizers) | 48" x 48" (base) |
| 2026 Price Range | $1,200 - $1,800 | $450 - $750 | $350 - $500 |
| Horizontal Stability | Exceptional (4-point base) | Good (Requires rear gussets) | Poor (High tip risk) |
| Row Versatility Score | 10/10 (Supports pulleys & landmines) | 7/10 (Supports landmines & bands) | 3/10 (Severe tipping hazard) |
Why You Need a Rack-Based Seated Row Dumbbell Alternative
According to biomechanics data cataloged by ExRx.net, the seated cable row provides continuous tension throughout the entire range of motion, maximizing latissimus dorsi and rhomboid activation without the lower-back stabilization bottleneck inherent to bent-over dumbbell rows. By rigging your rack, you can replicate or exceed this stimulus.
The Top 3 Rack-Configured Row Alternatives
- The Landmine Meadows Row: Utilizes a barbell sleeve and a landmine base attachment. Allows for heavy, unilateral loading with a neutral grip, completely bypassing the grip limitations of thick-handled dumbbells.
- The Banded Seated Low Row: Requires a bench, a heavy loop band, and a low anchor point on the rack. Provides accommodating resistance, making the contraction exponentially harder at peak shortening.
- The DIY Pulley Conversion: Using a functional trainer attachment kit (like the Rogue MAT-6 or Fitness Reality pulley system) mounted to the top crossmembers of a power rack, dropping a cable down to a low pulley footplate.
Complete Installation Walkthrough: Rigging Your Row Station
For this walkthrough, we are assuming the installation of a Full Power Rack or a Bolt-Down Half Rack, as these are the only safe options for heavy horizontal pulling. We will focus on anchoring, squaring, and rigging a landmine and band-peg rowing station.
Phase 1: Subfloor Prep and Concrete Anchoring
If you are generating horizontal pulling forces, gravity alone will not keep your rack grounded. You must mechanically fasten the frame to your slab.
- Locate and Mark: Position the rack over your horse-stall mats. Mark the pre-drilled holes in the base plates directly onto the concrete. Move the rack aside.
- Drill the Slab: Use a rotary hammer drill with a 1/2-inch carbide masonry bit. Drill to a depth of 3.5 inches. Pro-Tip: Do not use a standard hammer drill; it will overheat and fail to achieve the necessary depth for 3/8-inch wedge anchors.
- Vacuum and Clear: Use a shop-vac to remove all concrete dust from the holes. Residual dust will compromise the expansion friction of the anchor.
- Drive the Anchors: Insert 3/8-inch x 3-inch Red Head wedge anchors through the rack base plates. Hand-tighten the nuts, then use a torque wrench set to 35 ft-lbs to expand the wedge into the concrete.
Phase 2: Frame Assembly and Squaring
A rack that is out of square will cause barbell sleeves to bind inside your landmine attachment, creating dangerous friction during Meadows rows.
- Assemble the uprights and crossmembers, but leave all bolts 10% loose.
- Measure the diagonal distance from the top-left corner to the bottom-right corner, and compare it to the top-right to bottom-left measurement.
- Adjust the frame until the diagonals match within 1/16th of an inch.
- Once perfectly square, tighten all Grade 8 hardware to the manufacturer's torque specifications.
Phase 3: Rigging the Row Attachments
Now we convert the frame into the ultimate seated row dumbbell alternative.
- Install the Landmine: Slide your post-landmine attachment (e.g., Titan Fitness Post Landmine) into the lowest hole on the rear upright. Secure it with the hitch pin. Ensure the pivot sleeve is lightly lubricated with 3-in-One oil to prevent squeaking during high-rep sets.
- Mount Band Pegs: If utilizing banded rows, install steel band pegs on the inside of the front uprights, near the base. This keeps the band vector aligned with your hips when seated on a bench.
- Protect the Barbell: Wrap the sleeve of your rowing barbell with a thin layer of athletic tape or use a specialized landmine barbell sleeve. The constant pivoting of bare steel-on-steel will rapidly degrade your barbell's zinc or chrome finish.
Expert Insight: When setting up a bench for landmine rows, do not place it parallel to the barbell. Angle the bench at roughly 15 to 20 degrees away from the landmine base. This ergonomic adjustment aligns the pulling vector with the natural arc of the latissimus dorsi, preventing the shoulder capsule from impinging at the top of the contraction.
Troubleshooting Common Setup Failures
Even with a meticulous installation, home gym builders frequently encounter specific friction points when using a rack for back training. Here is how to solve them:
| Issue | Root Cause | Solution |
|---|---|---|
| Barbell binding in landmine | Uprights are out of plumb or frame is racked (twisted). | Loosen top crossmember bolts, apply downward pressure on the frame to settle it, and retighten. |
| Bands slipping off pegs | Using smooth steel pegs with high-tension loop bands. | Swap to pegs with welded retention lips, or wrap the peg base with friction tape. |
| Bench sliding during rows | Horizontal pull force exceeds the friction of the bench feet on rubber mats. | Bolt the bench feet to a 3/4-inch plywood platform, or place a 45lb plate on the bench's rear stabilizer bar. |
Final Verdict: Which Rack Wins for Back Day?
If your primary goal is to build a versatile, heavy-duty seated row dumbbell alternative, the Full Power Rack is the undisputed champion. Its 4-point enclosed base natively absorbs the horizontal shear forces of banded rows and supports top-mounted pulley systems that can convert the rig into a true cable row machine. While a Half Rack is a viable secondary option—provided you invest in the rear stabilizer extensions and bolt it to concrete—the Squat Stand should be strictly avoided for horizontal pulling exercises due to the severe tipping hazards.
By investing the time to properly anchor, square, and rig your power rack with landmine and band attachments, you eliminate the grip and lower-back bottlenecks of dumbbell rows. The result is a commercial-grade back station capable of driving serious hypertrophy, safely and efficiently, right in your garage.
More gear to consider
All reviews
CAP 40 lb Dumbbell Set vs Quick-Adjust: 2026 Comparison Guide

Olympic vs Standard Plates for Chest-Supported Dumbbell Rows

Rubber Hex vs Urethane: Best Deltoid Raise Dumbbell Value

Overhead Dumbbell Pullover: Olympic vs Standard Plates Compared
Bumper Plate vs Iron Plate Trends: The 200lb Dumbbell Effect
