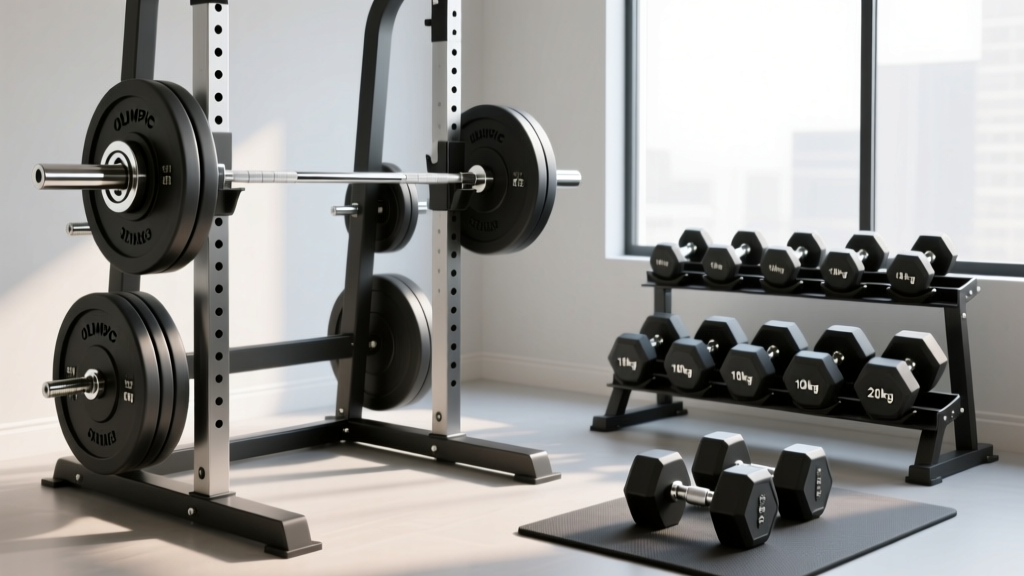
Olympic vs Standard Setup + 20 Minute Arm Workout with Dumbbells
Master your home gym setup with our Olympic vs standard plate installation guide, plus a 20 minute arm workout with dumbbells to test your new rack.

Building a functional, safe, and efficient home gym requires a meticulous approach to both heavy infrastructure and isolated hypertrophy tools. While selecting the right barbell and plates forms the backbone of your strength training, integrating a well-organized dumbbell station is equally critical for accessory work. In this comprehensive 2026 setup and installation walkthrough, we will dissect the structural differences between Olympic and standard weight plate systems, guide you through the physical anchoring of your storage racks, and cap it off with a highly targeted 20 minute arm workout with dumbbells to break in your new equipment and test your rack's ergonomic flow.
Olympic vs. Standard Weight Plates: The Infrastructure Breakdown
Before you unbox a single weight plate or drill into your walls, you must understand the fundamental engineering differences between Olympic and standard plate systems. The choice between the two dictates not only the barbells you can use but also the load-bearing requirements of your storage solutions.
Standard weight plates feature a 1-inch (25.4mm) center hole and are typically paired with lighter-duty, solid steel or chrome-plated barbells. These systems generally max out at a tensile strength of 30,000 to 45,000 PSI, meaning the bars will permanently bend if loaded beyond 200 to 250 pounds. Consequently, standard plate storage trees are designed for lighter loads and utilize 1-inch diameter pegs.
Olympic weight plates, governed by the International Weightlifting Federation (IWF) and widely adopted by commercial gyms, feature a 2-inch (50.4mm) center hole. Olympic bars are engineered with high-grade spring steel boasting tensile strengths of 190,000 PSI or higher, easily supporting 1,000+ pounds. The storage infrastructure for Olympic plates requires heavy-duty A-frames or wall-mounted racks with pegs measuring exactly 1.9 inches in diameter to allow for smooth clearance of the 2-inch plate holes.
| Specification | Standard Plate System | Olympic Plate System |
|---|---|---|
| Center Hole Diameter | 1 inch (25.4mm) | 2 inches (50.4mm) |
| Storage Peg Diameter | 0.95 inches | 1.9 inches |
| Max Safe Barbell Load | 200 - 300 lbs | 1,000 - 1,500+ lbs |
| Plate Material (Common) | Cast Iron / Vinyl-filled | Cast Iron / Urethane / Rubber |
| Calibration Tolerance | +/- 5% to 10% | +/- 1% (Calibrated) to 3% |
Complete Installation Walkthrough: Anchoring Your Storage
Improperly installed weight storage is a leading cause of home gym accidents. A fully loaded Olympic plate tree can easily exceed 800 pounds, creating a massive forward center of gravity. Follow these exact installation protocols based on your chosen system.
Scenario A: Wall-Mounted Standard Plate Tree
Standard plate trees are often wall-mounted to save floor space. Because they hold less weight, drywall anchors are entirely insufficient. You must anchor directly into wooden or steel wall studs.
- Locate the Studs: Use a magnetic stud finder to identify the center of two adjacent wooden studs (typically spaced 16 inches on-center).
- Pre-Drill Pilot Holes: Drill 3/16-inch pilot holes into the center of the studs at the rack's top and bottom mounting brackets.
- Secure with Lag Bolts: Drive 3/8-inch x 3-inch hex-head lag bolts through the brackets and into the studs using an impact driver. Apply a torque of approximately 40 ft-lbs to ensure a flush, secure fit without stripping the wood threads.
Scenario B: Floor-Mounted Olympic A-Frame
Free-standing Olympic A-frames must be bolted to a concrete slab to prevent tipping when a user aggressively pulls a heavy 45-pound bumper plate off the top peg.
- Position and Mark: Place the empty A-frame in its designated zone (leaving at least 24 inches of clearance on all sides for loading/unloading). Mark the four floor-mounting holes with a grease pencil.
- Drill the Concrete: Move the rack aside. Using a hammer drill equipped with a 1/2-inch carbide masonry bit, drill down to a depth of 3.5 inches at each mark. Vacuum out the concrete dust from the holes—this is critical for anchor expansion.
- Set the Wedge Anchors: Insert 1/2-inch x 3-3/4-inch zinc-plated wedge anchors through the rack base plates and into the concrete holes.
- Torque to Spec: Tighten the nuts with a torque wrench set to 90 ft-lbs. The wedge anchors will bite into the concrete, creating a permanent, immovable bond.
Dumbbell Rack Ergonomics and Placement
With your heavy plate infrastructure secured, attention must shift to the dumbbell station. According to guidelines from the National Strength and Conditioning Association (NSCA), equipment placement should facilitate a logical flow from compound movements to isolation exercises. Position your dumbbell rack at least 36 inches away from your bench or squat rack to allow for safe transit with heavy loads.
For optimal biomechanical retrieval, ensure your rack features a 30-degree to 45-degree inclined shelf for the lighter dumbbells (5 to 25 lbs) and a flat or slightly angled tier for heavier pairs (30 to 100+ lbs). This prevents wrist extension strain when lifting heavy hex dumbbells off the rack. Place 3/4-inch thick vulcanized rubber horse stall mats beneath the rack to absorb acoustic shock and protect your subfloor from dropped weights.
The Break-In: 20 Minute Arm Workout with Dumbbells
The best way to test the accessibility, knurling, and ergonomic flow of your newly installed dumbbell rack is to put it through a high-density hypertrophy session. This 20 minute arm workout with dumbbells utilizes antagonist supersets to maximize blood flow (the 'pump'), minimize rest periods, and force you to repeatedly interact with your rack's tier system.
Perform this circuit using a moderate weight where you reach 1 to 2 Reps in Reserve (RIR) by the final rep of each set. Focus on a controlled eccentric (lowering) phase of 2 seconds per rep.
Superset Block A (8 Minutes)
- A1. Dumbbell Hammer Curls (Neutral Grip): 4 sets x 10-12 reps. Focus on keeping the elbows pinned to your ribs. Retrieve the dumbbells from the flat bottom tier of your rack.
- A2. Overhead Dumbbell Triceps Extension (Single Heavy DB): 4 sets x 10-12 reps. Cup the inner plate of a single heavy dumbbell. This tests your grip strength and the clearance space around your rack.
- Rest: 45 seconds between supersets.
Superset Block B (8 Minutes)
- B1. Incline Dumbbell Curls (Supinated Grip): 4 sets x 8-10 reps. Set an adjustable bench to 45 degrees. Let your arms hang fully to stretch the long head of the bicep. Retrieve lighter DBs from the inclined top tier.
- B2. Dumbbell Skull Crushers (Neutral Grip): 4 sets x 10-12 reps. Keep elbows pointing at the ceiling. Lower the weights until they are parallel with your ears.
- Rest: 45 seconds between supersets.
Finisher: Rack Walk-Downs (4 Minutes)
Grab a moderately heavy pair of dumbbells. Perform as many strict bicep curls as possible until failure. Immediately step to the rack, grab the next lighter pair, and curl to failure. Continue 'walking down' the rack through at least 4 weight drops. This brutal finisher validates the organizational logic of your dumbbell rack's weight sequencing.
Long-Term Maintenance and Safety Protocols
A safe gym is a maintained gym. Cast iron standard plates are highly susceptible to oxidation (rust) in humid environments, such as basement garages. Wipe down standard plates monthly with a light coating of 3-in-One oil or a silicone-based rust inhibitor. Urethane-coated Olympic plates, which have become the industry standard in 2026 due to their lack of off-gassing odors compared to cheap rubber, only require a wipe-down with a mild, non-abrasive disinfectant.
Every six months, use a torque wrench to re-check the lag bolts on your wall-mounted standard trees and the wedge anchors on your Olympic A-frames. Vibrations from dropped deadlifts can slowly loosen hardware over time. For more detailed exercise execution cues and safety standards, refer to the American Council on Exercise (ACE) exercise library and safety guidelines.
By meticulously installing your plate storage and validating your dumbbell station with targeted hypertrophy work, you ensure your home gym is not just a collection of gear, but a finely tuned, safe, and highly effective training environment.
More gear to consider
All reviews
Dumbbell Lake Layout: Olympic vs Standard Plate Rack Setup

EZ Bar vs Straight Bar: Try the Incline Dumbbell Triceps Extension
EZ Curl Bar vs Straight Bar Value & Traps Exercises with Dumbbells

Space-Saving Rotator Cuff Dumbbell Workout: Hex vs Urethane

Dumbbell Prone Press Setup: Bumper vs Iron Plate Rack Guide
