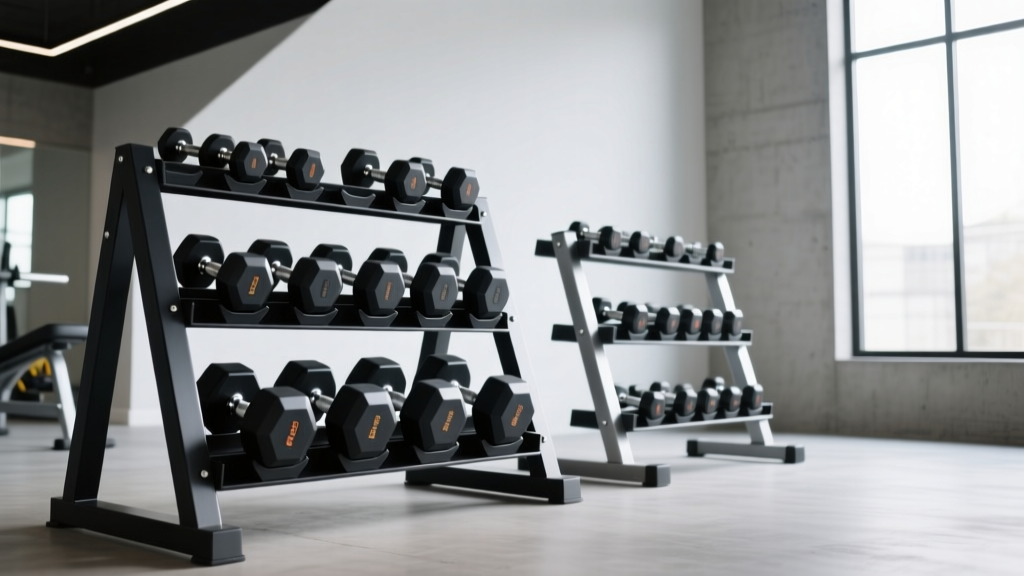
Dumbbell Rack Maintenance: Protecting Weights for Dumbbell Arm Raises
Learn essential dumbbell rack maintenance and storage tips to protect your lighter weights and ensure flawless form during high-rep dumbbell arm raises.

When building a comprehensive home gym, the focus often lands on heavy compound movements, leaving the storage and maintenance of lighter isolation weights as an afterthought. However, if your programming includes high-volume shoulder work, your lightest dumbbells and the top tier of your dumbbell rack endure a unique type of wear and tear. Dumbbell arm raises—whether lateral, front, or rear delt variations—are sweat-inducing, high-rep movements that exclusively utilize the 5 to 25 lb range. Because these weights are constantly grabbed, dropped, and returned to the top shelf of your dumbbell rack and storage solutions, they require a specialized maintenance approach to ensure longevity.
In this guide, we break down the exact maintenance routines, structural inspections, and storage optimizations required to protect your dumbbell rack and the specific weights you rely on for flawless dumbbell arm raises.
The Hidden Toll of High-Rep Isolation Work on Storage Gear
Unlike heavy squats or deadlifts where a single pair of dumbbells is used for a few minutes, a typical superset involving dumbbell arm raises might require you to cycle through three or four different weight pairs in rapid succession. This creates three specific failure modes for your equipment:
- Accelerated Sweat Transfer: High-rep sets elevate your core temperature and increase perspiration. The slightly acidic pH of human sweat (typically between 4.5 and 7.0) transfers directly to the dumbbell handles and the rack's top tray, accelerating oxidation on raw steel and degrading rubberized coatings.
- Micro-Impact Fatigue: Fatigue at the end of a lateral raise set often leads to users carelessly tossing lighter dumbbells back onto the rack rather than placing them down, causing repetitive micro-impacts that warp storage trays over time.
- Knurling Clogging: Chalk and dead skin cells accumulate rapidly in the shallow knurling of lighter dumbbells, turning handles into slippery hazards during overhead arm raises.
Top-Tier Rack Sag: Diagnosing and Fixing Tray Deformation
The top tier of a 3-tier dumbbell rack is designed to hold the lightest weights. Ironically, this tier is often built with thinner steel on budget models because manufacturers assume the load will be minimal. However, the dynamic dropping of weights after a grueling set of dumbbell arm raises can cause 14-gauge steel trays to sag, creating a forward tilt that causes round dumbbells to roll and chip their edges against the rack frame.
Upgrading to a rack with 11-gauge or 7-gauge steel trays, or reinforcing your existing trays, is critical. Below is a comparison of popular storage solutions and their structural resilience.
| Rack Model | Steel Gauge (Tray) | Tray Lip Height | Price Range | Longevity Rating |
|---|---|---|---|---|
| Rogue 3-Tier Dumbbell Rack | 11-Gauge | 2.0 inches | $395 - $450 | Excellent |
| REP Fitness DB-5000 3-Tier | 11-Gauge | 1.75 inches | $349 - $399 | Very Good |
| Budget A-Frame Racks | 14 to 16-Gauge | 1.0 inch | $80 - $150 | Poor (Prone to Sag) |
For detailed specifications on commercial-grade storage, review the Rogue Fitness 3-Tier Dumbbell Rack specifications, which highlight the necessity of reinforced gussets on top-tier trays to prevent forward-leaning deformation.
Preserving Urethane and Neoprene Coatings from Sweat and Friction
The dumbbells you use for arm raises are frequently coated in neoprene or urethane to protect floors and reduce noise. Neoprene, while comfortable to grip during high-rep lateral raises, acts like a sponge for sweat and oils. Over time, this leads to delamination, where the rubber coating peels away from the cast iron core.
Expert Cleaning Protocol for Coated Dumbbells
To prevent the breakdown of neoprene and urethane, avoid harsh degreasers or bleach-based wipes, which dry out the rubber and cause micro-cracking. Instead, use a pH-neutral cleaner.
- Wipe down handles and heads immediately after your workout with a microfiber cloth dampened with a 50/50 mix of distilled water and white vinegar.
- Once a month, scrub the knurling and coating seams with a soft nylon-bristle brush and a drop of mild dish soap.
- Dry completely before returning them to the rack to prevent trapped moisture from rusting the storage tray.
For more comprehensive cleaning routines, consult BarBend's comprehensive gym equipment maintenance guide.
Ergonomic Storage Layouts for Seamless Transitions
How you arrange your dumbbell rack directly impacts the physical wear on the equipment. When performing drop sets or supersets involving dumbbell arm raises, you need rapid access to descending weights. If your rack is poorly organized, you end up dragging dumbbells across the steel tray, scratching both the weight and the rack's powder coat.
The 'Arm Raise Zone' Configuration
Dedicate the top tier of your rack exclusively to the 5 lb to 25 lb range. Arrange them in strict 5 lb increments from left to right. If you use 2.5 lb increments for micro-loading your shoulder isolation work, invest in a secondary, smaller single-tier wall-mounted shelf specifically for these fractional plates and micro-dumbbells. This prevents the top tray of your main rack from becoming overcrowded, which is the primary cause of accidental drops and chipped urethane edges.
Hardware Inspection: Bolts, Welds, and Rubber Feet
A dumbbell rack is subjected to thousands of pounds of cumulative force over its lifespan. The vibration from dropping weights—even light 10 lb dumbbells after a burnout set of front raises—travels through the frame and slowly loosens structural hardware. Implement this quarterly maintenance checklist to ensure your storage solution remains rigid and safe:
- Inspect Tray Welds: Look for hairline fractures where the horizontal tray meets the vertical uprights. This is the most common failure point on budget racks.
- Torque Structural Bolts: Using a torque wrench, check all 3/8-inch and 1/2-inch structural bolts. Most commercial racks require a torque setting of 40 to 50 ft-lbs. Do not overtighten, as this can strip the threads on welded nuts.
- Condition Rubber Feet: The rubber feet on your rack prevent it from walking across your gym floor during loading and unloading. Clean them with a damp cloth and apply a light coat of 3-in-One silicone spray to prevent the rubber from drying out and crumbling.
- Check Tray Lips: Ensure the front lip of the top tray has not been bent downward. If it has, use a rubber mallet and a block of wood to gently tap it back to a 90-degree angle, restoring the safety barrier that keeps your arm raise dumbbells from rolling off.
Expert Verdict: Investing in Longevity
Maintaining your dumbbell rack and storage solutions is not just about aesthetics; it is about preserving the functionality and safety of your gym. The high-rep, sweat-heavy nature of dumbbell arm places disproportionate stress on your lightest weights and the top tier of your rack. By investing in an 11-gauge steel rack, adhering to a strict pH-neutral cleaning protocol for your coated dumbbells, and performing quarterly hardware torque checks, you will extend the lifespan of your equipment by years. Treat your storage gear with the same respect you give your lifting gear, and it will support your training without fail.
More gear to consider
All reviews
Dumbbell Bench vs Bench Press: Loadable Space Optimization

Olympic vs Standard Weight Plates & Tricep Pushdown Dumbbell Guide

Rogue Urethane Dumbbell Setup: Beyond Neoprene for Home Gyms

Power Rack vs Squat Rack vs Stand & Dumbbell Workout Exercise Poster

Best Neoprene Dumbbells for a Dumbbell Pull Up Workout (2026)