
Dead Lift Dumbbells Setup: Neoprene Home Gym Guide
Master your home gym with our dead lift dumbbells setup guide. Learn flooring, rack installation, and biomechanical walkthroughs for neoprene weights.

Introduction: The Neoprene Advantage for Home Deadlifts
Dumbbell deadlifts—specifically Romanian Deadlifts (RDLs) and stiff-legged variations—are foundational movements for posterior chain development. When outfitting a home gym in 2026, neoprene-coated hex dumbbells offer an exceptional balance of floor protection, noise reduction, and grip security. However, executing heavy dead lift dumbbells safely requires more than just purchasing a set of weights. It demands a deliberate environmental installation, strategic rack placement, and a precise biomechanical setup.
This comprehensive walkthrough will guide you through the physical installation of your home gym space, the selection of optimal neoprene equipment, and the exact biomechanical setup required to perform dumbbell deadlifts safely and effectively.
Phase 1: Environmental Installation & Floor Prep
Before you unbox your weights, you must prepare the 'drop zone.' Dead lift dumbbells, especially in the 50 to 80-pound range per hand, generate significant kinetic energy when lowered or dropped. Standard laminate or hardwood floors will crack, and thin foam puzzle mats will compress to uselessness.
Step 1: Selecting and Acclimatizing Rubber Mats
The industry standard for home gym flooring is 3/4-inch thick vulcanized rubber horse stall mats. According to Garage Gym Reviews, these dense mats absorb shock, protect concrete slabs from spalling, and provide a non-slip surface for your feet during heavy hinges.
- Thickness: Exactly 3/4 inch (19mm). Anything thinner will bottom out under heavy dumbbell drops.
- Acclimatization: Rubber expands and contracts with temperature. Leave your mats in the gym space for 48 to 72 hours before laying them flat. Ensure the room is between 65°F and 75°F to prevent future buckling or seam separation.
- Seaming: If laying over smooth concrete, use heavy-duty double-sided carpet tape (like Gorilla or XFasten) along the seams to prevent the mats from shifting laterally when you drag your feet during a deadlift setup.
Step 2: Spatial Clearance Configuration
Dumbbell RDLs require a specific spatial footprint. You need a minimum of 36 inches of lateral clearance (to prevent the dumbbells from striking walls or racks at your sides) and 24 inches of posterior clearance (to allow for a natural hip hinge without your glutes hitting a wall). Mark this 6x4 foot 'lift zone' on your mats using colored tape to ensure you always set up in the safest area.
Phase 2: Rack Selection & Installation
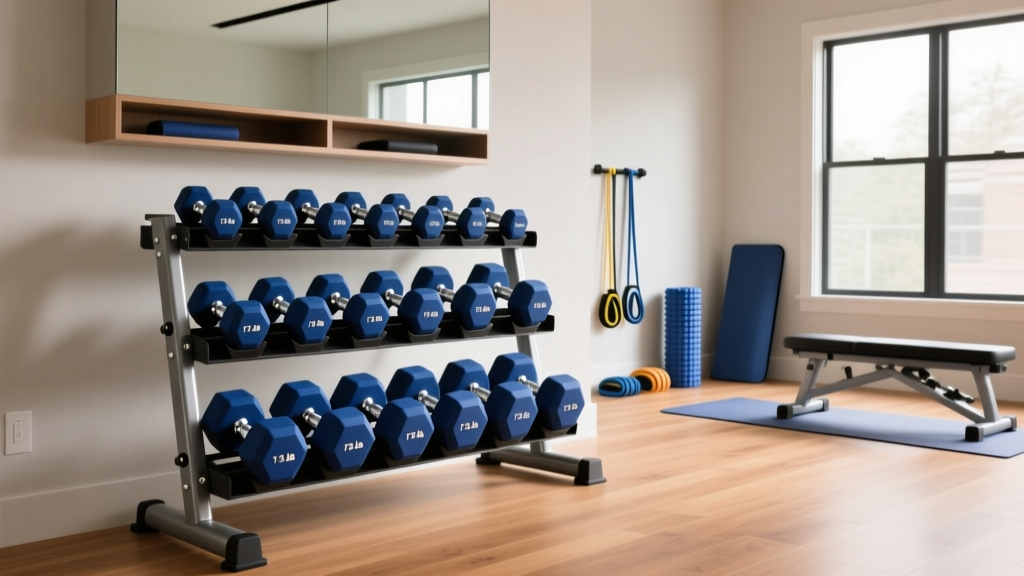
How you store and retrieve your dead lift dumbbells is a critical, often overlooked safety factor. Picking up a pair of 60-pound neoprene dumbbells from the floor or an awkwardly angled rack can cause lumbar shear before your working set even begins.
Comparing Rack Styles for Heavy Neoprene Sets
| Rack Type | Example Model | Pros for Deadlifts | Cons for Deadlifts | Estimated Cost (2026) |
|---|---|---|---|---|
| A-Frame Rack | CAP Barbell A-Frame | Compact footprint; stores many pairs vertically. | Requires deep bending and twisting to retrieve heavy weights; high lumbar risk. | $75 - $95 |
| 3-Tier Horizontal | Yes4All 3-Tier Rack | Weights are stored horizontally; easy to grip and lift with a flat back. | Larger footprint; heavier to assemble. | $110 - $140 |
| Wall-Mounted Shelf | Rogue Wall Stringer | Zero floor footprint; highly customizable height. | Requires drilling into studs; limited weight capacity per shelf. | $150 - $200 |
Phase 3: Selecting the Right Neoprene Hex Dumbbells
Not all neoprene dumbbells are created equal. When specifically sourcing weights for deadlifts, you must prioritize handle geometry and head shape.
Handle Geometry: Chrome vs. Coated
For lighter isolation exercises, a fully neoprene-coated handle is comfortable. However, for heavy dead lift dumbbells, a fully coated handle becomes a slipping hazard once your hands sweat. Look for models like the Yes4All Neoprene Hex or CAP Barbell Neoprene Hex that feature a bare, chrome-plated handle with medium knurling and neoprene-coated heads. The bare metal ensures a secure grip, while the neoprene heads protect your flooring.
The Hex Mandate
Never use round dumbbells for deadlifts. Round weights will roll away when placed on the floor, forcing you to chase them and potentially twisting your spine under load. Hexagonal heads lock the dumbbell in place, ensuring a consistent starting position for every rep.
Pricing and Sizing
In the current 2026 market, expect to pay between $1.50 and $2.20 per pound for high-quality neoprene hex dumbbells. For an effective RDL stimulus, most intermediate lifters will need a pair of 50 lb to 70 lb dumbbells. Budget approximately $160 to $220 for a dedicated heavy pair.
Phase 4: The Biomechanical Setup Walkthrough
With your environment installed and equipment selected, the final 'setup' is your physical positioning. The dumbbell RDL differs significantly from the barbell RDL. According to biomechanical data from ExRx, the dumbbell variation alters the center of mass and requires a specific tracking path to protect the lumbar spine.
Step-by-Step Execution Setup
- The Retrieval: Approach your horizontal rack. Hinge at the hips, brace your core, and grip the dumbbells. Stand up using a deadlift motion, keeping the weights close to your shins.
- The Stance: Position your feet hip-width apart (narrower than a barbell deadlift). Point your toes straight ahead or slightly outward (max 10 degrees).
- The Grip & Positioning: Hold the dumbbells with a neutral grip (palms facing your thighs). Unlike a barbell which rests in front of you, the dumbbells should rest directly against the lateral seams of your pants.
- The Hinge: Unlock your knees slightly (about a 15-degree bend). Initiate the movement by pushing your hips backward, as if trying to close a car door with your glutes.
- The Tracking: Lower the dumbbells by sliding them down the sides of your legs. Do not let them drift forward. If the dumbbells move away from your legs, the shear force on your lower back increases exponentially.
- The Depth: Descend only until your hamstrings reach their maximum stretch—usually just below the knee or mid-shin. As noted by the Cleveland Clinic, rounding the back to achieve extra depth defeats the purpose of the hip hinge and risks disc injury.
- The Return: Drive your hips forward to return to the standing position. Squeeze your glutes at the top, but avoid hyperextending your lower back.
Expert Tip: 'Think of your arms as mere ropes holding the weight. The biceps and forearms should not initiate the lift. The power comes entirely from the glutes and hamstrings driving the hips forward.' — NSCA Biomechanics Guidelines
Phase 5: Maintenance and Failure Modes
Neoprene is highly durable, but it is not invincible. To ensure your dead lift dumbbells last for years, implement the following maintenance protocols:
Preventing Neoprene Degradation
- UV Exposure: Keep neoprene weights out of direct sunlight. Prolonged UV exposure causes the synthetic rubber to dry out, crack, and eventually peel away from the cast iron core.
- Chemical Cleaners: Never use bleach or ammonia-based cleaners on neoprene. These chemicals break down the molecular bonds of the rubber. Use a simple mixture of mild dish soap and water, applied with a microfiber cloth, to wipe down sweat and chalk after your sessions.
- Impact Failures: While neoprene protects against minor drops, repeatedly dropping 70-pound dumbbells from waist height onto un-matted concrete will cause the neoprene to split at the corners. Always lower the weights with control, or ensure your 3/4-inch rubber mats are properly installed in the drop zone.
Conclusion
Setting up a dedicated space for dead lift dumbbells is an investment in your long-term training longevity. By properly installing 3/4-inch rubber flooring, selecting a horizontal storage rack to protect your lower back, choosing hex dumbbells with bare chrome handles, and adhering to strict biomechanical tracking paths, you transform a simple pair of neoprene weights into a highly effective, safe, and professional-grade home gym station. Take the time to install your space correctly, and the strength gains will follow.
More gear to consider
All reviews
Perfecting the Dumbbell Row for Lats: Rubber Hex vs Urethane

Power Rack vs Squat Rack: Dumbbell Lunges for Beginners Next Step

Best Adjustable Dumbbells for Seated Dumbbell Palms Down Wrist Curls
Complete Home Gym Setup: Racking Your 17.5 Dumbbells

Mastering the Single Arm Dumbbell Bench Press: Neoprene Dumbbell Mistakes & Fixes
