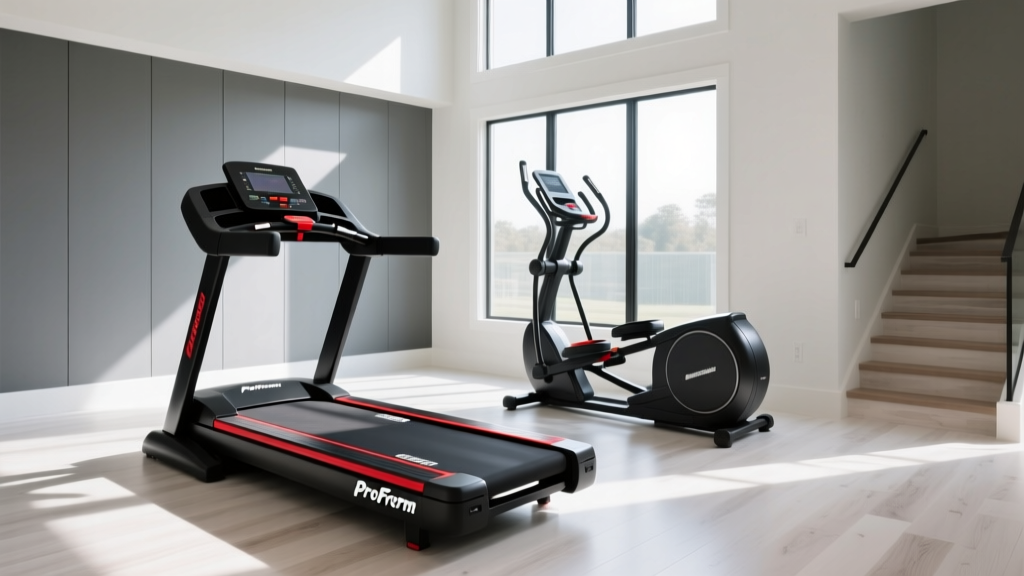
ProForm Carbon TLX Treadmill & Stair Climber Setup Guide
Master your home gym installation with our stair climber machine for home use guide and ProForm Carbon TLX treadmill setup walkthrough.

Pre-Installation: Space, Power, and Flooring Requirements
Building a high-performance cardio zone in 2026 requires more than just unboxing heavy machinery and plugging it in. When configuring a dual-machine layout—specifically anchoring your space with the ProForm Carbon TLX treadmill alongside a heavy-duty stair climber—precision in the pre-installation phase is the difference between a seamless workout experience and a room full of unusable, squeaking metal. This comprehensive stair climber machine for home use guide and treadmill installation walkthrough will ensure your equipment is safe, calibrated, and built to last.
Before you cut a single zip-tie, you must verify your room's spatial and electrical parameters. The Consumer Product Safety Commission (CPSC) mandates strict clearance zones to prevent entrapment and friction burns, yet over 40% of home gym owners ignore these metrics during setup.
The Clearance and Footprint Matrix
| Equipment | Footprint (L x W) | Min. Ceiling Height | Rear Safety Clearance | Weight Capacity |
|---|---|---|---|---|
| ProForm Carbon TLX Treadmill | 76.5' x 30' | 7'0' (Standard) | 30 Inches (Mandatory) | 300 lbs |
| Standard Chain-Drive Stair Climber | 45' x 24' | 8'6' (User Height + 15') | 12 Inches | 250-350 lbs |
For flooring, abandon the cheap interlocking EVA foam puzzle mats. They compress under the dynamic load of a stair climber, causing the machine to wobble and the chain drive to misalign. Invest in 3/4-inch vulcanized rubber horse stall mats or high-density gym tiles. They cost roughly $50 to $80 per 4x6 foot sheet but provide the acoustic dampening and structural rigidity required for heavy cardio equipment.
ProForm Carbon TLX Treadmill Assembly Nuances
The ProForm Carbon TLX treadmill is a staple for home runners, offering a reliable 1.5 CHP motor and a 16x50-inch running belt. However, its folding mechanism and upright console design introduce specific failure points during assembly. According to ProForm Official Support, the majority of 'dead-on-arrival' console tickets are caused by user error during the upright installation phase.
Step-by-Step Upright and Console Installation
- Stage the Base: With the deck folded, attach the front and rear stabilizers. Ensure the rubber leveling feet are threaded all the way in; you will adjust them later once the machine is on its rubber mat.
- Route the Ribbon Cable: This is the most critical step. Feed the console ribbon cable down the left upright. Use the included pull-wire. Do not let the cable rest against the metal edges of the upright tube.
- The Pinch-Point Check: When bolting the uprights to the base, have a second person hold the console. If the ribbon cable gets caught between the steel bracket and the bolt plate, it will sever the microscopic copper traces inside. The screen will turn on, but the incline and speed data will fail.
- Torque the Bolts: Use a torque wrench set to 18-22 Nm for the main upright bolts. Over-tightening can strip the welded nuts inside the frame tube, a catastrophic failure that requires drilling out the hardware.
Stair Climber Machine for Home Use Guide: Step-by-Step Setup
While treadmills rely on belt friction and motor drive, stair climbers utilize a complex system of pedal arms, chain drives, and magnetic or fan-based resistance. Setting up a stair climber requires mechanical empathy. If the frame is not perfectly level, the pedal arms will bind, leading to premature bearing wear and an annoying 'clunking' sound during your glute workouts.
Frame Assembly and Chain Tensioning
Most home stair climbers (such as the popular Sunny Health or Bowflex mini-stepper models) ship with the main drive chain slightly detensioned to prevent damage during freight shipping. If you skip the tensioning step, the chain will skip teeth on the main sprocket within the first 10 minutes of use.
- Base Stabilization: Attach the wide base stabilizers first. Do not fully tighten the hex bolts until all four corners are bolted. Once assembled, rock the machine. If it teeters, adjust the threaded leveling feet on the rear stabilizer until the frame is dead-still on your rubber mat.
- Pedal Arm Installation: Slide the pedal arms onto the main crankshaft. Secure them using the provided cotter pins and nylon lock nuts. Apply a drop of blue Loctite (threadlocker) to the nut threads to prevent them from vibrating loose during high-cadence stepping.
- Chain Deflection Test: Remove the lower plastic chain guard. Press your thumb against the midpoint of the drive chain. The optimal deflection is exactly 1/2 inch (12mm). If it moves more than 3/4 inch, use a 14mm wrench to loosen the idler pulley bracket, slide it downward to increase tension, and re-tighten. If it's too tight, the bearings will overheat and seize.
Expert Insight: The American Heart Association recommends varying your cardio modalities for optimal cardiovascular health. Pairing the steady-state endurance of your ProForm Carbon TLX treadmill with the high-intensity, low-impact glute isolation of a stair climber creates a perfectly balanced, joint-friendly home gym ecosystem.
Calibration, Testing, and First-Run Protocols
Once both machines are physically assembled, do not immediately jump on for a 5-mile run or a 30-minute stair session. You must perform a dry-run calibration to ensure safety and mechanical harmony.
Treadmill Belt Tracking and Lubrication
Stand beside the ProForm Carbon TLX treadmill, insert the magnetic safety key, and start the belt at 2.0 MPH. Observe the rear roller. If the belt drifts to the left, take the included Allen wrench and turn the left rear adjustment bolt clockwise by exactly one-quarter turn. Wait 10 seconds for the belt to track. Repeat on the right side if it drifts right. Never over-tighten the belt to fix tracking; this will burn out the motor control board. Furthermore, check the belt lubrication. Most modern ProForm decks are pre-lubricated with silicone, but if you see dry spots or hear a high-pitched whining noise, apply 100% pure silicone treadmill lube under the center of the belt.
Stair Climber Resistance Calibration
For magnetic resistance stair climbers, test the tension knob from level 1 to level 10. At level 1, the pedals should move with minimal effort. At level 10, you should feel a distinct, heavy drag without any grinding noises from the magnetic brake pad. If you hear metal-on-metal scraping, the brake pad is misaligned and needs to be re-centered over the flywheel using the side adjustment screws.
FAQ: Dual Cardio Machine Setups
Can I place my stair climber directly behind the ProForm Carbon TLX treadmill?
No. The CPSC requires a minimum 30-inch clear zone behind the rear roller of any treadmill to prevent severe friction burns in the event of a fall. Additionally, you need space to walk around the treadmill to access the stair climber. Maintain at least 48 inches of clearance between the rear of the treadmill and the front of the stair climber.
How do I prevent sweat damage to the console electronics?
Both the ProForm Carbon TLX treadmill and most stair climbers feature capacitive touchscreens or membrane buttons that are highly susceptible to saline corrosion. Keep a microfiber towel draped over the console when not in use, and wipe down the handrails and screen with a damp (not wet) cloth and a mild, non-ammonia cleaner after every session. Never spray cleaner directly onto the console.
Do I need to recalibrate the incline on the treadmill after moving it?
Yes. If you fold, move, and unfold the ProForm Carbon TLX treadmill, the internal potentiometer that measures incline angle can lose its zero-point. To recalibrate, enter the machine's engineering menu (usually by holding the 'Incline Up' and 'Speed Down' buttons simultaneously while inserting the safety key), select 'Calibrate Incline', and let the machine cycle from 0% to 10% and back down without standing on the belt.
More gear to consider
All reviews
HealthRider SoftStrider Treadmill vs Modern Stair Climbers: 2026 Guide

How to Get Rid of Old Treadmill & Switch to a Stair Climber

Nautilus T614 Treadmill Review: Expert Belt Maintenance Guide

Exercise Bike vs Treadmill: Folding Small-Space Budget Review
Stair Climber Guide: Bypassing a ProForm Treadmill Incline Problem
