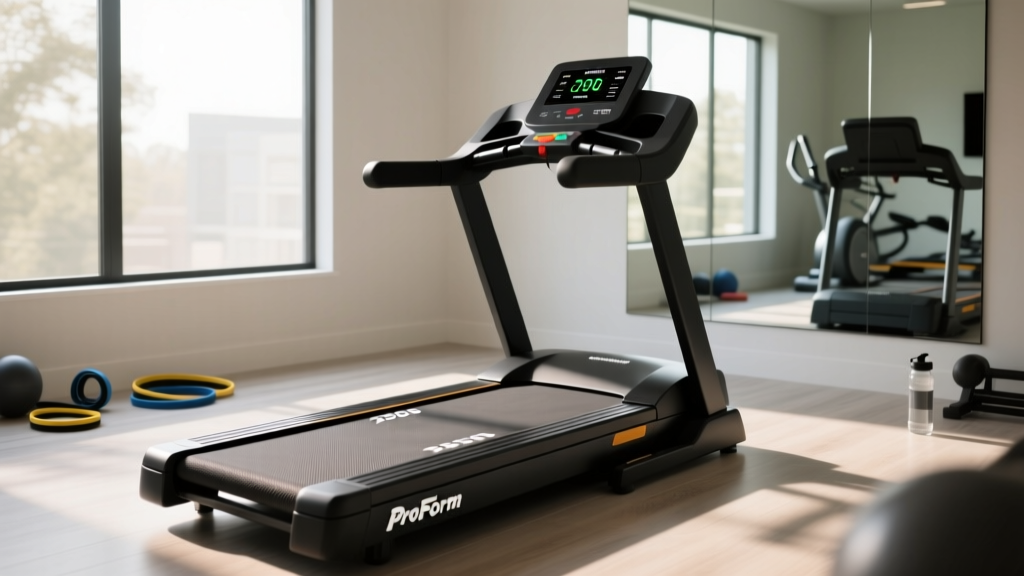
ProForm 2500 Treadmill Setup: Noise Level Comparison & Install Guide
Master your ProForm 2500 treadmill setup. Compare cardio machine noise levels and learn installation tricks to minimize decibel output in your home gym.

The Acoustic Reality of Home Gym Equipment
Building a home gym in 2026 means balancing commercial-grade performance with residential acoustic limits. The ProForm 2500 treadmill is a powerhouse, featuring a 3.5 CHP Mach Z motor and a robust 20-inch by 60-inch tread belt. However, a heavy-duty machine of this caliber (weighing over 240 lbs assembled) can easily become a structural nuisance if installed incorrectly. Footfall impact and motor vibration can transmit through your flooring, disturbing household members or neighbors.
This complete setup and installation walkthrough is specifically engineered to minimize the decibel (dB) output of your machine. By treating the installation process as an acoustic engineering project, you can optimize the ProForm 2500 treadmill to run whisper-quiet, while understanding exactly how its noise profile compares to other popular cardio machines on the market.
Baseline Data: Cardio Machine Noise Level Comparison
Before unboxing, it is crucial to understand where a high-end treadmill sits on the acoustic spectrum compared to other cardio equipment. The figures below represent average decibel levels measured at the user's ear level during a standard 6.0 mph pace (or equivalent moderate effort), assuming proper installation on a rubber mat over a concrete subfloor.
| Machine Category | Model Example | Avg. Noise (6 mph / Mod. Effort) | Primary Noise Source |
|---|---|---|---|
| Heavy-Duty Treadmill | ProForm 2500 Treadmill | 65 - 70 dB | Motor hum, footfall impact, belt friction |
| Entry-Level Treadmill | Generic 2.0 HP Folding | 72 - 78 dB | Motor strain, deck slapping, plastic rattling |
| Elliptical Cross-Trainer | NordicTrack FS14i | 45 - 55 dB | Flywheel bearings, pedal arm joints |
| Air Rower | Concept2 Model D | 55 - 65 dB | Air fan resistance (wind noise) |
| Spin Bike | Peloton Bike+ | 40 - 50 dB | Drivetrain whir, magnetic resistance |
According to the American Speech-Language-Hearing Association (ASHA), normal conversation sits around 60 dB, while a vacuum cleaner operates at roughly 70-75 dB. When properly installed, the ProForm 2500 treadmill operates at the lower end of conversational noise, but a poor installation can easily push it into the 80+ dB range due to acoustic resonance and friction. Prolonged exposure to noise above 85 dB can cause hearing fatigue, as noted by the CDC's National Institute for Occupational Safety and Health (NIOSH), making acoustic optimization a matter of both comfort and health.
Phase 1: Subfloor Assessment and Preparation
The single biggest mistake home gym owners make is ignoring the subfloor. The ProForm 2500 treadmill generates low-frequency vibrations from its 3.5 CHP motor and high-frequency impact shock from footfalls.
- Concrete Slabs (Basements/Garages): Concrete does not absorb impact; it reflects it. While the motor won't cause the floor to bounce, the impact noise will travel horizontally through the foundation to adjacent rooms.
- Suspended Wood Floors (Second Story/Living Areas): Wood joists act as an acoustic drum. Without dampening, a 180 lb runner at 7 mph will create a booming, low-frequency thud that is highly disruptive to rooms below.
Action Step: Clean the installation area thoroughly. Even a small piece of gravel or hardened debris trapped under the treadmill footpad will create a persistent clicking sound as the frame flexes during use.
Phase 2: Vibration Isolation and Matting
To achieve the 65 dB baseline listed in our comparison table, you must decouple the treadmill from the subfloor. Do not use cheap, thin PVC mats.
Expert Recommendation: Invest in a 3/8-inch (9.5mm) thick vulcanized recycled rubber mat. The high density of vulcanized rubber specifically targets the low-frequency motor hum, while the thickness absorbs the kinetic energy of footfalls before it reaches the floor joists.
Ensure the mat extends at least 4 inches beyond the perimeter of the ProForm 2500 treadmill's footprint (78" L x 35" W). This prevents the treadmill from "walking" off the mat over time, which alters the acoustic dampening profile.
Phase 3: Assembly and Frame Torquing
Rattling is the hallmark of a poorly assembled cardio machine. The upright masts and console frame of the ProForm 2500 treadmill are subjected to continuous harmonic vibration.
- Upright Installation: When bolting the uprights to the base frame, do not fully tighten the bolts immediately. Leave them at 80% torque.
- Console Alignment: Attach the console and handrails. Ensure the wiring harnesses are routed through the center of the mast to prevent them from slapping against the interior metal tubing during use.
- Final Torquing: Once the entire upper structure is assembled and square, go back and torque all frame bolts to 15-20 ft-lbs. Use a calibrated torque wrench if possible. Hand-tightening with an Allen key often results in uneven tension, leading to metal-on-metal squeaking within the first month of use.
Warning: Over-Tightening the Motor Hood
When reattaching the plastic motor hood cover after inspecting the drive belt, use only hand-tight pressure on the screws. Over-tightening these screws will warp the plastic housing, causing it to vibrate against the metal chassis and create a high-pitched buzzing noise that is often misdiagnosed as a failing motor bearing.
Phase 4: Belt Tensioning and Deck Lubrication
Friction between the tread belt and the wooden deck is a massive source of heat, motor strain, and noise. The ProForm 2500 treadmill features a ProShox cushioning deck, but the belt must be properly lubricated and tensioned to maintain a quiet operation.
The Tension Test
Reach under the center of the walking belt and lift it. You should be able to lift the edge of the belt exactly 2 to 3 inches off the deck.
- Under 2 inches: The belt is too tight. This puts excessive radial load on the motor bearings and front roller, resulting in a mechanical whining noise and premature motor failure.
- Over 3 inches: The belt is too loose. This causes the belt to slip under heavy footfalls, creating a loud "thwack" or slapping sound, and forces the motor to draw excess amperage to catch up.
Applying 100% Silicone Lubricant
Even if the belt feels smooth, factory lubrication is often insufficient for long-term quiet operation. Referencing ProForm's official support and manual documentation, you must use only 100% silicone treadmill lubricant.
- Loosen the rear roller bolts by exactly two full turns on each side.
- Lift the belt and apply a 0.5 oz line of silicone in a zig-zag pattern across the center third of the deck.
- Retighten the bolts by two full turns to restore the 2-3 inch lift tension.
- Run the treadmill at 3.0 mph for 5 minutes to distribute the silicone evenly.
Post-Installation Acoustic Troubleshooting
After completing the setup, run the ProForm 2500 treadmill at 6.0 mph without stepping on it. Listen closely. Then, step on and walk at 3.0 mph. Use a smartphone decibel meter app to verify your noise levels.
- Rhythmic Thumping (Empty Belt): This is usually the belt seam passing over the deck. It is normal for the first 2-3 weeks as the belt seam flattens out. Do not attempt to adjust the tension to fix this.
- High-Pitched Squeal (Under Load): The deck is dry, or you have accidentally used a petroleum-based lubricant which degrades the belt backing. Clean the deck with a mild degreaser and reapply 100% silicone.
- Clunking from the Rear: The rear roller bearings may be dry, or the drive belt (connecting the motor to the front roller) is misaligned. Remove the motor hood and ensure the drive belt sits perfectly centered on both pulleys.
Final Thoughts on Gym Acoustics
Treating the installation of your ProForm 2500 treadmill as a precision engineering task rather than a simple furniture assembly will drastically alter your home gym experience. By understanding the baseline cardio machine noise level comparison and actively mitigating impact and friction through proper matting, torqueing, and lubrication, you ensure that your equipment remains a tool for fitness, not a source of household friction. Take the extra hour during setup to measure, level, and isolate—your ears (and your family) will thank you for years to come.
More gear to consider
All reviews
Walking Pad vs Treadmill: What Does the Treadmill Help With? (2026)

AFG Treadmills Review: Budget Folding Picks for Small Spaces 2026

Rowing Guide: Technique vs Horizon 7.4 AT Treadmill Reviews

Assault Bike vs Air Bike: Budgeting for Hills on Treadmill Cardio

Treadmill Features Comparison & Where to Donate Treadmill Near Me
