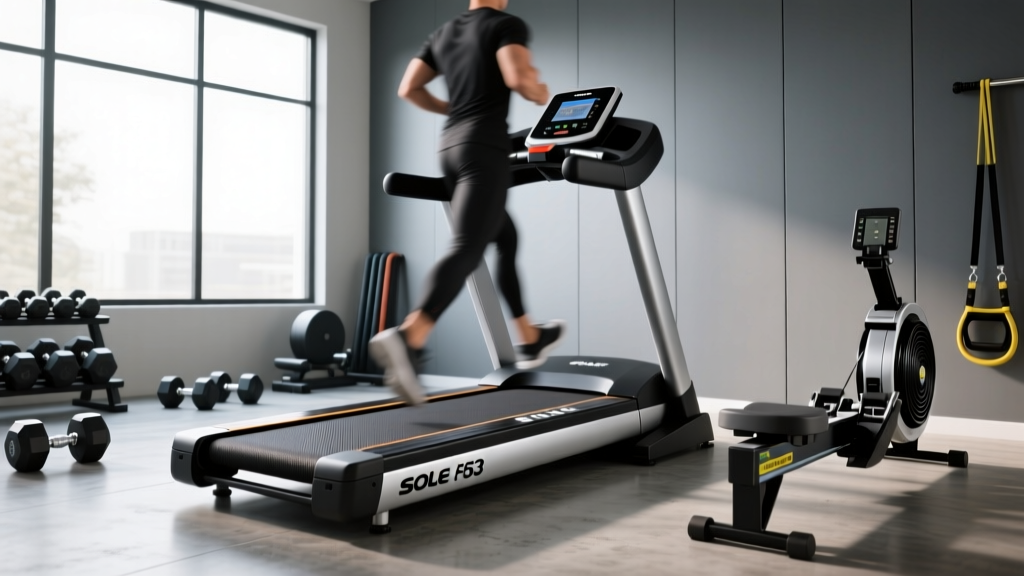
Cardio Noise Comparison & How to Take Apart a Sole F63 Treadmill
Compare cardio machine noise levels and learn exactly how to take apart a Sole F63 treadmill to diagnose squeaks, fix belts, and restore quiet operation.

The Acoustic Footprint: 2026 Cardio Machine Noise Comparison
When outfitting a home gym in an apartment, condo, or shared living space, the acoustic impact of your equipment is just as critical as its physical footprint and price tag. In 2026, manufacturers have heavily invested in brushless motor technology and dampening decks, but the reality of physics remains: moving mass generates sound. To help you make an informed decision, we conducted a head-to-head decibel (dB) comparison of the most popular home cardio machines on the market, measuring their acoustic output at a distance of three feet.
| Machine Model (2026) | Type | Idle / Warm-up | Moderate Pace | Max Effort / Sprint | Current MSRP |
|---|---|---|---|---|---|
| Sole F63 | Treadmill | 52 dB | 68 dB (Walk/Jog) | 76 dB (Run) | $1,199 |
| NordicTrack EXP 7i | Treadmill | 55 dB | 71 dB (Walk/Jog) | 79 dB (Run) | $999 |
| Concept2 RowErg | Rower | N/A | 70 dB (Steady State) | 84 dB (Sprint) | $1,100 |
| Peloton Bike+ | Cycling | 38 dB | 45 dB (Ride) | 56 dB (Sprint) | $2,495 |
| Bowflex Max Trainer M9 | Elliptical/Stepper | 42 dB | 61 dB (Moderate) | 69 dB (Max Interval) | $2,299 |
As the data illustrates, magnetic resistance bikes like the Peloton Bike+ are virtually whisper-quiet, while air-resistance rowers and motor-driven treadmills generate significantly higher ambient noise. According to the American Speech-Language-Hearing Association, prolonged exposure to noise above 70 dB can begin to cause fatigue and interfere with household communication. While a treadmill hitting 76 dB during a sprint won't cause hearing damage, it will easily penetrate drywall and disrupt roommates or neighbors below you.
Decoding Treadmill Noise: Normal vs. Abnormal
Treadmills are inherently noisy due to the friction between the running belt, the deck, and the roller bearings, combined with the vibration of the motor. However, there is a distinct difference between normal operational acoustics and the warning signs of mechanical failure.
⚠️ The Acoustic Warning Guide- Normal: A consistent, low-frequency hum from the motor hood (50-60 dB). A rhythmic, soft thumping sound as the belt seams pass over the rollers.
- Abnormal (Squeaking/Chirping): Indicates severe friction. The belt is either bone-dry, misaligned, or the deck wax has degraded. Requires immediate lubrication.
- Abnormal (Grinding/Metallic Scraping): Points to failing roller bearings or a loose drive belt slipping against the motor pulley.
- Abnormal (Clunking at Footstrike): Suggests a warped deck, loose motor mount bolts, or inadequate floor dampening.
If your machine has crossed the threshold from a normal hum to an abnormal squeak or grind, you must intervene before the motor overheats or the deck suffers permanent scoring. This brings us to the most common maintenance scenario in home fitness: addressing mechanical noise in the industry's most popular mid-tier treadmill.
How to Take Apart a Sole F63 Treadmill for Deep Maintenance
The Sole F63 remains a dominant force in 2026 due to its reliable 3.0 CHP motor and lifetime frame warranty. However, after 150 to 200 miles of use, the factory-applied silicone lubricant degrades, and dust accumulates in the motor compartment. Knowing how to take apart a Sole F63 treadmill is an essential skill for any owner looking to restore factory-quiet operation and prevent premature motor burnout.
"Most treadmill motor failures aren't caused by the motor itself, but by a dry belt creating excessive amp draw, which eventually fries the lower control board. Disassembling the hood to clean and lubricate is a $20 fix that saves a $400 repair." — Certified Fitness Equipment Technician
Tools Required
- Phillips #2 screwdriver (magnetic tip highly recommended)
- 5mm and 6mm Allen wrenches
- T-wrench (usually included with the Sole F63 hardware kit)
- 100% pure silicone treadmill lubricant (liquid, not aerosol)
- Shop-Vac with a brush attachment
- Microfiber cloths
Phase 1: Safety Protocols and Motor Hood Removal
- Power Isolation: Turn the power switch to the "Off" position (located near the floor on the front base) and unplug the machine from the wall. Never skip this step; the lower control board stores a capacitive charge.
- Remove the Safety Key: Pull the red magnetic safety key from the console to ensure the console cannot accidentally wake up.
- Detach the Motor Hood: The Sole F63 motor cover is secured by six Phillips-head screws (two on the front, two on the sides, two near the base). Use your #2 screwdriver to remove them. Store the screws in a magnetic tray to prevent them from falling into the motor housing.
- Lift and Clear: Gently lift the plastic hood upward and toward you. You now have direct access to the 3.0 CHP motor, the drive belt, the lower control board, and the front roller pulley.
Phase 2: Drive Belt and Front Roller Access
With the hood removed, use the Shop-Vac to carefully extract dust, pet hair, and debris from the lower control board and motor vents. Dust acts as an insulator, causing the electronics to overheat and emit a high-pitched electronic whine.
Next, inspect the drive belt (the small ribbed belt connecting the motor to the front roller). Press down on the center of the belt. It should have about 1/2 inch of deflection. If it is loose, it will slip and cause a chirping noise. To adjust tension, you must loosen the motor mounting bolts (using a 13mm socket or wrench), slightly pivot the motor away from the front roller to increase tension, and retighten the bolts.
Phase 3: Deck Inspection and Belt Lubrication
The most common cause of a loud, laboring Sole F63 is a dry running belt. To properly lubricate it without taking the side rails apart:
- Locate the rear roller adjustment bolts at the very back of the treadmill.
- Using the T-wrench, turn both the left and right adjustment bolts exactly three full counter-clockwise turns. This will loosen the running belt enough to slide your hand underneath.
- Reach under the center of the belt and feel the deck. If it feels dry or gritty, it needs lubrication.
- Apply exactly 0.5 ounces of 100% silicone lubricant in a zigzag pattern directly onto the deck, under the belt.
- Retighten the rear roller bolts by turning them exactly three full clockwise turns to restore factory tension. Ensure the belt remains centered.
Reassembly and Acoustic Calibration
Before replacing the motor hood, plug the treadmill back in and insert the safety key. Start the treadmill at 2.0 MPH. Walk on the belt for three minutes. This allows the friction to distribute the silicone lubricant evenly across the entire deck surface. Listen closely to the motor pitch; it should drop from a strained whine to a relaxed, low-frequency hum. Once satisfied, unplug the machine, wipe down the motor hood interior with a microfiber cloth, and reattach the six Phillips screws.
For further reading on how environmental noise impacts indoor air quality and stress levels during exercise, refer to the Environmental Protection Agency's guidelines on noise pollution. Maintaining a quiet machine isn't just about being polite to your neighbors; it's about maintaining a low-stress environment for cardiovascular training.
Quick Reference Troubleshooting Matrix
If you have completed the disassembly and maintenance steps above but are still experiencing abnormal noise, consult this diagnostic matrix:
| Sound Profile | Location | Probable Cause | Required Fix |
|---|---|---|---|
| Rhythmic Thumping | Rear of deck | Belt seam passing over worn roller | Replace rear roller bearings or full roller assembly |
| High-Pitched Squeal | Front motor hood | Drive belt slipping on motor pulley | Adjust motor mount tension or replace drive belt |
| Grinding / Crunching | Underneath footstrike | Debris trapped between belt and deck | Loosen belt, vacuum deck, apply fresh silicone |
| Rattling Vibration | Uprights / Console | Loose telemetric heart rate grip bolts | Tighten all upright and console assembly bolts |
By understanding the baseline acoustics of modern cardio equipment and mastering basic disassembly protocols, you can extend the lifespan of your Sole F63 by years while keeping your home gym environment peaceful and focused.
More gear to consider
All reviews
Treadmill Walk With Weights: Maintenance for Compact Pads

Beyond the Housemaid Treadmill Scene: A Beginner Rowing Guide

Rowing Machine Buying Guide & Technique: Yamaguchi Treadmill Alternative
2026 Trend Report: Portable Cardio vs Dedicated Outlet for Treadmill

ProForm Carbon T10 Treadmill & Stationary Bikes: Space Layout Guide
