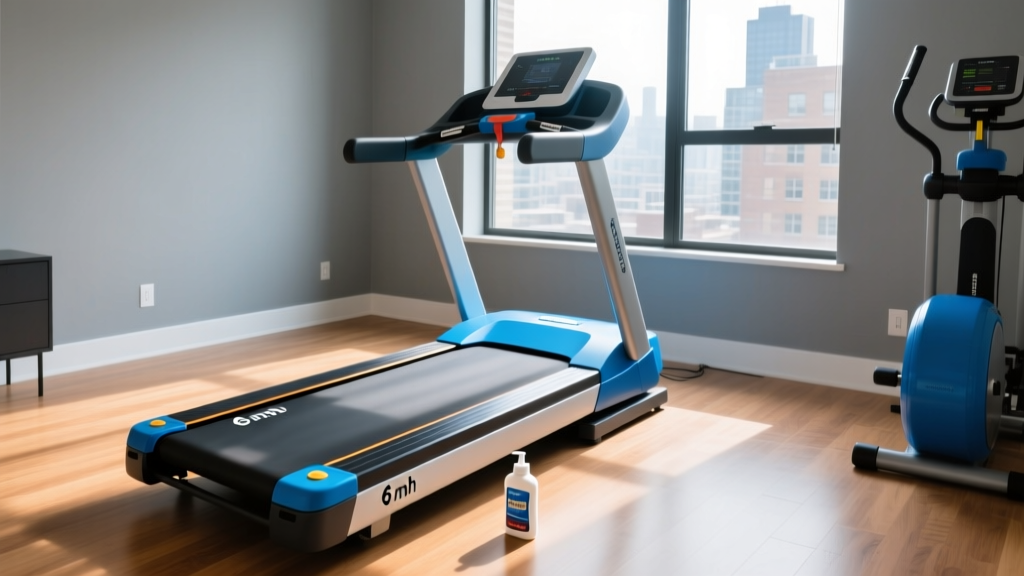
Treadmill Belt Care: Layout Space & Treadmill Speed Miles Per Hour
Optimize your home gym layout for treadmill belt maintenance. Learn clearance specs, lubrication steps, and speed miles per hour friction testing.

Designing a home gym layout is rarely just about aesthetics or maximizing floor space; it is fundamentally about long-term equipment viability. When optimizing your floor plan for cardio machines, the most frequently overlooked factor is the "maintenance envelope." A treadmill shoved flush against a wall or wedged into a tight alcove might save you six square feet of walking space, but it transforms a routine 15-minute belt lubrication and alignment job into a logistical nightmare. Proper spatial planning ensures you can maintain your machine without needing to unplug, disassemble, and deadlift a 250-pound chassis every three months.
The Spatial Geometry of Treadmill Maintenance
Before unboxing a new treadmill, you must account for the clearance required not just for user safety, but for mechanical access. The American College of Sports Medicine and major manufacturers mandate specific clearances, but from a layout and maintenance perspective, the requirements are even more precise.
- Left-Side Clearance (Minimum 24 inches): This is your primary maintenance access point. The belt tensioning bolts, rear roller adjustment screws, and lubrication access zone are almost universally located on the left rear of the deck. If your treadmill is placed with the left side against a wall, you cannot properly align a drifting belt or apply silicone lubricant without moving the entire unit.
- Rear Clearance (Minimum 36 inches): While often cited for safety in case of a fall, the 36-inch rear clearance is critical for motor hood removal. If your drive belt snaps or your motor controller fails, you need enough space to stand behind the machine, remove the Phillips #2 screws from the hood, and access the internal wiring without the machine resting against a baseboard.
- Right-Side Clearance (Minimum 12 inches): The right side typically houses the main power switch and emergency stop key lanyard anchor. It requires less maintenance access but needs enough room to prevent the power cord from being crushed against a wall, which is a common fire hazard in poorly planned layouts.
Step-by-Step Belt Lubrication in Restricted Layouts
Even with an optimized layout, space can be at a premium. Modern 2026 treadmills, such as the Sole F80L or the NordicTrack Commercial series, utilize advanced phenolic resin-coated decks that require specific 100% silicone lubricants. Applying this lubricant correctly in a space-constrained room requires a methodical approach.
CRITICAL WARNING: Never use WD-40, lithium grease, or petroleum-based household lubricants on a treadmill deck. Petroleum products will instantly dissolve the phenolic resin coating and delaminate the cotton/polyester weave of the belt, resulting in a mandatory $120 to $180 belt and deck replacement.- Loosen the Rear Roller: Using a 3/16-inch Allen wrench, turn the left and right rear roller adjustment bolts counter-clockwise by exactly three full turns. This creates a gap between the belt and the deck.
- Apply the Silicone: Squeeze exactly 0.5 to 1.0 ounces of 100% silicone treadmill lubricant in a zig-zag pattern directly onto the center of the deck, reaching as far toward the middle of the machine as your arm allows. In tight layouts, use a lubricant bottle with an extended applicator wand to reach the center without crawling under the console.
- Retension the Belt: Turn the adjustment bolts clockwise by the exact same three turns to restore the factory tension. Do not overtighten; excessive tension increases friction and strains the motor.
- Distribute the Lubricant: Turn the machine on and let it run unweighted at 2.0 mph for three minutes to spread the silicone evenly across the deck surface.
Verifying Friction at Your Target Treadmill Speed Miles Per Hour
Once the belt is lubricated and tensioned, you must verify that the friction has been reduced to safe operating parameters. The most accurate way to do this without specialized diagnostic tools is by measuring the motor's amp draw. To accurately assess post-lubrication friction, you must test the deck at a consistent treadmill speed miles per hour metric—ideally 3.0 mph. At this baseline pace, a healthy, well-lubricated motor on a standard 2.5 HP continuous duty system will draw between 2.0 and 3.5 amps. If your multimeter or smart-plug wattage converter (converted to amps) shows a draw exceeding 6.0 amps at this specific treadmill speed miles per hour setting, your deck is likely warped, the belt is over-tensioned, or the silicone application was insufficient.
Layout Profiles and Lubrication Intervals
Your room's layout and environmental factors directly dictate how often you must perform this maintenance. Enclosed spaces trap particulate matter, which acts as an abrasive between the belt and deck. According to repair data analyzed by the Treadmill Doctor, environmental dust is the leading cause of premature deck wear in home environments.
| Layout Profile | Dust & Debris Risk | Recommended Lube Interval | Expected Deck Lifespan |
|---|---|---|---|
| Open Concept / Hardwood | Low | Every 6 months / 150 miles | 5 - 7 Years |
| Enclosed Alcove / Carpeted | High (Static cling) | Every 3 months / 75 miles | 2 - 3 Years |
| Garage / Basement (Unsealed) | Severe (Humidity + Dust) | Monthly / 50 miles | 1 - 2 Years |
Troubleshooting Belt Friction and Motor Strain
When layout constraints prevent proper maintenance, the resulting friction initiates a cascading failure sequence that is expensive to reverse. Understanding these failure modes highlights why spatial optimization is a financial necessity, not just a design preference.
The Glazed Belt and Delaminated Deck
If a belt is starved of lubricant, the kinetic friction generates heat exceeding 140°F at the deck interface. This heat melts the microscopic wax coating on the underside of the belt, causing it to "glaze." Once glazed, the belt becomes slick, leading to foot-slip at higher speeds. Simultaneously, the heat strips the phenolic coating off the wooden deck. Once the raw MDF (Medium-Density Fiberboard) wood is exposed, it absorbs ambient humidity, swells, and creates a permanent, unfixable ridge down the center of the running surface.
Motor Controller (MCB) Burnout
The Consumer Reports Treadmill Buying Guide frequently notes that motor failures are rarely the result of the motor itself dying, but rather the lower control board failing due to excessive amp draw. When friction spikes, the motor demands more current to maintain the set pace. This excess current generates heat in the MCB's transistors. In 2026, replacing a proprietary motor control board for a premium treadmill costs between $185 and $340, plus the labor or frustration of diagnosing the electrical fault in a cramped space.
"The most common mistake homeowners make is treating the treadmill as a piece of furniture rather than a piece of machinery. If you cannot comfortably kneel beside the left rear quarter of the machine with a vacuum hose and a wrench, your layout is actively destroying your investment." — Lead Technician, National Fitness Equipment Repair Association
Expert Layout Tips for Long-Term Belt Health
To finalize your space optimization strategy, integrate these micro-layout adjustments to extend the life of your belt and deck:
- Implement a Hard Surface Sub-Floor: Never place a treadmill directly on plush carpet. Carpet fibers are pulled up by the static electricity generated by the moving belt, acting as a direct abrasive to the deck. Use a dense, 3/8-inch thick vulcanized rubber equipment mat that extends at least 12 inches beyond the machine's footprint on all sides to catch falling dust and sweat.
- Optimize Airflow for Cooling: The motor hood relies on a front-mounted intake fan to pull cool air over the MCB and motor windings. If your layout places the front of the treadmill facing a wall or a dense cluster of furniture, the motor will recirculate its own exhaust heat, accelerating the degradation of the belt tensioning components.
- Use Casters Strategically: If your room absolutely demands a flush-to-wall layout for daily living, invest in a heavy-duty appliance dolly or a specialized treadmill mat with built-in glide sliders. This allows a single user to pivot the 250lb machine away from the wall by 30 degrees, providing the necessary triangular clearance to access the left-side maintenance zone without fully relocating the unit.
More gear to consider
All reviews
Adidas Ultra Series T 23 Treadmill Noise Troubleshooting & Comparison

Best Stair Climbers 2026: Beyond the Treadmill Bike GIF Hype

2026 Market Trend: Horizon T101 Treadmill vs Stationary Bike Types

Under-Desk Treadmill Tail Porn & Maintenance Guide

Under Desk Treadmill Review: Beyond the Viral Treadmill Video Clip
