
Sled Push vs 2 in 1 Leg Press and Hack Squat Machine: Beginner Guide
Master lower body training with our beginner guide comparing sled push pull workouts to the 2 in 1 leg press and hack squat machine for maximum gains.

The Great Leg Day Debate: Fixed Machines vs. Ground-Based Sleds
When beginners step into a gym to build serious lower-body strength, they are immediately faced with an equipment dilemma. On one side of the weight room sits the highly stable, track-guided 2 in 1 leg press and hack squat machine. On the other side, sitting on a strip of artificial turf, is the humble weight sled. While both are phenomenal tools for leg hypertrophy and strength, they operate on entirely different biomechanical principles.
As we move through 2026, functional ground-based training has seen a massive resurgence in commercial and home gyms. However, fixed-path machines remain staples for targeted isolation. This step-by-step guide will break down exactly how sled push and pull equipment compares to traditional fixed machines, and how you can execute your first sled session safely and effectively.
Biomechanics: Horizontal Force vs. Fixed-Path Isolation
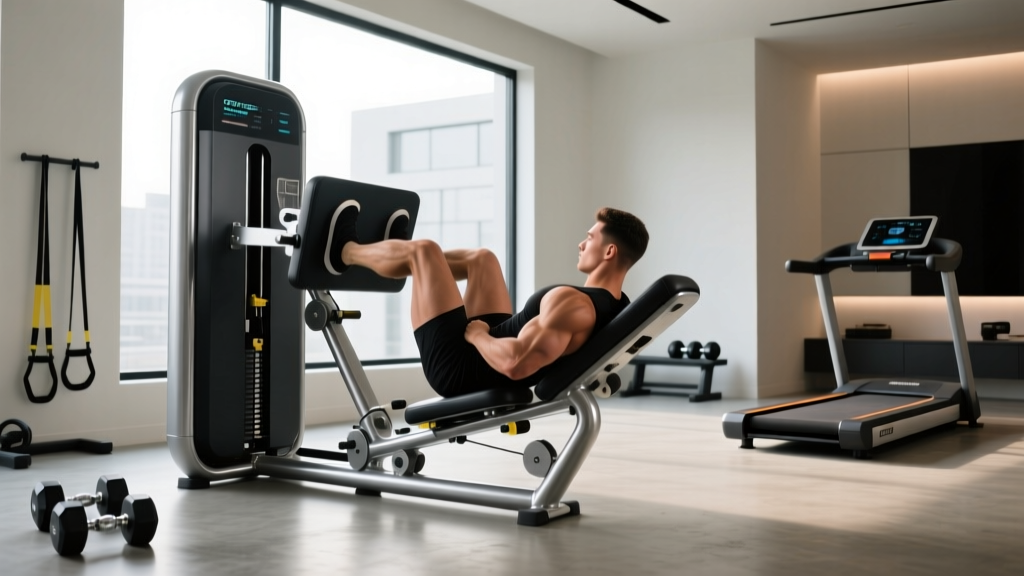
Understanding the physical differences between these tools is critical for programming. A 2 in 1 leg press and hack squat machine locks your torso into a fixed pad, removing the need for core stabilization and allowing you to push massive loads strictly through the quadriceps and glutes along a predetermined diagonal or vertical track.
Sled training, conversely, requires you to generate horizontal force vectors while stabilizing your own spine. According to research published by the National Institutes of Health (NIH), resisted sled pushing heavily recruits the soleus, vastus lateralis, and erector spinae in a coordinated, multi-joint sequence that mimics the mechanics of sprinting and athletic acceleration.
Expert Insight: The Stabilizer Tax
When using a sled, your central nervous system must allocate energy to keep your spine rigid while your legs drive. This 'stabilizer tax' means you will move less absolute weight on a sled than on a hack squat, but the functional carryover to real-world athleticism is significantly higher.
Step-by-Step: Executing Your First Sled Push & Pull
Transitioning to sled work requires a methodical approach. Follow this beginner-friendly protocol to master the movement patterns without risking injury.
Phase 1: The Sled Push (Anterior Chain & Quads)
- Load the Sled: Start with 50% of your body weight. If you weigh 180 lbs, load 90 lbs of bumper plates onto the sled pin.
- Hand Placement: Grip the high vertical poles to emphasize the glutes and hamstrings, or grip the low horizontal handles to target the quadriceps.
- Spine Alignment: Hinge at the hips. Your spine should form a straight 45-degree line from your tailbone to your skull. Do not round your lower back.
- The Drive: Push through the balls of your feet, fully extending the knee and ankle with every step. Keep your eyes focused on the ground two feet ahead of you.
- Distance: Push for 15 to 20 yards at a slow, grinding pace. Rest for 90 seconds before repeating.
Phase 2: The Sled Pull (Posterior Chain & Calves)
- Setup the Harness: Attach a nylon pulling harness to the sled's front tow loop and strap it around your waist or shoulders.
- Stance: Face away from the sled. Lean forward slightly, bending your knees to roughly 60 degrees.
- The March: Drive your knees upward and forward, pulling the sled hand-over-hand if using a rope, or simply marching if using a waist harness.
- Distance: Pull for 20 yards. The load should feel challenging but allow for a continuous, fluid walking pace.
⚠️ Common Beginner Failure Modes
- Achilles Strain: Pushing exclusively on your toes with heavy loads. Ensure your mid-foot is engaged during the drive phase.
- Lumbar Flexion: Allowing the lower back to round during heavy pushes. Brace your core as if anticipating a punch to the stomach.
- Knee Valgus: Letting the knees cave inward. Actively push your knees outward to track over your toes.
Equipment Matrix: Sleds vs. The 2 in 1 Leg Press and Hack Squat Machine
Choosing the right equipment for your home gym or understanding the commercial gear you use is vital. Below is a 2026 market comparison of top-tier sleds versus popular combo machines.
| Feature | Premium Weight Sleds (e.g., Rogue Dog Sled 1.2) | 2 in 1 Leg Press & Hack Squat (e.g., Body-Solid Pro Dual) |
|---|---|---|
| Average Price | $395 - $450 | $1,199 - $1,899 |
| Footprint | ~4 sq ft (Highly mobile) | ~14 sq ft (Fixed footprint) |
| Primary Vector | Horizontal / Multi-planar | Diagonal / Vertical Track |
| Core Demand | Extremely High | Low (Pad supported) |
| Best For | Conditioning, athletic power, joint-friendly rehab | Pure quad hypertrophy, heavy overload, drop sets |
Programming: How to Combine Both for Leg Day
You do not have to choose just one. In fact, combining the raw isolation of a 2 in 1 leg press and hack squat machine with the functional exhaustion of sled work yields incredible hypertrophy and conditioning results. As highlighted in programming guides by BarBend, placing high-stability machine work at the start of a workout and finishing with ground-based sleds is a hallmark of elite athletic programming.
Sample Beginner Hypertrophy & Conditioning Split
- Exercise 1: Hack Squat (Machine) - 3 sets of 8-10 reps. Focus on deep knee flexion and controlled eccentrics. (Rest 2 mins)
- Exercise 2: Leg Press (Machine) - 3 sets of 12-15 reps. Place feet slightly higher on the platform to engage the glutes. (Rest 90 secs)
- Exercise 3: Heavy Sled Push - 4 rounds of 15 yards at 70% body weight. Focus on maximal force output per step. (Rest 2 mins)
- Exercise 4: Harness Sled Pull - 3 rounds of 25 yards at 40% body weight. Focus on continuous tension and hamstring engagement. (Rest 90 secs)
"Machines build the muscle tissue; sleds build the engine that powers it. Use the track to isolate, and the turf to integrate." — Modern Strength & Conditioning Principles
Frequently Asked Questions
Can I use a sled if I have knee pain?
Yes. Sled pushes and pulls are concentric-only movements, meaning there is no eccentric (lowering) phase. Eccentric loading is typically what causes delayed onset muscle soreness (DOMS) and aggravates patellar tendonitis. Many physical therapists use sleds for knee rehab because they build quad strength without the joint shearing forces found in traditional squats.
Do I need a specific type of flooring for sled training?
Absolutely. Dragging a metal sled will destroy standard rubber gym mats or hardwood floors. You need a dedicated strip of artificial turf (typically 15mm to 40mm pile height) or a specialized slick floor if using a friction sled. If you are training at home in a garage, carpet remnants or specialized UHMW plastic sled runners can be used on concrete.
Why not just use the 2 in 1 leg press and hack squat machine for everything?
While the 2 in 1 leg press and hack squat machine is unparalleled for safely pushing to muscular failure without a spotter, it neglects the stabilizing muscles of the core, hips, and ankles. Relying exclusively on fixed machines can lead to strength imbalances and poor force transfer to real-world activities like running, jumping, or carrying heavy objects.
More gear to consider
All reviews
Beyond Leg Press Gym Machines: Leg Extension & Curl Guide 2026

Normatec vs. Field: A Clinically Informed Comparison of Recovery Systems for Athletes and Rehab Professionals

Space Layouts: Squat Racks & Different Kinds of Leg Press Machines
Beyond the Leg Press Machine Description: Home Gym Head-to-Head 2026

Amazon Leg Press Machine Guide: Horizontal vs 45-Degree (2026)
