
Sled Push vs Leg Press Machine Foot Position: A Beginner Guide
Master the sled push and pull with our step-by-step beginner guide. Learn why sled training beats obsessing over leg press machine foot position tweaks.

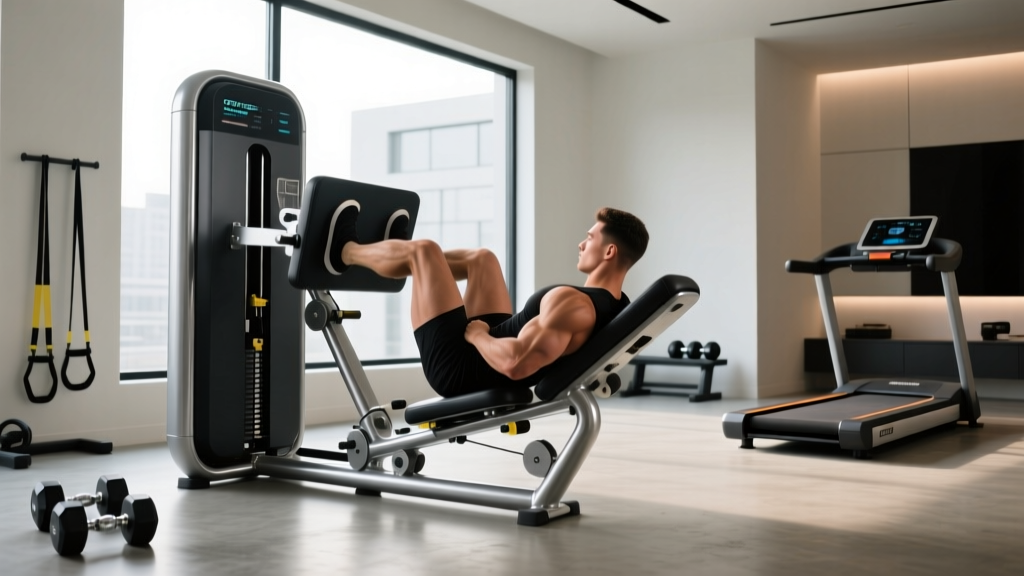
Walk into any commercial gym, and you will inevitably see beginners staring at the 45-degree leg press, mentally reciting a chart they found online about optimal leg press machine foot position. The traditional dogma is rigid: place your feet low and narrow to target the quadriceps, or high and wide to engage the glutes and hamstrings. While this biomechanical theory holds some truth, it forces beginners into a fixed-track movement pattern that often leads to patellofemoral knee pain, hip impingement, and lower back rounding when mobility breaks down.
There is a vastly superior, functional alternative that eliminates the need to obsess over leg press machine foot position entirely: the push/pull sled. Sled training provides a closed-chain, multi-planar leg workout that builds raw strength, bulletproofs joints, and targets every muscle in the lower body without the spinal compression or shear forces of a fixed-track machine. This step-by-step guide will teach you how to master sled equipment for leg training, replacing complex foot-placement math with natural, functional movement.
Expert Insight: The human body is designed to push and pull against resistance through space, not to be locked into a predetermined metal track. Sled training allows your joints to self-organize and track naturally, drastically reducing the risk of the connective tissue injuries commonly associated with heavy, poorly positioned leg presses.The Biomechanical Reality: Fixed Track vs. Free Movement
When you use a leg press, the machine dictates the path of the weight. If your ankle mobility is poor, a low leg press machine foot position will force your heels to lift or your knees to cave inward (valgus collapse) as you reach deep flexion. According to biomechanical analyses of closed-chain exercises published by ExRx.net, altering foot placement on a fixed axis changes the moment arm at the knee and hip joints, which can inadvertently place dangerous shear stress on the ACL and PCL if the lifter lacks the requisite mobility.
The sled, conversely, is a free-moving implement. You dictate the path. If your ankle mobility is limited, your body naturally adjusts your stride length and torso angle to compensate safely. You get the exact same muscular stimulus—massive quad and glute hypertrophy—with a fraction of the joint stress.
Step-by-Step Guide: The Heavy Sled Push (Quad & Glute Focus)
The sled push is the ultimate leg press replacement. Here is how to execute it perfectly as a beginner.
Step 1: Calculate Your Base Load
Beginners often load the sled with too much weight, turning the exercise into a slow, grinding march that spikes blood pressure without providing a good hypertrophy stimulus. Start with a load equal to 50% to 75% of your body weight. Remember to account for the base weight of the sled itself (most standard steel sleds weigh between 70 and 90 lbs unloaded). For a 180 lb beginner, load two 25 lb plates onto a 75 lb sled for a total working weight of 125 lbs.
Step 2: Grip and Torso Angle
This is where you target specific muscles, completely bypassing the need to adjust your leg press machine foot position.
- For Quadriceps (Upright Push): Grip the high, vertical poles of the sled. Keep your torso relatively upright (around 45 degrees). This mimics the mechanics of a front squat or a low-stance leg press, placing maximum tension on the quads.
- For Glutes and Hamstrings (Forward Lean Push): Grip the low, horizontal handles. Hinge at the hips, keeping your spine neutral and your torso almost parallel to the floor. This mimics a hip thrust or a high-stance leg press, heavily recruiting the posterior chain.
Step 3: The Foot Strike and Stride
Never push the sled on your toes. Drive through the mid-foot to the heel, just as you would when accelerating during a sprint. Take short, choppy, powerful steps. Fully extend the driving leg before bringing the recovery leg forward. Keep your eyes looking down at the turf about 10 feet ahead of you to maintain a neutral cervical spine.
Step-by-Step Guide: The Sled Pull (Posterior Chain Focus)
The leg press is notoriously poor at targeting the hamstrings, which is why many lifters supplement it with leg curls. The sled pull solves this elegantly.
- Attach the Pull Strap: Secure a heavy-duty pulling strap or a dedicated sled harness to the center eyelet of the sled.
- Face the Sled: Stand facing the sled, holding the strap or harness handles with your arms extended.
- The Backward Walk: Lean back slightly, bend your knees, and walk backward. Drive your heels into the ground and pull the sled toward you hand-over-hand, or simply walk backward continuously if using a waist harness.
- The Muscle Target: Walking backward forces the hamstrings and calves into continuous, high-tension eccentric and concentric contractions. It also heavily targets the VMO (vastus medialis oblique), the teardrop quad muscle crucial for knee health.
Muscle Targeting Matrix: Sled vs. Leg Press
Use this matrix to translate your old leg press goals into functional sled movements.
| Muscle Target | Traditional Leg Press Method | Sled Training Equivalent |
|---|---|---|
| Quadriceps | Low & Narrow Foot Position | Upright Torso Push (High Handles) |
| Glutes | High & Wide Foot Position | Forward Lean Push (Low Handles) |
| Hamstrings | Ineffective / Requires Machine Curl | Backward Sled Pull (Strap/Harness) |
| Calves | Toes on Platform Edge (High Shear Risk) | Walking on Toes During Light Push |
| Adductors | Extremely Wide Stance (Hip Impingement Risk) | Lateral Sled Shuffles (Side-to-Side) |
Top Push/Pull Sleds for Beginners in 2026
Investing in the right equipment is crucial for consistent training. Based on current market durability, pricing, and biomechanical design, here are the top sleds for home and garage gyms.
1. Rogue Butcher 2.0 (Best Overall Plate-Loaded)
Price: ~$425 | Base Weight: 73 lbs
The Butcher 2.0 is the industry standard. It features ultra-high-molecular-weight (UHMW) plastic skis that glide smoothly on concrete, asphalt, and turf without leaving scuff marks. The dual high/low handle design makes transitioning between quad-focused and glute-focused pushes seamless.
2. XPO Trainer Push/Pull Sled (Best for Small Spaces)
Price: ~$395 | Base Weight: 55 lbs
If you lack a 20-yard stretch of turf, the XPO Trainer is a game-changer. It uses an exponential resistance curve driven by an internal fan and magnetic system. The harder and faster you push, the heavier it gets. It requires zero weight plates, making it perfect for apartment balconies or small garages where you can push endlessly in place or over short 5-yard distances.
3. Titan Fitness Weight Sled (Best Budget Option)
Price: ~$199 | Base Weight: 66 lbs
For beginners on a strict budget, Titan offers a robust, no-frills steel sled. It includes a pull strap and features standard 2-inch Olympic plate posts. It is slightly rougher on indoor turf than the Rogue, but unbeatable for the price point.
Programming Your Sled Workouts
According to strength and conditioning protocols outlined by experts at BarBend, sled programming should be dictated by your specific training goal. Because the sled lacks an eccentric (lowering) phase, it causes significantly less delayed onset muscle soreness (DOMS) than traditional squats or leg presses, allowing for higher frequency training.
Programming Framework:- For Raw Strength: 4 to 5 sets of 15 yards. Load the sled heavily (100%+ of body weight). Rest 2 to 3 minutes between sets. Focus on maximal force production into the ground.
- For Hypertrophy (Muscle Growth): 3 to 4 sets of 25 to 30 yards. Moderate load (75% of body weight). Rest 60 to 90 seconds. Focus on the mind-muscle connection and continuous tension.
- For Conditioning & Fat Loss: 6 to 8 sets of 40 yards. Light load (25% to 50% of body weight). Rest 30 seconds. Move as fast as possible while maintaining good form.
Common Beginner Mistakes to Avoid
Even though the sled is safer than the leg press, poor execution can still limit your results.
- Over-striding: Taking steps that are too long reduces power output and places excessive stretch on the hip flexors. Keep your steps short and piston-like.
- Rounding the Lower Back: When pushing heavy loads with a forward lean, beginners often let their lumbar spine flex. Brace your core exactly as you would for a heavy deadlift to maintain a neutral spine.
- Ignoring the Pull: Many beginners only push the sled. Neglecting the backward pull leaves the hamstrings and VMO underdeveloped, creating muscular imbalances that can lead to knee pain over time.
Conclusion
Stop wasting mental energy memorizing a leg press machine foot position chart. While the leg press has its place in a bodybuilder's arsenal for isolated, high-volume pumping, the push/pull sled offers a vastly superior, functional foundation for beginners. By learning to manipulate your torso angle and stride rather than your foot placement on a metal platform, you will build stronger, more athletic legs while simultaneously bulletproofing your knees and lower back. Load the sled, drop your hips, and drive.
More gear to consider
All reviews
Cable Leg Care: How Much Does the Leg Press Machine Weigh By Itself?

Leg Extension and Curl Guide: Hack Squat Leg Press Machine Setup

Beyond Machine Leg Presses: Beginner Sled Push Guide

Normatec vs. Field: A Clinically Informed Comparison of Recovery Systems for Athletes and Rehab Professionals
Beyond the Leg Press Machine Description: Home Gym Head-to-Head 2026
