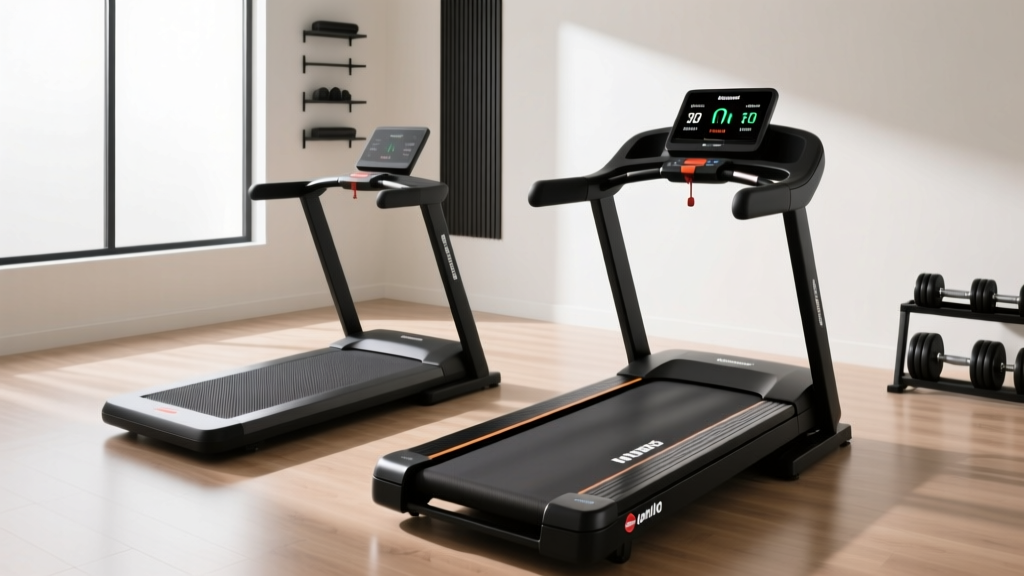
Walking Pads vs Motorized Treadmills: Setup & Install Guide
Compare walking pads and motorized treadmills with our complete 2026 setup, installation, and space-planning walkthrough for home gyms.

The 2026 Home Gym Dilemma: Walking Pad vs. Full-Size Motorized Treadmills
The home fitness landscape has shifted dramatically. While traditional motorized treadmills remain the gold standard for serious runners and high-intensity interval training, ultra-compact walking pads have carved out a massive niche for remote workers and under-desk walkers. But beyond the marketing gloss, how do these two categories actually compare when it comes to physical setup, spatial requirements, and long-term installation? As a senior equipment technician reviewing cardio machines for 2026, I have unboxed, assembled, and calibrated hundreds of units. This comprehensive walkthrough breaks down the exact installation processes, spatial footprints, and electrical requirements for both walking pads and standard motorized treadmills, helping you make an informed, hardware-level decision for your home gym.
Quick Decision Matrix: Which Setup Fits Your Space?
- Choose a Walking Pad if: You have less than 15 square feet of dedicated floor space, lack a dedicated 15-amp electrical circuit, or primarily walk at speeds under 4.0 MPH while working.
- Choose a Motorized Treadmill if: You run at speeds up to 12 MPH, require an incline greater than 3%, need a running surface wider than 20 inches, and have a dedicated 77x32 inch footprint.
Pre-Installation: Spatial Planning and Flooring Prep
Before cutting any zip ties, you must prepare your installation zone. The Consumer Product Safety Commission (CPSC) strictly recommends maintaining a minimum clearance zone behind any treadmill to prevent severe friction burns and entrapment in the event of a fall.
Clearance Requirements
- Motorized Treadmills: Require at least 20 inches (50 cm) of clear space behind the rear roller, and 24 inches on at least one side for emergency egress. Total footprint for a standard unit like the Sole F63 is roughly 77 inches long by 32 inches wide.
- Walking Pads: Generally require 10 inches of rear clearance due to lower maximum speeds (usually capped at 4.0 to 6.0 MPH). A standard KingSmith WalkingPad R2 requires a footprint of just 56 by 22 inches during operation.
Flooring and Vibration Dampening
Do not place cardio equipment directly on carpet or hardwood. For motorized treadmills, use a 3/4-inch thick vulcanized rubber mat (minimum 8x4 feet). This prevents the machine's 300-pound frame from compressing carpet padding, which can cause the treadmill deck to flex and prematurely wear the belt. Walking pads, being lighter (typically 50-70 lbs), can use thinner 1/4-inch PVC equipment mats, but rubber is still preferred to prevent 'walking' or creeping across hard floors during use.
Complete Walkthrough: Installing a Traditional Motorized Treadmill
Setting up a full-size motorized treadmill is a two-person job. Units like the Horizon 7.4 or NordicTrack T Series ship in boxes weighing between 180 and 240 pounds. Here is the professional installation sequence.
Step 1: Unboxing and Base Positioning
Never pull the cardboard box off the treadmill. Instead, cut the heavy-duty plastic straps, remove the top and side panels of the box, and leave the base on the cardboard pallet. Tilt the treadmill base backward slightly, slide your rubber mat underneath, and lower it into place. This saves you from lifting the 200+ lb base.
Step 2: Upright Mast Assembly and Data Cables
This is where 90% of user errors occur. The upright mast contains a delicate data ribbon cable that connects the console to the motor control board.
- Feed the data cable through the lower upright tube before bolting it to the base.
- Use the included 6mm Allen wrench to secure the mast bolts. Tighten to roughly 40 Nm of torque—snug, but do not overtighten and strip the threads.
- Connect the data cable using the pinch-clasp. Ensure no wires are pinched between the metal mast and the plastic shroud. A pinched wire will result in a blank console or erratic speed surges.
Step 3: Console and Handlebar Attachment
Mount the console using the provided 8mm hex bolts. Connect the heart rate monitor wires (usually small, color-coded push-connectors) before sliding the console onto the mounting pegs. Attach the side handrails last, ensuring the safety magnetic lanyard is freely hanging and not caught under any plastic caps.
Complete Walkthrough: Setting Up a Foldable Walking Pad
Walking pads prioritize out-of-the-box readiness, but they still require specific mechanical checks to ensure longevity. Let us look at a foldable model, such as the UREVO Strol 2E or the WalkingPad R2.
Step 1: Unfolding and Hinge Tension
Foldable walking pads utilize a central friction hinge. Lay the unit flat on your mat. Grasp the front aluminum housing and lift it to the 180-degree locked position. Listen for the mechanical 'click' of the locking pin. If the hinge feels loose and the front deck droops, use a 14mm open-ended wrench to tighten the central hinge nut by a quarter-turn until the deck holds perfectly horizontal under pressure.
Step 2: Remote Pairing and Safety Tether
Unlike motorized treadmills that use a magnetic clip, walking pads rely on Bluetooth or RF remotes and wearable safety tethers. Power on the unit using the physical switch near the power cord (often hidden under a rubber flap). Hold the 'Mode' and 'Start' buttons on the remote simultaneously for 3 seconds to pair. Crucial: Always attach the magnetic safety key to your clothing. Because walking pads lack side handrails, a sudden stop or trip can result in you stepping off the back onto the moving belt.
Electrical Configuration and Network Setup
Power delivery is a major differentiator between these two machine types.
Warning: Dedicated Circuits for Motorized TreadmillsA standard 3.0 CHP (Continuous Horsepower) motorized treadmill can draw up to 15 amps during startup surge. Plugging this into a shared living room circuit alongside a TV, space heater, or air conditioner will frequently trip your breaker and degrade the treadmill's motor control board over time. Always use a dedicated 15-amp or 20-amp 120V circuit.
Walking pads, conversely, utilize smaller 1.0 to 1.5 HP motors that draw a maximum of 6 to 8 amps. They can safely share a standard household circuit with other electronics.
Smart Features and WiFi Calibration
If your 2026 motorized treadmill features an integrated touchscreen (like Peloton or iFIT-enabled ProForm models), connect it to a 2.4GHz WiFi network—most fitness consoles lack 5GHz antennas. Once connected, run the mandatory 'Auto-Calibration' sequence from the settings menu. This forces the machine to cycle through its entire incline and speed range, resetting the internal potentiometers to factory zero.
Comparison Matrix: Installation & Footprint
| Feature | Standard Motorized Treadmill (e.g., Sole F63) | Foldable Walking Pad (e.g., KingSmith R2) |
|---|---|---|
| Shipping Weight | 280 lbs (Requires 2 people) | 62 lbs (1 person) |
| Assembly Time | 45 - 90 Minutes | 5 - 10 Minutes |
| Operating Footprint | 77' L x 32' W (17.1 sq ft) | 56' L x 22' W (8.5 sq ft) |
| Electrical Draw | 12A - 15A (Dedicated Circuit) | 4A - 8A (Shared Circuit OK) |
| Belt Width | 20' to 22' | 15' to 17' |
| Tools Required | 6mm/8mm Allen, 17mm Socket, Phillips | 14mm Wrench (Hinge only) |
Post-Install Calibration: Belt Tracking and Tension
Whether you just assembled a $1,200 motorized treadmill or a $400 walking pad, the belt will likely need tracking adjustment after the first 30 minutes of use as the fabric stretches and seats into the rollers.
The Quarter-Turn Rule
Stand at the rear of the machine and observe the belt while it runs at 3.0 MPH.
- If the belt drifts to the left, insert the provided Allen wrench into the left rear roller bolt and turn it clockwise exactly one quarter-turn (90 degrees).
- If the belt drifts to the right, turn the right rear roller bolt clockwise one quarter-turn.
- Never adjust both sides simultaneously, and never turn a bolt more than a quarter-turn at a time. Over-tightening the rear roller will stretch the belt seams and blow out the front roller bearings.
Lubrication Check
Most 2026 motorized treadmills ship with a dry belt that requires immediate application of 100% silicone treadmill lubricant. Lift the center of the belt and apply a zigzag pattern of roughly 0.5 oz of silicone directly onto the wooden deck. Walk on the belt at 1.0 MPH for 3 minutes to distribute the lubricant evenly. Walking pads often come pre-lubricated from the factory, but you should verify by sliding your hand under the belt; it should feel slick, not dry or tacky.
'The number one cause of motor control board failure in home gyms is a dry, high-friction belt. The motor has to work twice as hard to pull the belt, drawing excess amperage that eventually fries the internal capacitors. Lubricate your deck every 130 miles, regardless of whether it is a full-size treadmill or a compact walking pad.'
— FitGearPulse Hardware Testing Lab, 2026 Maintenance Report
Final Verdict: Choosing Your Installation Path
Choosing between a walking pad and a traditional motorized treadmill ultimately comes down to your spatial reality and biomechanical goals. If you are outfitting a spare bedroom or home office and want a low-friction installation that takes 10 minutes and plugs into any wall outlet, a high-quality walking pad is unmatched for daily step-count accumulation—a habit strongly correlated with cardiovascular health by the American Heart Association. However, if you are training for a 10K, require shock-absorbing deck articulation, and have the dedicated square footage and electrical circuit to support it, the physical installation of a full-size motorized treadmill is a one-time effort that yields years of high-performance running capability. Measure twice, prep your floors, and follow the torque and calibration specs to ensure your new cardio machine operates flawlessly from day one.
More gear to consider
All reviews
Stair Climber Troubleshooting: Beyond the Treadmill Wooden Board
Sytiry Treadmill Reviews: Elliptical vs Treadmill Care

Quiet Treadmills for Women on Treadmill Workouts: 2026 Noise Test

NYRR Run Center Gait Analysis: Replicate It on a Budget

Office Treadmill Review: Care vs NordicTrack X24 Treadmill Assembly
