How Heavy Is The Thomas Inch Dumbbell? Grip History & Barbell Collar Troubleshooting
Discover how heavy the Thomas Inch dumbbell is, explore grip history, and master barbell collar troubleshooting to avoid dangerous loading mistakes.

The Legend of the Thomas Inch Dumbbell: How Heavy Is It?
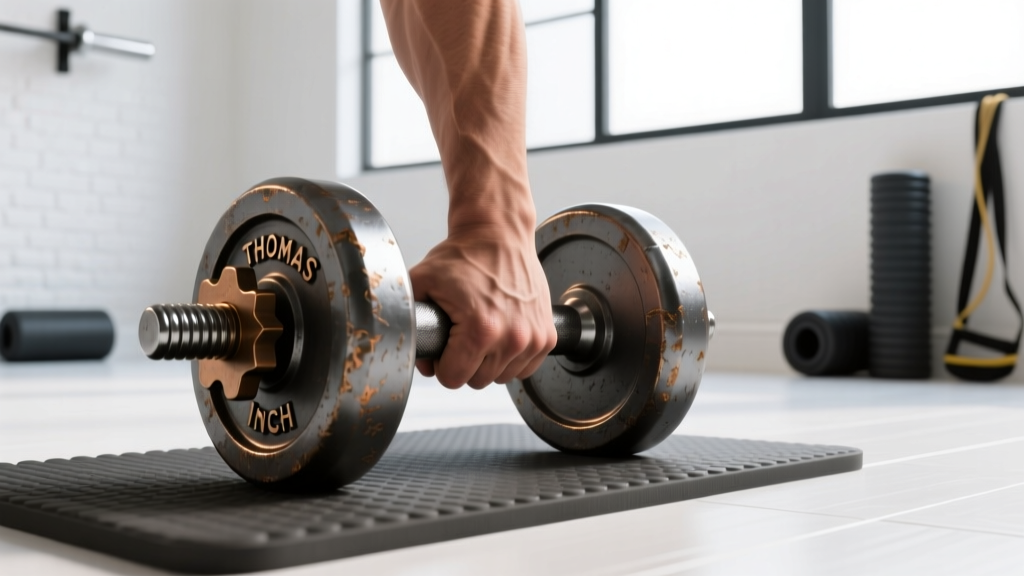
If you have ever wandered down a rabbit hole of strength history or grip sport forums, you have likely asked the question: how heavy is the Thomas Inch dumbbell? The answer is a highly specific 172 pounds (78 kg). However, the weight is only half the story. The true notoriety of the original Inch dumbbell lies in its handle, which measures a staggering 2.38 inches (60.45 mm) in diameter.
Thomas Inch, a legendary British strongman of the early 20th century, used this custom-forged implement to challenge the grip strength of the world's strongest men. Because the handle is so thick, the lifter's fingers cannot wrap around it to lock the grip. Instead, the lifter must rely entirely on crushing grip strength and thumb friction to support the 172-pound load. According to historical strength archives, the dumbbell's extreme dimensions and the resulting leverage disadvantage made it one of the most famously un-liftable objects in strength history for decades.
"The Inch Dumbbell is not just a test of muscle; it is a test of the central nervous system's ability to maintain tension under extreme mechanical disadvantage."
From Thick Handles to Olympic Bars: Why Collar Selection Matters
While very few lifters today are pressing the original 172-pound Inch dumbbell, the underlying principle of load security remains universal. Whether you are attempting to close your hand around a 2.38-inch thick grip or loading 400 pounds onto an Olympic barbell for heavy deadlifts, control and security are paramount.
When you transition from specialized grip training back to standard barbell work, the leverage shifts, but the requirement for absolute load security does not. This is where modern lifters frequently fail. Selecting the wrong barbell collar for the biomechanical demands of a specific lift is a leading cause of gym accidents, asymmetrical loading, and ruined barbell sleeves. In this 2026 troubleshooting guide, we break down the exact mistakes lifters make with barbell clamps and how to fix them.
Barbell Collar & Clamp Types Comparison Matrix
Before troubleshooting your specific lifting errors, you must understand the mechanical limitations of the equipment on the market. Below is a comparison of the primary collar types available to lifters today.
| Collar Type | 2026 Market Example & Price | Best Application | Primary Failure Mode |
|---|---|---|---|
| Spring Collar | Harbinger Pro Spring ($14/pair) | Light isolation, bench press, warm-ups | Tension loss during impact; slips on drops |
| Spin-Lock | Standard Threaded Steel ($20/pair) | Home gyms, standard 1-inch bars | Thread stripping; slow to change plates |
| Quick-Release Clamp | Rogue Monster Lock-Jaw ($35/pair) | Powerlifting, CrossFit, dynamic drops | Urethane degradation; hinge pin snapping |
| Competition Collar | Eleiko Olympic Competition ($95/pair) | Weightlifting, calibrated plate meets | Over-tightening damaging bar sleeves |
Common Barbell Collar Mistakes & Troubleshooting Guide
Even experienced lifters fall into bad habits when loading the bar. Here are the most common mistakes and their exact troubleshooting protocols.
Mistake 1: Using Spring Collars for Dynamic or Dropped Lifts
The Scenario: You are performing power cleans, snatches, or high-rep deadlifts where the barbell frequently impacts the floor. You are using cheap wire spring collars to save time.
The Failure Mode: Spring collars rely on radial tension. When the barbell hits the ground, the kinetic shockwave travels through the steel sleeve, momentarily breaking the friction seal of the spring. Over a set of 5 cleans, the collar will "creep" outward by 1 to 2 inches. If a bumper plate slips past the collar's edge, the load becomes asymmetrical, risking severe wrist or lower back torque.
The Fix: Upgrade to a rigid quick-release clamp. As noted in the Rogue Monster Lock-Jaw specifications, rigid urethane and aluminum clamps physically lock around the 50mm Olympic sleeve, eliminating radial creep entirely during floor impacts.
Mistake 2: The "Flush" Alignment Error on Quick-Release Clamps
The Scenario: You load your plates, slap the quick-release clamp onto the barbell, and pull the lever down without pushing the clamp inward first.
The Failure Mode: Quick-release clamps feature an inner rubberized O-ring designed to grip the steel sleeve. If you lock the lever while the clamp is a quarter-inch away from the outermost plate, the clamp secures to the bar, but it is not applying lateral pressure to the plates. During a heavy bench press, the plates will rattle and shift inward toward your fingers, or shift outward if the bar tilts.
The Fix: Implement the "Push-and-Lock" protocol. Always use your palm to aggressively shove the clamp flush against the outer plate before pulling the locking lever down. You should see the barbell sleeve's threads or snap-ring groove completely covered by the clamp's inner housing.
Mistake 3: Ignoring Sleeve Tolerances and Wear
The Scenario: You use the same rigid plastic clamps on a brand-new Olympic barbell and a 10-year-old rusted garage gym bar.
The Failure Mode: An official Olympic sleeve is exactly 50mm (1.968 inches) in diameter. However, older, poorly maintained bars can suffer from sleeve wear, rust pitting, or chalk buildup, altering the diameter by up to 1.5mm. Rigid plastic clamps (like standard lock-jaws) have zero tolerance for this variance. They will either fail to close entirely or slide off mid-lift because they cannot bite into the degraded steel.
The Fix: Maintain your barbell sleeves with 3-in-One oil and a nylon brush. If your bar is heavily pitted, switch to a competition-style clamp with a micro-adjustable tension screw, which allows you to dial in the exact clamping force regardless of minor sleeve imperfections.
Expert Insight: The Biomechanics of Grip and Bar Control
Whether you are grappling with the 2.38-inch handle of the Thomas Inch dumbbell or stabilizing a 500-pound deadlift, your central nervous system treats grip security and load stability as a single continuum. According to biomechanical testing standards, if a lifter perceives lateral instability in the barbell (caused by loose plates or failing collars), the CNS will involuntarily inhibit force production in the prime movers to protect the joints. Securing your plates properly isn't just about safety; it is a neurological requirement for maximum force output.
Step-by-Step Troubleshooting: When Your Plates Slip Mid-Set
If you are currently experiencing plate slippage during your training cycles, follow this diagnostic checklist:
- Inspect the O-Rings: Remove your quick-release clamps and look at the inner rubber O-rings. If they are flattened, cracked, or missing chunks, the clamp is dead. Replace the clamps immediately (budget $35-$45 for a new pair).
- Check the Bumper Plate Hubs: Some cheap recycled-rubber bumper plates have steel inserts that are slightly wider than the standard 50mm sleeve. If the plate hub catches on the barbell's snap-ring, it prevents the plate from sitting flush. Sand down the inner rim of the plate hub or use a rubber mallet to seat it properly.
- Evaluate the Barbell Snap-Rings: If your barbell's outer snap-rings (the metal clips that keep the sleeve from falling off) are bent outward, they will prevent collars from seating deeply. Use snap-ring pliers to compress them back into their grooves.
Maintenance and Longevity of Modern Clamps
To ensure your equipment lasts through years of heavy loading, implement a basic maintenance routine. Urethane clamps are highly durable but are susceptible to UV degradation and extreme cold. If you train in an unheated garage gym in the winter, the urethane housings can become brittle and snap under the leverage of the locking mechanism. Store your clamps indoors when not in use. For metal competition collars, apply a drop of lithium grease to the tension screws every six months to prevent them from seizing due to chalk dust and sweat oxidation.
Final Thoughts on Load Security
Understanding how heavy the Thomas Inch dumbbell is (172 lbs) and why its thick handle challenged the greatest strongmen in history provides a valuable lesson in leverage and control. You may not be lifting the original Inch implement, but the physics of iron remain unchanged. Respect the load, choose the correct collar for your specific movement patterns, and never compromise on the mechanical security of your barbell. Your joints, your central nervous system, and your training partners will thank you.
More gear to consider
All reviews
2026 Trends: Loadable Dumbbells & Squats with Dumbbells on Shoulders
Troubleshooting Miniature Dumbbells: Neoprene Home Use Mistakes

Olympic vs Standard Plates: Your Bulgarian Deadlift Dumbbell Guide

Pectoral Muscle Exercises With Dumbbells: Plate Guide
Best Loadable Dumbbells for Front Delt Raises (2026)
