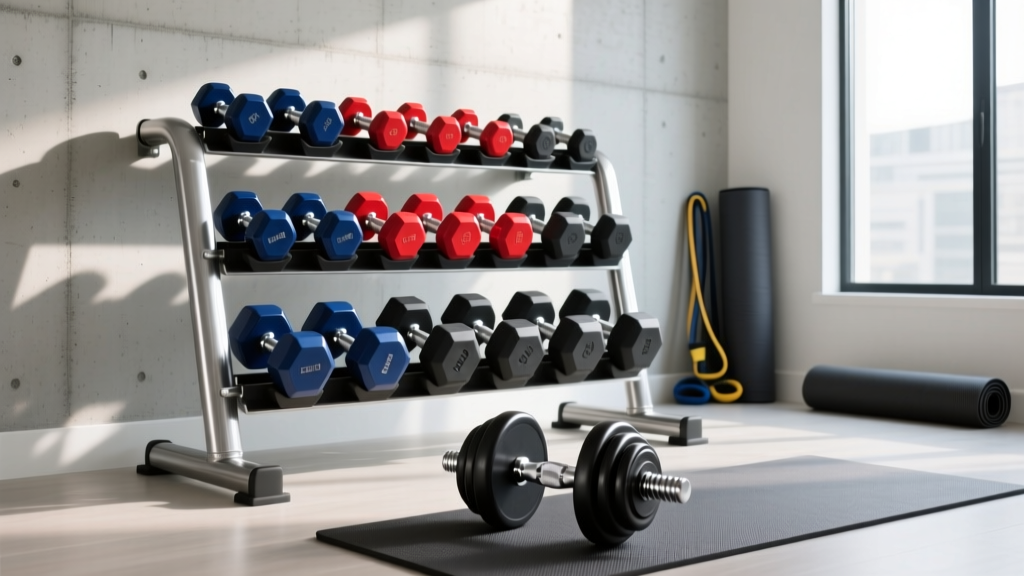
Rack Maintenance for a Full Body Home Workout With Dumbbells
Optimize your storage and rack maintenance to ensure safety, flow, and longevity for your full body home workout with dumbbells. Expert care tips inside.

The Hidden Link Between Storage and Your Full Body Home Workout With Dumbbells
When athletes and fitness enthusiasts design a high-intensity full body home workout with dumbbells, the focus is almost entirely on programming, rep schemes, and recovery. However, the physical infrastructure that houses your equipment—specifically your dumbbell rack and storage solutions—plays a silent but critical role in your training longevity and safety. A poorly maintained rack doesn't just look unsightly; it introduces structural risks, disrupts workout flow, and accelerates the degradation of your expensive free weights.
As of 2026, premium dumbbell sets (like urethane-coated hex dumbbells or adjustable PowerBlocks) represent a significant financial investment, often ranging from $300 to over $1,500. Storing them on a compromised or improperly maintained rack can lead to catastrophic shelf failure or accelerated cosmetic and structural damage to the weights themselves. According to safety guidelines emphasized by the American Council on Exercise (ACE), proper equipment storage and environmental maintenance are foundational to preventing home gym injuries and ensuring ergonomic efficiency during complex movement circuits.
This comprehensive guide dives deep into the metallurgy, material science, and spatial optimization required to maintain your dumbbell storage solutions, ensuring your rack remains a reliable partner for years of heavy training.
Load Distribution Physics: Preventing Shelf Bowing and Weld Fatigue
The most common failure mode in home gym storage is shelf deflection (bowing) and subsequent weld fatigue. This occurs when users ignore the load-bearing physics of their specific rack model. Not all steel is created equal, and placing 100-pound dumbbells on the top tier of a budget rack will inevitably lead to structural failure over a 12-to-18-month period due to continuous static loading and dynamic vibration from drop sets.
Understanding Steel Gauge and Tier Limits
Steel gauge measures thickness; a lower number indicates thicker, stronger steel. An 11-gauge steel tube (approximately 0.1196 inches thick) offers vastly superior resistance to bending moments compared to 12-gauge steel (0.1046 inches). When organizing your rack, you must adhere to a strict heavy-to-light, bottom-to-top hierarchy.
| Rack Model (2026 Market) | Steel Gauge | Max Tier Load Limit | Optimal Placement Strategy | Avg. Price Range |
|---|---|---|---|---|
| Rogue Fitness 3-Tier Rack | 11-Gauge | 400+ lbs per tier | Heavy pairs (50-100 lbs) on bottom tier | $495 - $595 |
| Rep Fitness 3-Tier Rack | 11-Gauge | 350 lbs per tier | Medium pairs (40-80 lbs) on middle/bottom | $299 - $349 |
| Titan Fitness 3-Tier Rack | 12-Gauge | 250 lbs per tier | Light pairs (5-40 lbs) on top tier only | $199 - $249 |
Pro Tip: If you own a 12-gauge rack but possess heavy dumbbells (e.g., 70+ lbs), you must reinforce the shelves. You can do this by sourcing 3/16-inch thick steel flat bars from a local hardware store and bolting them underneath the existing shelf cross-members to increase the moment of inertia and prevent sagging.
Material Degradation: Protecting Urethane, Rubber, and Steel
Your dumbbell rack doesn't exist in a vacuum; it interacts directly with the materials of the dumbbells resting upon it. Improper cleaning routines and environmental factors can cause irreversible damage to both the rack's finish and the dumbbell coatings.
⚠️ CRITICAL WARNING: The 'Blooming' Effect on Rubber DumbbellsNever use bleach, ammonia, or undiluted harsh degreasers on rubber-coated dumbbells or the rubber saddles of your rack. These chemicals strip the stearic acid and protective waxes from the rubber compound, causing a phenomenon known as 'blooming'—a chalky, white, irreversible residue that makes the weights slippery and prone to cracking. Furthermore, the National Academy of Sports Medicine (NASM) notes that degraded equipment surfaces can harbor bacteria and compromise grip security during heavy lifts.
The Correct Cleaning and Preservation Protocol
- For Rubber Dumbbells and Rack Saddles: Use a 10:1 dilution of Simple Green All-Purpose Cleaner and water. Wipe with a microfiber cloth. Once a month, apply a light coat of 303 Aerospace Protectant to the rubber. This UV-inhibitor acts like sunscreen, preventing ozone and ultraviolet degradation that leads to dry rot.
- For Urethane Dumbbells: Urethane is highly resistant to chemicals but attracts dust and oils. Simply wipe down with a damp microfiber cloth and a mild dish soap solution. Do not use petroleum-based cleaners, which can cloud the urethane finish.
- For Powder-Coated Steel Racks: Sweat is highly corrosive due to its sodium chloride content. If sweat drips onto the rack frame during your full body home workout with dumbbells, wipe it immediately. For micro-scratches in the powder coat, use a clear automotive touch-up pen to seal the exposed steel and prevent oxidation (rust) from creeping under the coating.
Hardware Maintenance: The Vibration Loosening Effect
Every time you drop a 50-pound dumbbell onto a rack shelf after a grueling set of lunges, a kinetic shockwave travels through the steel frame. Over hundreds of reps, this high-frequency vibration causes standard hex nuts and bolts to back out of their threads—a mechanical failure mode known as 'vibration loosening' or the Junker effect.
Step-by-Step Hardware Audit
To prevent your rack from developing a dangerous wobble, implement a strict hardware maintenance schedule:
- Identify the Hardware: Most premium racks use M8x20mm or M10x30mm hex bolts. Check if your rack uses standard hex nuts or Nyloc (nylon-insert lock) nuts.
- Apply Threadlocker: If your rack uses standard metal-on-metal nuts, remove them one by one, apply a drop of Blue Loctite 243 (medium-strength threadlocker) to the threads, and re-tighten. Blue Loctite is ideal because it prevents vibration loosening but can still be broken with standard hand tools if you need to disassemble the rack.
- Torque Specifications: Tighten M8 bolts to approximately 25-30 Nm (Newton-meters) and M10 bolts to 40-50 Nm. Overtightening can strip the threads on cheaper imported racks or crack welded gussets.
- Leveling Feet: Check the adjustable rubber feet at the base of the rack. Uneven floors cause torsional stress on the rack frame. Adjust the feet until the rack sits perfectly flush, using a carpenter's level on the top shelf to verify.
Spatial Optimization for Uninterrupted Circuit Training
The physical placement of your dumbbell rack dictates the efficiency of your training space. When executing a full body home workout with dumbbells, you frequently transition between floor exercises (like renegade rows or goblet squats) and standing movements. If your rack is placed poorly, you risk tripping, colliding with the steel frame, or failing to extract heavy weights safely.
'Ergonomic flow in a home gym isn't just about having space; it's about the geometry of extraction. You need a minimum of 36 inches of clearance in front of a dumbbell rack to safely hinge at the hips and deadlift a heavy pair of dumbbells off the bottom tier without rounding your lower back into the steel shelving behind you.'
— Biomechanics and Home Gym Layout Standards, Rogue Fitness Engineering Guidelines
Positioning Framework for Safety
Place your rack against a load-bearing wall to prevent tip-overs, especially if you have children or pets in the home. Use L-brackets to anchor the top of the rack directly into the wall studs. This not only prevents catastrophic tipping if a heavy dumbbell is loaded unevenly, but it also eliminates any lateral sway during aggressive weight extraction, preserving the structural integrity of the rack's welds.
Longevity Checklist: Annual and Monthly Audits
To maximize the lifespan of your storage solutions and ensure your full body home workout with dumbbells remains safe and effective, commit to the following maintenance cadence:
Monthly Tasks (5 Minutes)
- Wipe down all rubber and urethane surfaces with the approved 10:1 Simple Green solution.
- Check the rack for lateral wobble; adjust the base leveling feet if the floor has settled.
- Inspect the bottom tier shelves for any visible deflection or bowing.
Annual Tasks (30 Minutes)
- Perform a full hardware audit with a socket wrench, checking all M8 and M10 bolts for tightness.
- Apply 303 Aerospace Protectant to all rubber components to prevent UV and ozone dry rot.
- Inspect all weld joints with a bright LED flashlight, looking for hairline micro-fractures or rust bleeding through the powder coat.
- Re-evaluate your load distribution. As you grow stronger and buy heavier dumbbells, ensure your new weights are migrated to the appropriate lower tiers based on your rack's gauge limits.
By treating your dumbbell rack not as a static piece of furniture, but as a dynamic piece of load-bearing athletic equipment, you protect your investment, safeguard your physical health, and ensure that every full body home workout with dumbbells is executed with precision, safety, and uninterrupted flow.
More gear to consider
All reviews
Power Rack vs Squat Rack vs Squat Stand for Goblet Squat Dumbbells

Bumper vs Iron Plates: Layouts for Dumbbell Posterior Deltoid Raises

Best Dumbbell Racks for Small Gyms + Dumbbell Chest Workout No Bench

Bumper Plate vs Iron Plate & The Best Tricep Workout with Dumbbells

Bumper Plate vs Iron Plate Maintenance & Dumbbell Connector Care
