Rowing Machine Guide: Technique vs Manual Treadmill Curve Cardio
Master rowing machine technique with our beginner step-by-step guide. Compare rower benefits, costs, and biomechanics against a manual treadmill curve.

The Ultimate 2026 Beginner Guide to Rowing Machines
When building a high-performance home gym in 2026, cardiovascular equipment is usually the centerpiece. For beginners seeking maximum caloric expenditure with minimal joint degradation, two machines frequently dominate the shortlist: the indoor rowing machine (ergometer) and the manual treadmill curve. While both offer self-paced, high-yield cardio, the biomechanics, spatial requirements, and learning curves differ drastically. This comprehensive guide focuses specifically on the rowing machine, providing a step-by-step technique breakdown, a detailed buying guide, and a direct comparison to the manual treadmill curve to help you make an informed, data-driven decision for your fitness journey.
Expert Insight: According to the Cleveland Clinic, rowing engages approximately 86% of the muscles in your body, making it vastly superior to lower-body-dominant cardio machines for overall muscular endurance and postural development.Step-by-Step Rowing Technique for Beginners
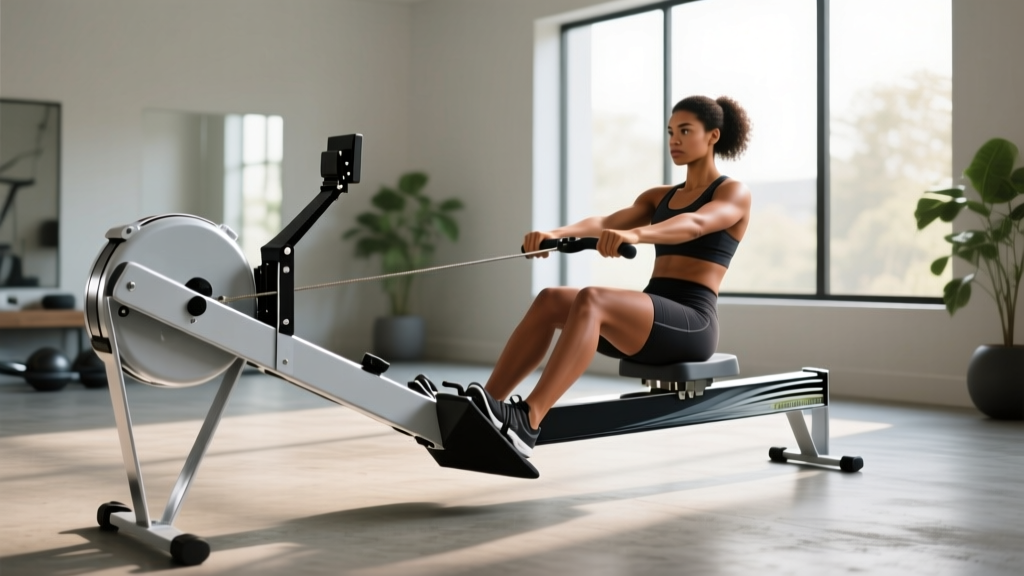
The most common mistake beginners make on the ergometer is treating it like an upper-body pulling machine. Proper rowing technique is a highly coordinated sequence that relies heavily on leg drive. The official Concept2 technique guide breaks the stroke into four distinct phases. Here is your step-by-step masterclass.
1. The Catch (The Setup)
The Catch is the starting position. Your shins should be vertical (or as close to vertical as your ankle mobility allows), with your heels slightly lifted if necessary. Your arms must be fully extended, shoulders relaxed and low, and your torso hinged forward at about an 11 o'clock angle. Critical metric: Ensure your seat is approximately 6 to 8 inches away from the flywheel cage to prevent slamming the front stopper.
2. The Drive (The Power Phase)
The Drive is where the work happens, and it follows a strict kinetic chain: Legs, Core, Arms.
1. Legs: Push explosively through your mid-foot. Your arms remain straight and your torso angle remains unchanged until your legs are nearly fully extended.
2. Core: Once the legs are almost straight, swing your torso from the 11 o'clock position to a 1 o'clock position.
3. Arms: Finally, draw the handle to your lower ribcage, just below the chest line.
3. The Finish (The End of the Pull)
At the Finish, your legs are fully extended, your torso is leaning back slightly (1 o'clock), and the handle is resting lightly against your lower chest. Your wrists must remain flat and neutral—never bent inward. This position should feel stable and controlled, not strained.
4. The Recovery (The Return)
The Recovery is the exact reverse of the Drive and should take roughly twice as long.
1. Arms: Extend your arms fully away from your body.
2. Core: Hinge forward from the hips, returning to the 11 o'clock angle.
3. Legs: Only after the handle has cleared your knees should you bend your legs, sliding the seat forward back into the Catch position.
Pacing Tip: A standard stroke rate for beginners is 18 to 22 strokes per minute (SPM). Do not rush the recovery.
Buying Guide: Top Rowing Machines for 2026
Selecting the right machine depends on your budget, space, and desired resistance type. Here are the top three models dominating the 2026 market for beginners and intermediate users.
1. The Gold Standard: Concept2 RowErg (Standard Legs)
- Price: $990
- Resistance Type: Air
- Footprint: 94" L x 24" W
- Why it wins: The Concept2 RowErg remains the undisputed king of indoor rowing. The PM5 performance monitor provides unparalleled accuracy, and the air resistance scales infinitely with your effort. For beginners, setting the damper lever to 3 or 4 (yielding a drag factor of 100-110) simulates the feel of a sleek racing shell on water, preventing lower back fatigue.
2. The Premium Immersive Option: Hydrow Wave
- Price: $1,695
- Resistance Type: Electromagnetic
- Footprint: 80" L x 22" W
- Why it wins: If you struggle with motivation and need guided coaching, the Hydrow Wave's 16-inch touchscreen and electromagnetic resistance offer a whisper-quiet, highly immersive experience. It is notably more compact than the Concept2, making it ideal for smaller apartments.
3. The Budget Entry: Sunny Health & Fitness Magnetic Rower
- Price: $249 - $299
- Resistance Type: Magnetic
- Footprint: 82" L x 19" W
- Why it wins: For those not ready to invest a thousand dollars, Sunny Health offers a reliable magnetic rower. While the monitor is basic and the stroke feels slightly less dynamic than air or water, it provides a smooth, quiet introduction to rowing biomechanics without breaking the bank.
Head-to-Head: Rower vs. Manual Treadmill Curve
Many home gym owners cross-shop the rowing machine with a manual treadmill curve (such as the AssaultRunner Elite or TrueForm Trainer). Both are self-powered, non-motorized, and demand high energy output. However, their applications are vastly different. Below is a detailed comparison matrix to help you decide which machine aligns with your specific physiological and spatial needs.
| Feature | Indoor Rowing Machine | Manual Treadmill Curve |
|---|---|---|
| Primary Muscle Focus | Full Body (60% Legs, 20% Core, 20% Upper Body) | Lower Body & Core (Posterior Chain emphasis) |
| Joint Impact | Zero impact (seated, non-weight-bearing) | Low impact (curved deck absorbs shock, but weight-bearing) |
| Average 2026 Price | $250 (Budget) to $1,695 (Premium) | $2,495 to $3,999 (Premium only) |
| Learning Curve | High (Requires technical skill to avoid injury) | Low (Natural running/walking biomechanics) |
| Floor Space Required | ~16 sq ft (Can be stored vertically) | ~22 sq ft (Heavy, usually permanent placement) |
| Ideal For | Cross-training, rehabilitation, full-body endurance | Runners, sprint intervals, gait correction |
Your First 30 Days: A Step-by-Step Progression Plan
Jumping into a 5,000-meter row on day one is a recipe for severe delayed onset muscle soreness (DOMS) and potential lumbar strain. Follow this 4-week beginner progression to build tissue tolerance and neurological efficiency.
Week 1: Neurological Patterning
Goal: Master the Catch and Drive sequence without fatigue.
Workout: 5 sets of 3 minutes at a very light pace (18 SPM). Rest 1 minute between sets. Focus entirely on the 'Legs-Core-Arms' sequence. Do not look at the split time; look at your form in a mirror placed beside the machine.
Week 2: Building Aerobic Base
Goal: Increase continuous time under tension.
Workout: 2 sets of 8 minutes at a moderate pace (20 SPM). Rest 2 minutes between sets. Introduce the 'Pick Drill' during your warmup: 10 strokes using only legs, 10 strokes using legs and core, 10 strokes using full body.
Week 3: Introducing Power Intervals
Goal: Spike the heart rate and understand drag factor manipulation.
Workout: 8 x 250 meters at a high intensity (24-26 SPM). Rest 90 seconds between intervals. Ensure your damper is set correctly (use the PM5 'Drag Factor' menu to find a setting between 110 and 120).
Week 4: The Benchmark Test
Goal: Establish a baseline for future programming.
Workout: 2,000-meter time trial. Pace yourself. The first 500 meters should feel manageable, the middle 1,000 meters should require deep focus, and the final 500 meters should be an all-out effort. Record your average split (e.g., 2:15/500m) to track progress over the coming months.
Frequently Asked Questions
Is rowing bad for your lower back?
When performed with incorrect technique—specifically, rounding the lumbar spine at the Catch or pulling with the arms before engaging the legs—rowing can aggravate the lower back. However, when executed properly with a braced core and neutral spine, rowing actively strengthens the erector spinae and is frequently used in physical therapy for back rehabilitation.
Can I lose belly fat using a rowing machine?
Rowing is a massive caloric burner, often expending 600 to 900 calories per hour depending on intensity and body weight. While spot reduction is a myth, the high metabolic demand of rowing, combined with a caloric deficit, makes it one of the most efficient tools for overall body fat reduction.
Should I buy a rower or a manual treadmill curve for HIIT?
If your HIIT involves sprinting and you are training for outdoor running events, the manual treadmill curve is superior for mimicking running biomechanics. If your HIIT goals are centered around full-body conditioning, CrossFit-style workouts, or low-impact joint preservation, the rowing machine is the unequivocal choice.
More gear to consider
All reviews
Maximize Your Treadmill Trade In: Upright vs Recumbent vs Spin Bikes
Under Desk Treadmill Review: ProForm Treadmill Motor vs Walking Pads
Spin, Upright & Recumbent Bikes + True Treadmill Lubricant Guide
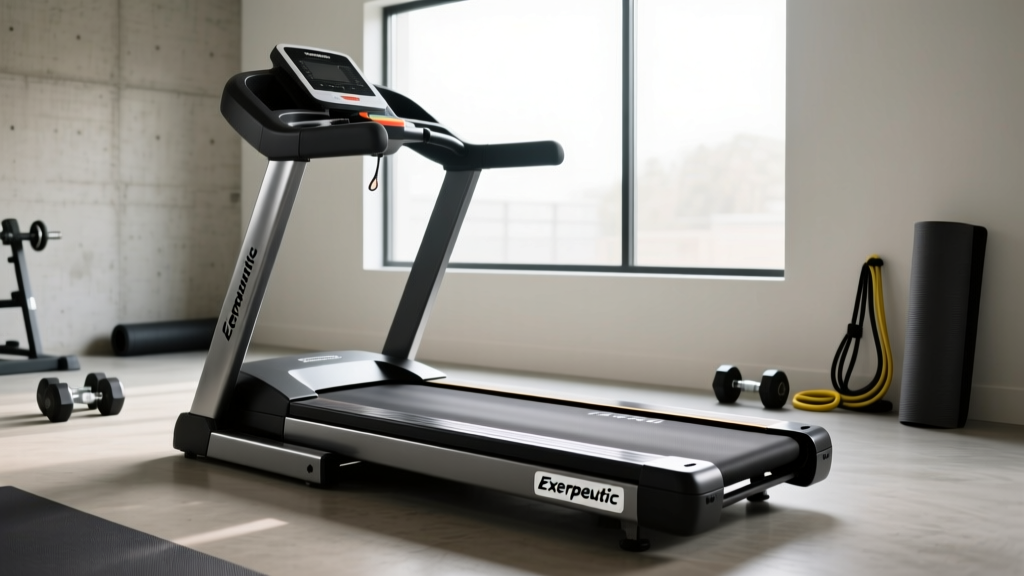
Exerpeutic 400 lb Heavy Duty Walking Jogging Treadmill Motor Guide

NordicTrack C 700 Treadmill Setup & Walking Pad Review
