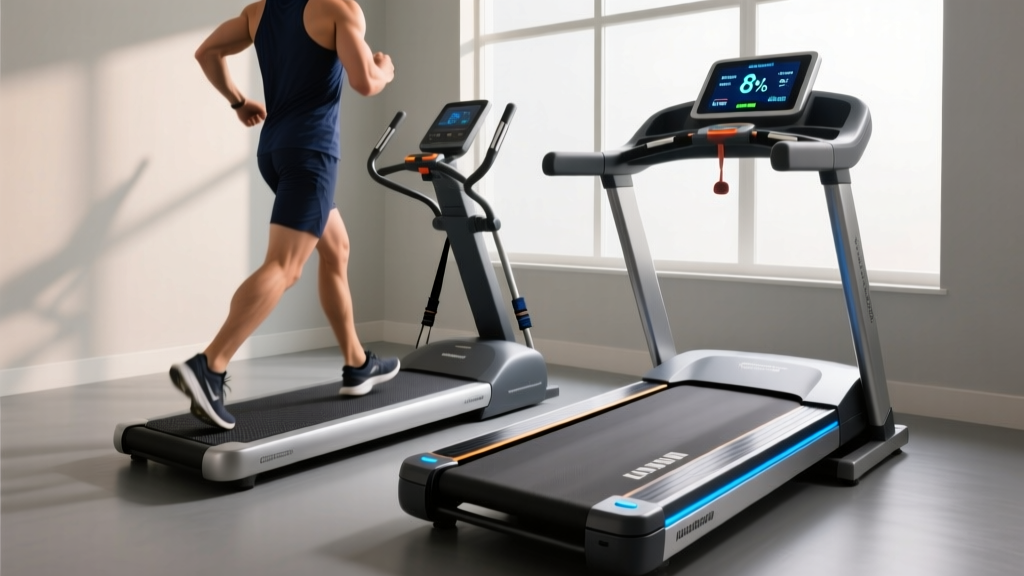
Rowing Buying Guide & Technique: ProForm Carbon TLS Treadmill Setup
Master your home gym setup. This rowing machine buying guide and technique walkthrough perfectly complements your ProForm Carbon TLS treadmill installation.

The Ultimate Cardio Duo: Integrating a Rower with Your ProForm Carbon TLS
The ProForm Carbon TLS treadmill is a staple in many 2026 home gyms, offering a reliable 1.0 CHP motor, a 14-inch HD touchscreen, and a compact folding footprint (32 x 30 x 69 inches when stored) that appeals to space-conscious athletes. However, running or walking exclusively on a treadmill—even one with excellent cushioning—can lead to repetitive strain injuries over time. To build a truly bulletproof cardiovascular engine and protect your joints, fitness experts universally recommend cross-training with a rowing machine.
This comprehensive guide bridges the gap between your existing treadmill setup and your new rowing machine. We will walk through the spatial installation, provide a data-driven buying guide, and break down the exact biomechanical technique required to row efficiently without injuring your lower back.
Spatial Planning: Home Gym Installation & Footprint Analysis
Before purchasing a rower, you must map out your floor space. The ProForm Carbon TLS treadmill requires a 76.5 x 30-inch operational footprint, plus at least 24 inches of clearance behind the deck for safety dismounts. Rowing machines demand a different type of spatial awareness—specifically, longitudinal clearance.
Installation Pro-Tip: Never place a rowing machine directly on hardwood or laminate flooring. The repetitive friction of the seat rollers on the rail, combined with the microscopic dust generated by the fan or magnetic flywheel, will degrade your floor finish. Invest in a 3/8-inch thick vulcanized rubber mat (often sold as horse stall mats or heavy-duty gym tiles) that spans beneath both your Carbon TLS treadmill and your rower to dampen vibration and protect the subfloor.Clearance Requirements by Machine Type
- Air/Fan Rowers (e.g., Concept2 RowErg): Require 95 inches of length during use. Can be separated into two pieces or stood upright for storage.
- Magnetic Rowers (e.g., Hydrow Athina): Require 86 inches of length. Often feature a sleek, single-piece rail that cannot be disassembled but can be tilted vertically.
- Water Rowers: Generally require 84 inches of length. Must remain horizontal due to the water tank; cannot be stored upright.
2026 Rowing Machine Buying Guide: Picking Your Cross-Trainer
When pairing a rower with a mid-tier treadmill like the ProForm Carbon TLS (which retails around $699), you generally want a rowing machine that offers commercial-grade durability without demanding a $3,000+ investment. Below is a comparison of the top three rowers that complement a home gym setup this year.
| Model | Resistance Type | Price (2026) | Best For |
|---|---|---|---|
| Concept2 RowErg (Model D) | Air Flywheel | $990 | Data nerds, CrossFit, competitive rowers |
| Hydrow Athina | Electromagnetic | $1,495 | Immersive screen experience, quiet operation |
| NordicTrack RW900 | Magnetic | $1,199 | iFIT integration, matching ProForm ecosystem |
Note: If you are heavily invested in the ProForm/iFIT ecosystem via your Carbon TLS treadmill, the NordicTrack RW900 (NordicTrack and ProForm share the same parent company, iFIT Health & Fitness) will allow you to use a single subscription for both machines, syncing your workout history seamlessly.
Complete Setup and Installation Walkthrough
Once your machine arrives, follow this precise installation protocol to ensure smooth operation and accurate telemetry.
Step 1: Unboxing and Rail Alignment
Most rowers ship with the rail detached from the flywheel housing. When bolting the rail together (specifically on models like the Concept2 or NordicTrack), do not fully tighten the hex bolts immediately. Leave them at 80% tightness, slide the seat carriage across the entire length of the track to ensure there is no 'bump' or misalignment at the joint, and then torque the bolts to the manufacturer's specification (usually 15-20 Nm).
Step 2: Chain and Track Maintenance Setup
Before your first stroke, inspect the drive chain. Air rowers use a steel chain that requires lubrication. Never use WD-40. Apply 10-15 drops of purified mineral oil or a dedicated chain lube to a paper towel and pull the chain through it. Wipe away excess. For the seat rail, use a silicone-based spray on a clean cloth to wipe down the stainless steel track; this prevents the polyurethane wheels from chattering.
Step 3: Calibrating the Drag Factor
The most common setup error is leaving the damper setting at 10. According to Concept2's official technique guidelines, a damper setting of 10 does not equate to a 'better' workout; it simply mimics rowing a heavy, slow wooden boat. For a realistic water feel and optimal cardiovascular output, access the hidden diagnostics menu on your monitor to check the 'Drag Factor'. Adjust the physical damper lever until the drag factor reads between 110 and 130 (usually a lever position of 3 to 5).
Mastering the Technique: The 60-30-10 Biomechanical Rule
Transitioning from the upright, impact-heavy posture of the ProForm Carbon TLS treadmill to the seated, horizontal pull of a rower requires a complete neuromuscular reset. Rowing is not an upper-body pull; it is a lower-body push. According to British Rowing's indoor technique framework, the power distribution of a proper stroke should be 60% legs, 30% core/hips, and only 10% arms.
The 4-Phase Stroke Sequence
- The Catch: Shins vertical, torso leaning forward at roughly 11 o'clock, arms straight, and lats engaged. You should feel a stretch in your hamstrings, not your lower back.
- The Drive: Initiate the movement by pressing through your heels. The arms remain completely straight until the legs are 80% extended. This is where the 60% leg power is generated.
- The Finish: Once the legs are flat, hinge the hips back to 1 o'clock, and finally draw the handle to your lower ribcage (not the chest, not the belly button). Squeeze the shoulder blades together.
- The Recovery: Reverse the sequence exactly. Arms extend first, torso hinges forward past the knees, and finally, the knees bend to slide back to the catch. The recovery should take twice as long as the drive (a 1:2 ratio).
"The rowing machine exposes kinetic chain weaknesses instantly. If you feel your lower back burning before your quads, you are relying on spinal extension rather than hip hinging and leg drive. Reset your posture and focus on pushing the footplate away from you."
Common Failure Modes & Troubleshooting
When integrating high-volume rowing into your weekly routine, watch out for these specific technical breakdowns:
- Shooting the Slide: The hips and seat move backward, but the handle doesn't move. This places immense shear force on the lumbar spine. Fix: Ensure your core is braced and your arms are locked like cables connecting the handle to your hips.
- Early Arm Bend: Pulling with the biceps before the legs are fully engaged. This leads to rapid forearm fatigue and potential bicep tendonitis. Fix: Wrap your thumbs over the top of the handle and think about 'hanging' your body weight off the handle rather than pulling it.
- Rushing the Slide: Sliding back to the catch too quickly, crashing into the front stops. This spikes your heart rate inefficiently and ruins your force curve. Fix: Count 'one-two' on the drive, and 'one-two-three-four' on the recovery.
Programming: The Treadmill & Rower Weekly Split
To maximize cardiovascular health while minimizing joint degradation, alternate your modalities. The CDC recommends at least 150 minutes of moderate-intensity aerobic activity per week. Here is how to split that between your two machines:
- Monday (Treadmill - Carbon TLS): 30-minute Zone 2 steady-state incline walk (10% incline, 3.0 MPH). Low impact, builds aerobic base.
- Tuesday (Rower): 20-minute Interval Training. 500m hard effort (drag factor 120), followed by 2 minutes of active recovery paddling. Repeat 4 times.
- Thursday (Treadmill - Carbon TLS): 20-minute Tempo Run. 5-minute warmup, 10 minutes at 6.0 MPH, 5-minute cooldown.
- Saturday (Rower): 45-minute endurance row at a low stroke rate (18-20 strokes per minute), focusing purely on technique and the 1:2 drive-to-recovery ratio.
By meticulously setting up your space, selecting a rower that matches your ecosystem, and adhering to strict biomechanical form, you transform a simple home gym corner into a comprehensive, injury-proof performance center.
More gear to consider
All reviews
Free Tax Treadmill Guide: HSA/FSA Compact Cardio & Maintenance
Renestar Treadmill Reviews and Home Stair Climber Mistakes

Free Run Treadmill Features & Setup Walkthrough 2026

NordicTrack C950i Treadmill Noise: Step-by-Step Cardio Comparison

Home Stair Climber Guide: Better Than a Treadmill Workout Warm Up?