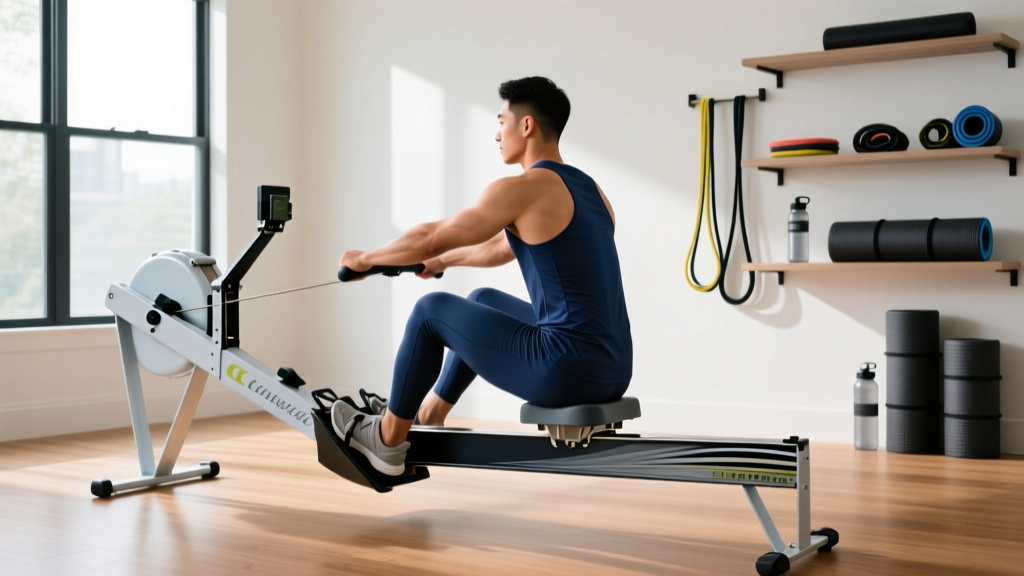
Rowing Machine Setup: Why It Wins the Treadmill vs Elliptical Debate
Master your rowing machine setup and technique. Discover why rowers outshine the treadmill vs elliptical debate and learn step-by-step installation.

When fitness enthusiasts get stuck in the endless treadmill vs elliptical debate, they often overlook the most biomechanically efficient machine in the room: the rowing machine (ergometer). While treadmills offer high-impact bone-density benefits and ellipticals provide low-impact glute isolation, neither matches the 86% full-body muscle recruitment of rowing. According to the American Academy of Orthopaedic Surgeons (AAOS), low-impact aerobic exercises like rowing are critical for long-term joint preservation while maximizing cardiovascular output.
If you have decided to bypass the treadmill vs elliptical dilemma and invest in a rower, proper installation and biomechanical setup are non-negotiable. A poorly assembled machine leads to chain slap, monitor errors, and lower back pain. This comprehensive 2026 guide walks you through the complete setup, installation, and technique calibration for premium rowing machines like the Concept2 RowErg, Hydrow, and NordicTrack RW900.
Phase 1: Pre-Installation Space & Buying Considerations
Before unboxing, you must verify your spatial and electrical requirements. Rowing machines demand significantly more longitudinal clearance than stationary bikes or ellipticals.
Spatial Footprint Requirements
- Concept2 RowErg: Requires 106" x 24" (270 cm x 61 cm) during use. Can be separated into two pieces for storage.
- Hydrow (2nd Gen): Requires 102" x 20" (260 cm x 51 cm). Must be stored upright using the specific Hydrow Upright Storage Kit.
- NordicTrack RW900: Requires 105" x 22". Features a folding rail design for compact storage.
Pro Tip: Always add 12 inches of clearance behind the flywheel housing for ventilation and maintenance access.
Flooring & Power: Never place a rower directly on hardwood or carpet. Sweat is highly corrosive and will degrade floor finishes. Purchase a 3/8" thick rubber equipment mat (minimum 8 feet long). While air rowers (Concept2) require zero electrical power (the PM5 monitor uses D-cell batteries), magnetic and electromagnetic rowers (Hydrow, RW900) require a dedicated 15-amp circuit or a high-quality surge protector to prevent logic board failures during high-drag intervals.
Phase 2: Step-by-Step Assembly Walkthrough
Improper assembly is the leading cause of premature rail wear and bungee cord failure. Follow these exact steps for standard air and magnetic rowers.
- Unboxing & Base Stabilization: Remove the flywheel housing first. Attach the front and rear stabilizer feet. For the Concept2, use the provided 10mm hex bolts and tighten to exactly 20 Nm (15 ft-lbs). Overtightening can warp the aluminum extrusion.
- Rail Alignment: Slide the monorail into the flywheel housing sleeve. This is a two-person job for heavier magnetic rowers. Ensure the rail seats flush against the bumper stop before inserting the frame lock bolts.
- Monitor Arm Routing: Feed the monitor cable through the internal chain guard channel before bolting the arm to the chassis. Pinching this cable during assembly is the #1 cause of dead PM5 monitors and blank Hydrow screens.
- Foot Stretcher Calibration: Attach the footplates. Ensure the quick-release mechanisms engage with an audible click. The heel cups should sit at a 45-degree angle relative to the rail to accommodate natural ankle dorsiflexion at the catch.
Phase 3: System Calibration & Drag Factor Setup
A common mistake beginners make is setting the damper to 10, assuming higher resistance equals a better workout. This is equivalent to rowing a heavy, waterlogged wooden boat rather than a sleek racing shell.
Calibrating the Damper (Air Rowers)
The Concept2 Indoor Rower Training Guide recommends a drag factor between 110 and 120 for most aerobic workouts. To calibrate:
- Turn on the PM5 monitor.
- Navigate to Menu > More Options > Display Drag Factor.
- Row steadily at 24-26 strokes per minute (SPM).
- Adjust the physical damper lever on the side of the flywheel until the screen reads between 110 and 120. For most machines, this falls between a 3 and 5 setting.
"Setting the damper to 10 forces you to pull with maximal muscular force at a slower cadence, rapidly accumulating lactic acid and compromising your lumbar spine. A drag factor of 115 mimics the true hydrodynamic drag of an 8-person racing shell." - Biomechanics Coaching Standard
The Treadmill vs Elliptical vs Rowing Machine Matrix
To understand why the rowing machine setup is worth the spatial investment, compare the biomechanical output against traditional cardio staples.
| Feature | Treadmill | Elliptical | Rowing Machine |
|---|---|---|---|
| Joint Impact | High (Up to 3x body weight) | Zero Impact | Zero Impact (Seated) |
| Muscle Engagement | Lower Body (40%) | Lower Body + Light Core (55%) | Full Body (86%) |
| Caloric Burn (60 min) | 400 - 700 kcal | 300 - 550 kcal | 500 - 850 kcal |
| Posterior Chain Focus | Low (Hamstrings/Calves) | Moderate (Glutes) | High (Lats, Rhomboids, Glutes, Hamstrings) |
Phase 4: Biomechanical Setup & Technique Fundamentals
Unlike a treadmill where you simply walk or run, rowing requires a precise kinetic sequence. The British Rowing Technique Fundamentals outline a strict four-phase stroke that must be mastered to avoid injury.
1. The Setup & Foot Strap Placement
Adjust the foot stretchers so the strap crosses exactly over the metatarsophalangeal joint (the ball of your foot, where your toes bend). If the strap is too high (across the ankle), you will lose power transfer. If too low (across the toes), your heels will lift prematurely at the catch.
2. The Four-Phase Stroke Sequence
- The Catch: Shins are perfectly vertical (90 degrees). Arms are fully extended, gripping the handle loosely with the fingers (not a death grip). The torso is hinged forward from the hips at an 11 o'clock angle.
- The Drive: This is a pushing motion, not a pulling motion. Initiate the drive by pressing through the heels. The power ratio is 60% legs, 20% core swing, and 20% arm pull. Do not bend your arms until your legs are nearly fully extended.
- The Finish: Legs are flat and fully extended. The torso is leaned back to a 1 o'clock position. The handle is pulled horizontally into the lower sternum (just below the ribs). Wrists remain perfectly flat.
- The Recovery: The exact reverse of the drive. Arms extend first, torso hinges forward to 11 o'clock, and only then do the knees bend to slide back to the catch. A common failure mode is bending the knees too early, causing the handle to collide with the kneecaps.
Troubleshooting Common Installation & Technique Failures
Warning: Chain Slack & Bungee Failure
If your chain does not retract quickly into the flywheel housing during the recovery phase, your internal bungee cord has lost tension or the chain requires lubrication. Fix: Wipe the chain with a paper towel and apply 1 teaspoon of purified mineral oil (or 20W-50 motor oil) every 50 hours of use. Never use WD-40, as it strips existing lubricants and attracts dust, accelerating sprocket wear.
Monitor Dropout on Air Rowers
If the PM5 monitor turns off mid-stroke, the D-cell batteries are likely failing to supply peak voltage during high-drag intervals. Replace with high-quality alkaline batteries, and ensure the battery contacts inside the compartment are free of corrosion. For long-term setups, use the Concept2 USB power adapter plugged into a wall outlet to bypass battery drain entirely.
Lower Back Pain (The Early Swing Fault)
If you experience lumbar fatigue within the first 10 minutes of rowing, you are likely "shooting the slide." This occurs when your legs push the seat backward, but your core and upper body remain stationary, placing massive shear force on the lower back. Correction: Engage your lats and core at the very beginning of the catch, ensuring the handle and your torso move backward in unison during the first 30% of the drive.
Final Thoughts on Your Home Gym Layout
Choosing a rowing machine over the standard treadmill vs elliptical options is a commitment to functional, full-body fitness. By meticulously following this installation walkthrough, calibrating your drag factor to true hydrodynamic standards, and adhering to the biomechanical sequence of the stroke, you will unlock a machine that builds both elite cardiovascular endurance and explosive posterior chain power. Take the time to measure your space, lay down proper rubber matting, and respect the kinetic chain—your joints and your VO2 max will thank you.
More gear to consider
All reviews
Top Compact Picks for Your Treadmill Exercise Plan (2026 Review)

Air Bike vs Assault Bike Care & Treadmill Toning Workout Maintenance

Treadmill on Second Floor? Air Bike vs Assault Bike Layout Guide
Multi Directional Treadmill Motor Size & Horsepower Troubleshooting
Complete In10ct Treadmill Setup & Motor Power Guide
