
Setting Up a Rogue Leg Press Machine vs Hack Squat
Compare spatial, assembly, and flooring requirements of a Rogue leg press machine attachment versus a standalone hack squat for your home gym setup.

When designing a high-performance lower-body training zone in 2026, the debate between a hack squat and a leg press extends far beyond muscle activation patterns. It becomes a complex logistical challenge involving spatial geometry, subfloor load capacity, and mechanical assembly precision. For gym owners and serious home-gym builders, choosing between a standalone hack squat and a Rogue leg press machine setup (specifically the highly popular Monster Utility Leg Press attachment) requires a deep understanding of installation requirements.
This comprehensive walkthrough breaks down the exact setup, flooring, and assembly procedures for both pieces of equipment, providing the granular data you need to make an informed, structurally sound decision.
The Spatial & Structural Matrix: Hack Squat vs. Leg Press
Before unboxing any heavy steel, you must evaluate the physical footprint and dynamic load distribution of your chosen equipment. A traditional 45-degree leg press and a dedicated hack squat interact with your floor very differently.
| Equipment Model | Footprint (L x W) | Base Weight | Max Load Capacity | Installation Type |
|---|---|---|---|---|
| Rogue Westside Hack Squat | 89" x 53" | 330 lbs | 600+ lbs (sled) | Freestanding (Bolted) |
| Rogue Monster Utility Leg Press | 43" x 49" (Attachment) | 65 lbs (Carriage) | Rack Dependent | Rack-Mounted (Pins) |
| Traditional Plate-Loaded Leg Press | 83" x 34" | 450 lbs | 1,000+ lbs | Freestanding (Gravity) |
Phase 1: Subfloor and Matting Preparation
Both the hack squat and the leg press require a premium shock-absorption layer to protect the equipment's linear bearings and your concrete slab.
- Matting Thickness: Use 3/4-inch (19mm) vulcanized rubber mats. Avoid cheap foam interlocking tiles, which will compress and cause the machine frame to rack (twist) out of square under heavy loads.
- Leveling: Use a 48-inch digital level across the installation zone. The floor must be level within 1/8-inch over 10 feet. If the floor slopes, use heavy-duty steel shims under the machine's base plates before tightening the anchor bolts.
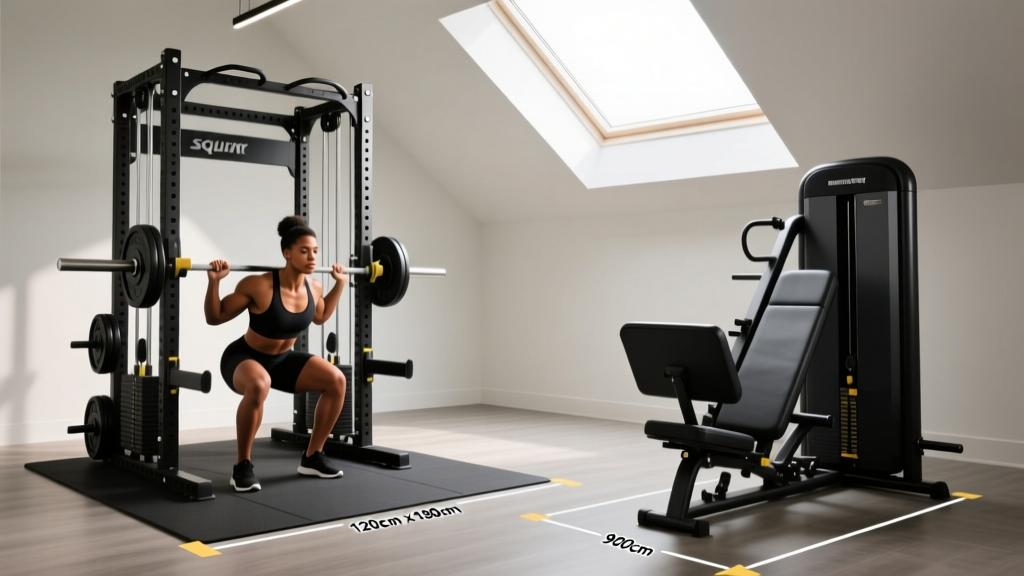
- Clearance: You need a minimum of 36 inches of lateral clearance on both sides of a hack squat for safe plate loading. For a rack-mounted rogue leg press machine attachment, ensure you have 48 inches of frontal clearance to allow for full knee flexion without hitting a wall.
Phase 2: Standalone Hack Squat Assembly Walkthrough
Assembling a 45-degree hack squat is notoriously unforgiving. If the frame is torqued out of square during assembly, the linear bearings will bind, causing a jerky, dangerous carriage descent. ExRx.net kinesiology data emphasizes that any lateral friction in a hack squat alters the shear force placed on the patellar tendon.
Step-by-Step Installation
- Base Frame Assembly: Lay the main base rails on the rubber matting. Insert the structural cross-members. Do not fully tighten the bolts yet. Leave them at 50% torque to allow the frame to self-square.
- Upright & Rail Installation: Attach the 45-degree main sled rails. Use a digital angle finder to verify the rails are exactly at 45 degrees relative to the base. A deviation of even 1 degree will cause uneven wear on the UHMW (Ultra-High Molecular Weight) polyethylene guides.
- Squaring the Frame: Measure diagonally from the bottom-left base corner to the top-right rail end, and compare it to the opposite diagonal. They must match within 1/16th of an inch. Once squared, use a calibrated torque wrench to tighten all Grade 8 structural bolts to 85 ft-lbs.
- Carriage & Bearing Alignment: Slide the carriage onto the rails. Before loading weight, push the empty carriage up and down the track. It should glide silently. If you hear grinding or feel resistance, loosen the bearing block set-screws, realign the carriage, and re-tighten.
- Safety Stop Adjustment: Install the adjustable safety catches. Test them with an empty carriage to ensure the capture hooks engage simultaneously on both sides.
Phase 3: Rogue Leg Press Machine Attachment Setup
When lifters search for a 'rogue leg press machine', they are usually referring to the Monster Utility Leg Press. This is a plate-loaded carriage that integrates directly into a Rogue Monster Series power rack, utilizing the rack's existing uprights as the sled track. This setup saves massive amounts of floor space but introduces unique installation variables.
Mounting and Integration
- Rack Width Verification: The Utility Leg Press requires a specific rack width to function smoothly. Verify your Monster rack uprights are spaced exactly 43 inches or 49 inches apart (outside-to-outside), depending on the specific carriage model you purchased.
- UHMW Track Alignment: The carriage rides on UHMW plastic blocks against the steel uprights. Apply a dry PTFE (Teflon) spray lubricant to the inside faces of the rack uprights. Never use wet silicone or WD-40, as these will attract gym chalk and dust, creating an abrasive paste that ruins the plastic guides.
- Pin Security: The carriage is secured to the rack via heavy-duty steel hitch pins. Always use the secondary locking clips (lynch pins) on these hitch pins. A vibrating carriage can slowly back a pin out over hundreds of reps if left unclipped.
- Spotter Arm Integration: Unlike a standalone machine, the rack-mounted leg press relies on your rack's safety spotter straps or pin-pipe safeties. Position the safeties exactly 2 inches below the carriage's bottom-dead-center to allow for a safe bailout without the weight crashing onto the stops.
"The beauty of the rack-mounted leg press attachment isn't just the footprint savings; it's the structural rigidity of a fully bolted-together Monster rack. A standalone leg press can shift during explosive reps, but a carriage mounted inside a 1,000-lb bolted rack is completely immovable."
— Elite Gym Fitters Review, 2025
Phase 4: Biomechanical & Maintenance Considerations
Post-installation, the maintenance schedules for these two machines diverge significantly based on their mechanical design.
Hack Squat Maintenance (Linear Bearings)
Standalone hack squats typically use sealed linear ball bearings. These require minimal lubrication but are highly sensitive to dust and chalk. Protocol: Wipe down the chrome guide rods with a microfiber cloth after every session. Every 6 months, apply a light coat of 3-in-One silicone-based lubricant to the rods. Inspect the shoulder and back pad upholstery for tears, as sweat ingress into the high-density foam will degrade the padding rapidly.
Leg Press Attachment Maintenance (Friction Glides)
The Rogue Utility Leg Press relies on friction glides (UHMW plastic) rather than ball bearings. Protocol: Inspect the plastic glide blocks annually for uneven wear patterns. If the carriage begins to 'chatter' or skip during the concentric phase, the UHMW blocks may need to be shimmed or replaced. Keep the rack uprights meticulously clean of chalk buildup using a stiff nylon brush and a mild degreaser.
Final Verdict: Which Should You Install?
The decision ultimately hinges on your spatial constraints and existing equipment ecosystem.
- Choose the Hack Squat if: You have a dedicated commercial space or a large garage gym (minimum 10x10 foot dedicated zone), prioritize absolute biomechanical isolation for the quads, and want a standalone unit that doesn't monopolize your primary power rack.
- Choose the Rogue Leg Press Machine Attachment if: You already own a Monster Series rack, operate in a space-constrained environment, and value the modularity of being able to unpin the carriage and use the rack for heavy squats and pull-ups. It offers 90% of the biomechanical benefits of a traditional sled leg press at a fraction of the spatial and financial cost.
Proper installation is the difference between a machine that lasts a lifetime and one that binds, squeaks, and fails prematurely. Take the time to square your frames, prep your subfloors, and respect the torque specifications. Your joints—and your concrete slab—will thank you.
More gear to consider
All reviews
Inner Thigh Workout Equipment: Horizontal vs 45° Leg Press

How to Adjust Leg Press Machine for Calves: Standing vs Seated
Optimizing Gym Layouts: Squat Racks & Leg Press Workout Machines
Beyond the Leg Press Curl Machine: Sled Push Pull Beginner Guide

Glute Equipment Trends 2026: Hip Thrusts vs Leg Press Machine 45
