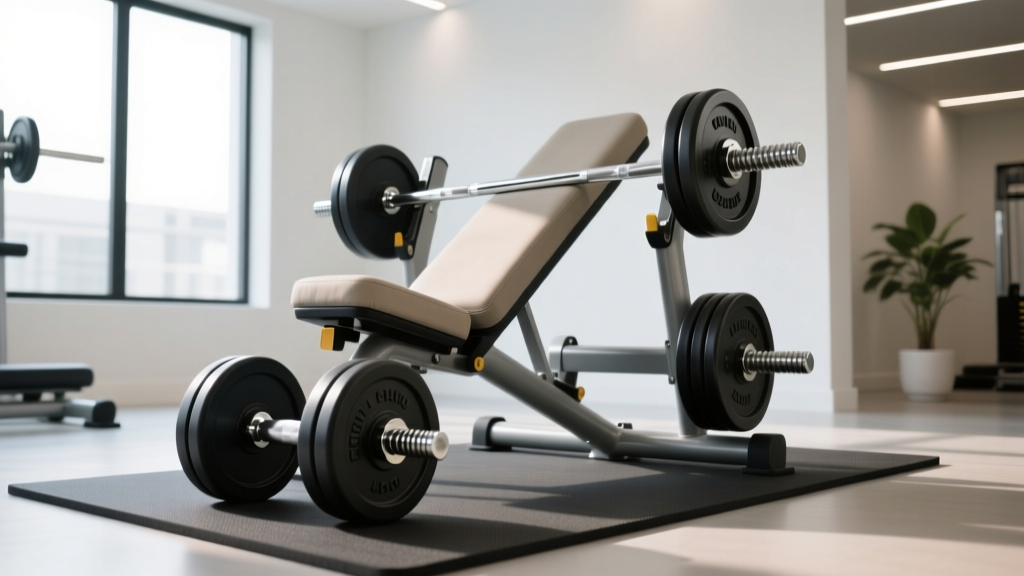
Reverse Fly Dumbbell Bench Setup: Olympic vs Standard Plates
Master your reverse fly dumbbell bench setup. Compare Olympic vs standard weight plates, optimize gym spacing, and follow our step-by-step installation guide.

The Biomechanics of the Reverse Fly Dumbbell Bench Station
Building a comprehensive home gym in 2026 requires more than just a barbell and a power rack; it demands dedicated stations for targeted isolation work. The posterior chain and rear deltoids are notoriously difficult to engage without proper chest support. This is where a dedicated reverse fly dumbbell bench setup becomes non-negotiable for serious lifters. By utilizing an adjustable utility bench set to a 30-to-45-degree incline, you eliminate lower back momentum and force the rear delts, rhomboids, and mid-traps to handle the load. According to biomechanical analyses published by the American Council on Exercise (ACE), chest-supported variations reduce lumbar shear force by up to 68% compared to bent-over standing variations.
However, the bench is only half the equation. The dumbbells you use—and by extension, the weight plate ecosystem you build around them—dictate the safety, footprint, and efficiency of your station. Whether you are using fixed hex dumbbells, adjustable selectorized models, or traditional plate-loaded spinlock handles, understanding the foundational differences between Olympic and standard weight plates is critical for designing a cohesive, safe, and space-efficient installation.
Pro Setup Tip: For optimal rear deltoid isolation on a reverse fly dumbbell bench, set the back pad to exactly 35 degrees. This specific angle aligns the humerus with the transverse plane of the scapula, minimizing latissimus dorsi takeover during the concentric phase of the movement.Olympic vs Standard Weight Plates: The Core Compatibility Matrix
When outfitting the area surrounding your reverse fly station, you must decide between standard (1-inch hole) and Olympic (2-inch hole) weight plates. While Olympic plates are the undisputed king of barbell lifting, standard plates still permeate the market for budget-friendly adjustable dumbbell sets and compact plate-loaded machines. If your reverse fly setup incorporates plate-loaded dumbbell handles or an integrated plate-storage tree attached to the bench frame, this choice dictates your hardware compatibility.
| Feature | Standard Plates (1-Inch) | Olympic Plates (2-Inch) |
|---|---|---|
| Center Hole Diameter | 25mm (approx. 1 inch) | 50.4mm (approx. 2 inches) |
| Max Load Capacity | ~250 lbs (before handle bending) | 1,000+ lbs (commercial grade) |
| Dimensional Tolerance | Unregulated; high variance | Strict IWF calibrated specs |
| Hub Construction | Cast iron (often with burrs) | Machined steel or precision brass |
| Average Cost per lb | $1.20 - $1.80 | $2.50 - $4.50 |
The International Weightlifting Federation (IWF) mandates strict dimensional tolerances for Olympic plates, ensuring a 50mm hole with a variance of just +0.1mm / -0.0mm. Standard plates lack a governing body, resulting in warped center holes that can scratch 1-inch dumbbell handles, increasing friction and making mid-set plate changes frustrating. If your reverse fly station utilizes plate-loaded dumbbells for micro-loading, Olympic-compatible handles with machined steel inserts will vastly improve your user experience.
Complete Installation & Floor Anchoring Walkthrough
A wobbly bench during the eccentric phase of a reverse fly ruins the mind-muscle connection and poses a safety hazard. Follow this step-by-step installation guide to anchor your reverse fly dumbbell bench and adjacent plate storage securely.
Step 1: Subfloor Preparation and Matting
Do not place your bench directly on hardwood or bare concrete. Lay down 3/4-inch thick vulcanized horse stall mats (typically 4x6 feet). The vulcanization process ensures the rubber will not degrade or off-gas heavily in temperature-controlled environments. Cut the mat to create a dedicated 48x60-inch footprint for the bench and immediate dumbbell drop zone.
Step 2: Frame Assembly and Torque Specifications
High-end adjustable benches, such as the Rep Fitness AB-5200 2.0 ($599) or the Rogue Adjustable Bench 3.0 ($695), utilize 13-gauge or 11-gauge steel tubing. When assembling the front and rear base supports:
- Use a calibrated torque wrench set to 45 Nm (Newton-meters)
- Apply a medium-strength threadlocker (e.g., Loctite Blue 242) to the threads of the ladder adjustment mechanism to prevent vibration loosening over time.
- Ensure the front base tube is positioned at least 14 inches away from the edge of the seat pad to prevent shin interference when leaning over for chest-supported flyes.
Step 3: Integrating Plate Storage Trees
If your bench features a rear-mounted plate storage horn, verify the diameter. Most commercial benches feature 50mm (Olympic) horns. Loading standard 1-inch plates onto a 50mm horn using cheap plastic adapters is a critical failure point; the adapters crack under lateral stress when you bump the bench. Always match the plate hole to the horn diameter natively.
Spatial Planning & Ergonomic Clearances
The reverse fly requires significant lateral arm extension. When setting up the spatial footprint of your station, you must account for the 'wingspan' of the lifter plus the length of the dumbbells.
"The most common home gym design flaw is placing a dumbbell rack too close to the lateral edges of an adjustable bench. During heavy rear delt flyes, lifters need a minimum of 28 inches of clearance on both the left and right sides to safely drop the weights without striking a rack or plate tree."
For standard plate storage racks positioned near the bench, opt for an A-frame design rather than a vertical tree. A-frames keep the center of gravity low and prevent the rack from tipping if a lifter accidentally bumps it while maneuvering into the chest-supported position. Ensure the A-frame is placed at least 36 inches behind the bench's rear base to allow for unobstructed entry and exit.
Troubleshooting Common Setup Failures
Even with premium gear, improper installation can lead to mechanical and ergonomic failures. Here is how to troubleshoot the most common issues encountered in 2026 home gym setups:
Issue: Lateral Wobble During Eccentric Lowering
Cause: Uneven floor leveling or under-torqued lateral support bolts.
Solution: Adjustable benches feature leveling feet on the rear base. Use a digital level on the seat pad. Adjust the rear feet until the bubble is perfectly centered, then tighten the locking nuts against the base frame to freeze the adjustment. Re-torque the main lateral M10 bolts to 45 Nm.
Issue: Standard Dumbbell Handles Bending Under Load
Cause: Using 1-inch standard plates on cheap, hollow-core spinlock handles for heavy reverse flyes.
Solution: Standard 1-inch handles typically max out at 250 lbs before permanent deformation occurs. If your reverse fly sets require heavy loads, transition to solid steel Olympic-compatible plate-loaded dumbbell handles (like those from Titan Fitness or Rogue) which utilize 50mm sleeves and can safely support 400+ lbs per hand.
Issue: Pad Slippage and Vinyl Tearing
Cause: High friction from sweat and repeated chest pressing against the pad during flyes.
Solution: Wipe down the high-density polyurethane pad with a dedicated vinyl conditioner (not harsh chemical cleaners, which dry out the material) every 30 days. If your bench uses a standard vinyl cover, consider upgrading to an upholstery-grade Cordura or marine-grade vinyl pad cover to resist tearing from repetitive friction.
Final Thoughts on Your Ecosystem
Designing a flawless reverse fly dumbbell bench station is an exercise in precision engineering. By understanding the deep mechanical differences between Olympic and standard weight plates, you ensure that every component—from the dumbbell handles to the storage horns—operates in perfect harmony. Invest in 50mm Olympic-compatible hardware wherever possible, adhere strictly to torque specifications during assembly, and respect the spatial clearances required for safe, heavy posterior chain training. Your rear delts will thank you.
More gear to consider
All reviews
Rep Fitness Urethane Dumbbells vs. Olympic vs. Standard Plates

Dumbbell Exercises for Back Muscles: Loadable Dumbbell Maintenance

Barbell Collars & Long Head Tricep Exercises Dumbbell Safety
Barbell Knurling & Weight Guide: Dumbbell Side Squat Comparisons

Barbell Collar Types: Safety Guide for American Dumbbells Users
